As the ill-fated 2020 school year faded into memory and the vast expanse of summer opened up before me, I was eager to finally have access to some me-time.
Astute readers may note note that this meant a brief flurry of blog posts, some useful and some rather arcane. But then, well, I got bored.
It’s not that I’d run out of stuff to write about; it’s just that Pandemic Life was really starting to get to me. It had already been months since I was last able to see my family in person, and there are only so many walks around the block one can take with the dog before the world just gets…stale.

I either needed a therapist (hashtag #2020) or a Quarantine Project that I could completely absorb myself into.
Technically, my fiancée and I had already taught ourselves the requisite new skill: namely, the ability to cut our dog’s hair such that he kind of resembles the miniature poodle mix we believe him to be.

Nevertheless, somehow I got it in my head that what I really needed to do was learn how to create a full-stack, single-page web application.
(I know, right?)
Terminology Tango
Alright, that sounds like a jumble of search keywords from a job listing or developer’s resume. (You hiring?) But that, in a nutshell, was indeed the goal of the project.
Single-page application is basically jargon for websites like Facebook, Twitter, Gmail, and countless others that look, feel, and act like a computer program that lives inside your web browser. With a traditional website (say, nytimes.com), each time you click on a link, a brand new page has to load. With a single-page application, you only load the web page once. That page may have buttons, links, menus, input fields, you name it. But when you interact with them, different pieces of the interface respond, appear, or otherwise update themselves on demand without reloading the overall page.
For many situations, this kind of architecture provides a more natural, seamless user experience. It’s also probably more efficient because the code that controls the interface only has to be retrieved once. But every time you click on something to request new information, that data has to come from somewhere.
Even though the application runs in your browser (the “front end”), the information usually lives on a remote server (the “back end”). Full-stack refers to web development or design that implements both the back-end data processing/retrieval and the front-end user experience.
Inventory Innovation
I’ve had the opportunity to work on a number of web development projects in recent years, but they have almost always been of the back-end variety. I taught myself PHP, the venerable server-side scripting language, while working on a student organization’s website back in college. That led to numerous exciting forays into WordPress development for both personal and professional projects.
And then, of course, there was the Inventory Box.
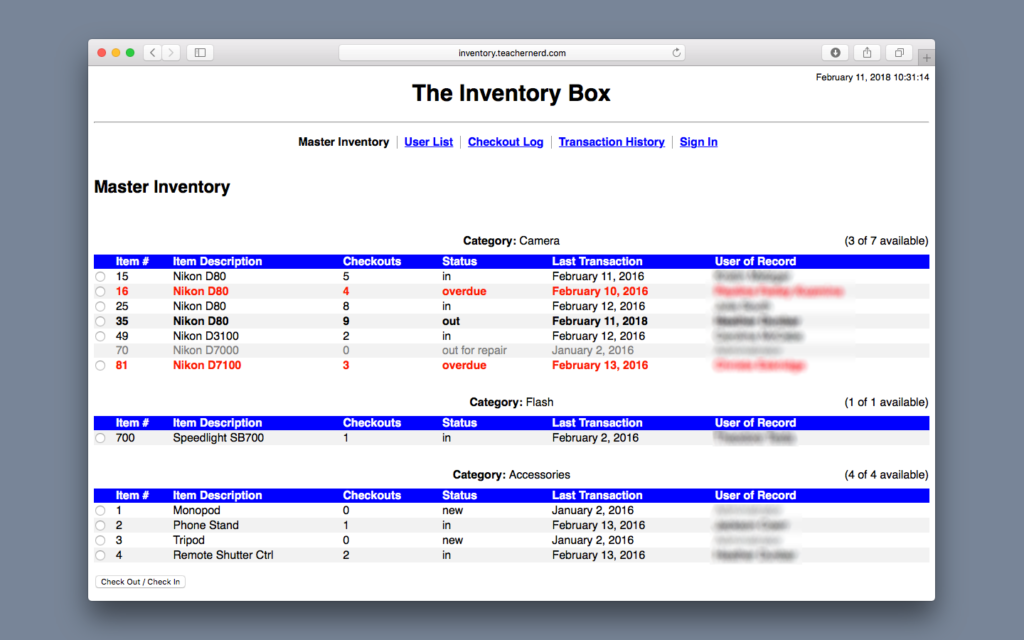
The Inventory Box is one of my favorite projects because I built it from the ground up, it solved a meaningful problem, and it got near-daily use by students in multiple journalism classes at my school.
Sumptuous Spaghetti
In my humble opinion, Inventory Box worked really well, but it had one serious knock against it: it was ugly.
I was much more interested in developing something that “got the job done” rather than something that looked good. So I only implemented the most minimal of visual styles—and the actual code that ran the thing, while functional, was honestly a mess. Over time, it became harder and harder for me to understand how my own creation worked. (The technical term for this is “spaghetti code.”)
Part of the problem was the way the application mixed database access (MySQL), back-end processing (PHP), front-end semantics (HTML), and occasional special effects (JavaScript) all in one stream of code. I had attempted to organize different pieces of the application into different files, but I didn’t know as much then as I do now. Despite my best intentions, the overall effect was still rather soupy.
The application was in need of not just a visual makeover, but a complete rewrite, with a much more serious focus on separation of concerns. In other words, it was a prime candidate for a summer project whose entire purpose was to better understand the intricacies of front-end and back-end development.
Dividends from Division
This time around, in order to make the codebase more manageable, extensible, and maintainable, I decided to separate the Inventory Box into a series of relatively self-contained components.
1. The Database
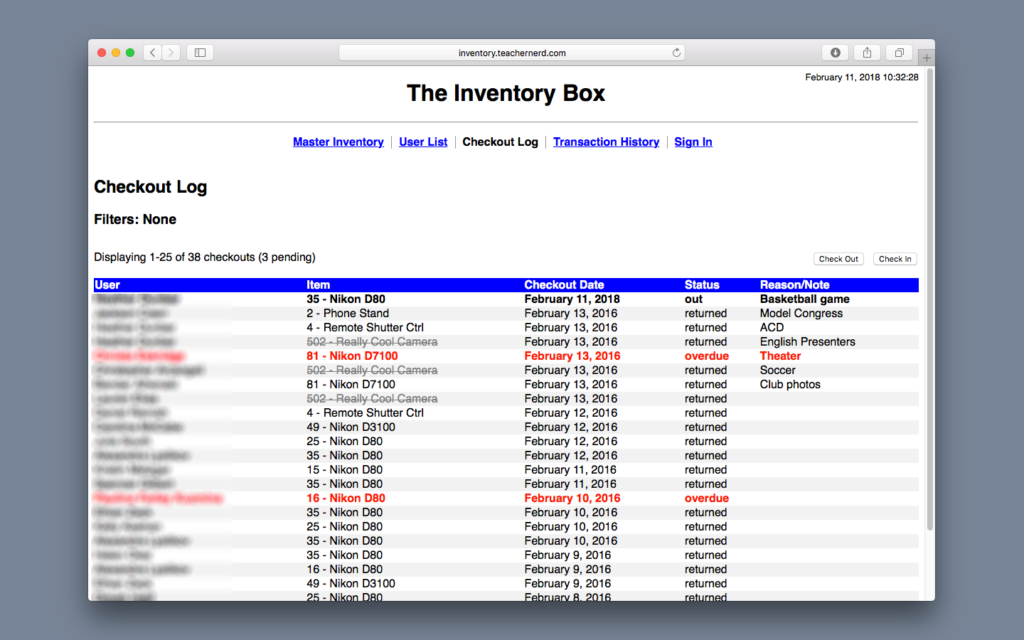
The original Inventory Box was already using a MySQL database to store a list of user names, a list of items, and a list of transactions. Through a series of interesting relationships and queries, the application was able to keep track of all kinds of information using these three main tables (plus a few others for additional functionality).
For the new version, I had to add a few tables to handle an updated login system (see below), but otherwise, I was able to retain the existing database. (The updated version is backwards-compatible with the original application, which is great for testing purposes.)
2. The Server Application
One of the easiest ways to clean up this overall project was to separate the code that controls the user interface from the code that interacts with the database. Whereas each URL in the original server application returned an entire page full of information and interface elements, the new server application (the back end) only returns data.
It’s up to the front-end application to figure out how to interpret and display that data.
The server application continues to be written in PHP because I needed at least one part of this project to use a language I was familiar with. One major improvement, however, is that the new application uses PHP’s object-oriented programming functionality, which made it easier to further compartmentalize and separate various parts of the code, including that which actually talks to the database and that which interacts with the client. It also allowed me to cut down on repetitive code through the principles of inheritance (wherein one object can reuse methods and properties from another).
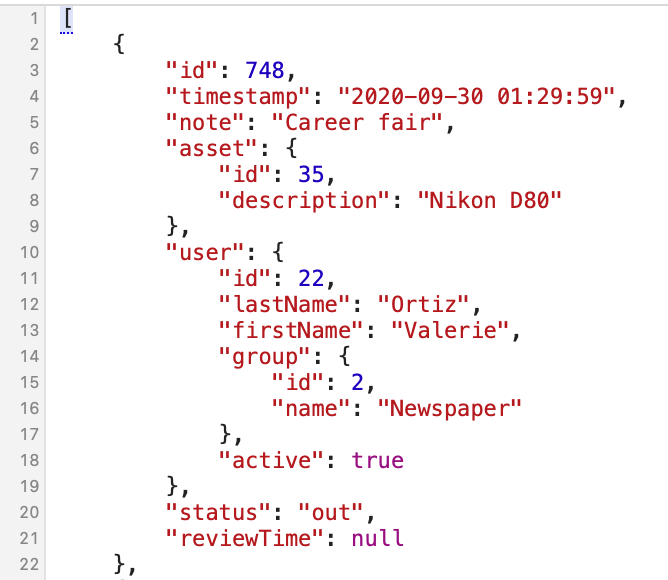
3. The API
An API, or application programming interface, is how different computer programs pass information between one another. (For example, the weather app on your phone uses an API provided by the National Weather Service or some other source to grab the current temperature.)
Rather than recreate the wheel, I used the PHP League’s Route library to create a series of URLs and controller objects that allow a client to talk to the database. I tried to follow the principles of RESTful API design as much as possible along the way.
4. The Browser-Based Client App
Since it needs to run in the browser, the client app is written in JavaScript. While I’ve dabbled with JavaScript here and there in the past, this is the first time I used it to build an entire application. Since this project was already ridiculously complex, I decided I might as well learn how to use a front-end development framework at the same time. Frameworks do just what they sound like they do: they give you a skeleton to build your application around so that you can focus on the big-picture stuff while the framework handles many of the smaller details that are common to every software project. (In computer science, this is known as abstraction.)
There are a number of JavaScript frameworks out there to choose from. AngularJS and React are two of the most prominent, but after dong some research, I actually opted for Vue.js. Based on my research, Vue seemed like the easiest to pick up for a complete newbie. It’s also smaller and more “lightweight,” which seemed appropriate for a relatively simple project like this. (It also didn’t hurt that Vue is not largely developed by Google or Facebook, like the others.)
5. The Authorization & Authentication System
One of the interesting aspects of RESTful architecture is that ideally, the server should have to remember as little as possible (ideally nothing) about the client’s current situation in between requests. This is called “stateless” design. In other words, only the client has to worry about the client. And whenever the client requests information from the server, it provides the server with whatever information the server needs to know in order to complete the request. This may sound complicated, but it actually simplifies things in the long run by enforcing some level of independence between the front end and back end (i.e. it helps promote the separation of concerns).
There’s a bit of a catch, however, when it comes to determining who is allowed to obtain information from the server. Because it’s completely separate, the front end needs to somehow let the back end know that it actually has permission to view (or even change) the server’s data.
In many modern web applications, the process of authentication (accurately identifying a user) and authorization (granting permission for a client to access a server’s information) is handled by a protocol known as OAuth. If you’ve ever signed into your Google or Facebook account in order to log into another website, you’ve used OAuth.

What OAuth basically does is verify the user’s identity and then, with the user’s permission, give the client app one or more “tokens,” which act like keys and/or ID badges to use when the client talks to the server. These tokens tell the server that the client is allowed to access that user’s data.
This approach might not have been strictly necessary (I could have cheated and used cookies instead), but I decided to implement a very simple OAuth server as part of my redesigned inventory manager. I used Brent Shaffer’s OAuth 2.0 Server PHP as a starting point because the project is very well documented and relatively self-contained. (You don’t have to write a ton of your own code to get it mostly working out of the box.)
However, this library is a bit on the old side. Consequently, it doesn’t include support for a newer OAuth method known as “Authorization Code Flow with PKCE.” You can read some really technical stuff about PKCE here if you want, but what you mainly need to know is that this OAuth method seems to be the most modern/preferred approach for single page apps.
Thankfully, because Mr. Shaffer’s project is open source and uses those principals of object-oriented design I mentioned earlier, I was able to examine the code and figure out how to graft this functionality onto it myself.
6. The User Interface
This isn’t technically a separate component; it’s part of the client application. But I would be remiss if I didn’t point out how I was able to use the Bootstrap front end toolkit (along with BootstrapVue, a library that helps you integrate it with Vue) to give the Inventory Box that visual makeover that it sorely desired.
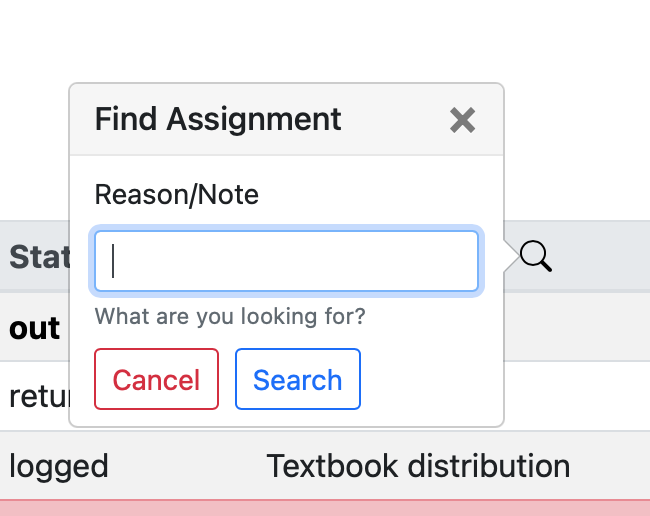
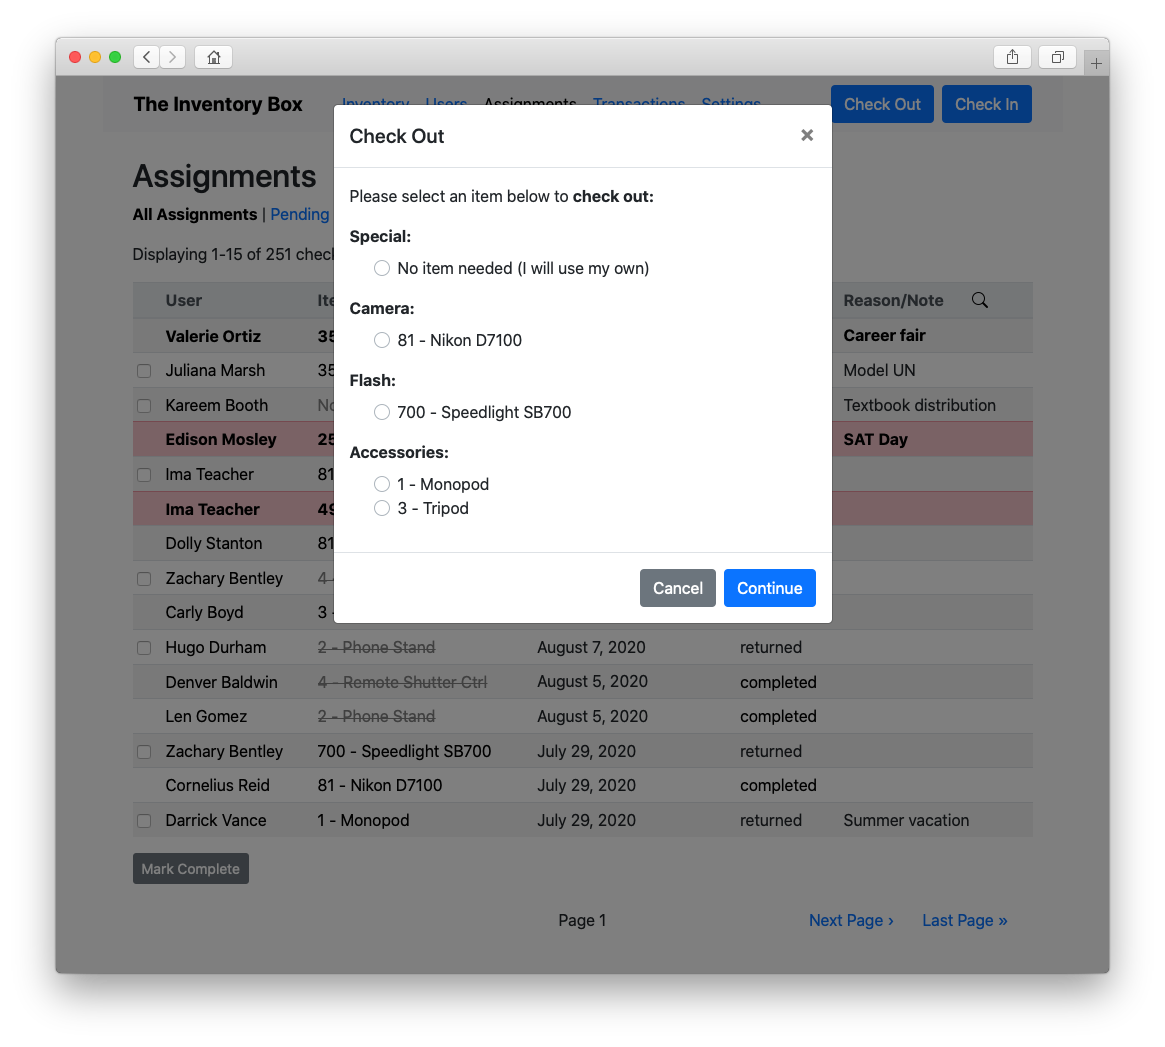
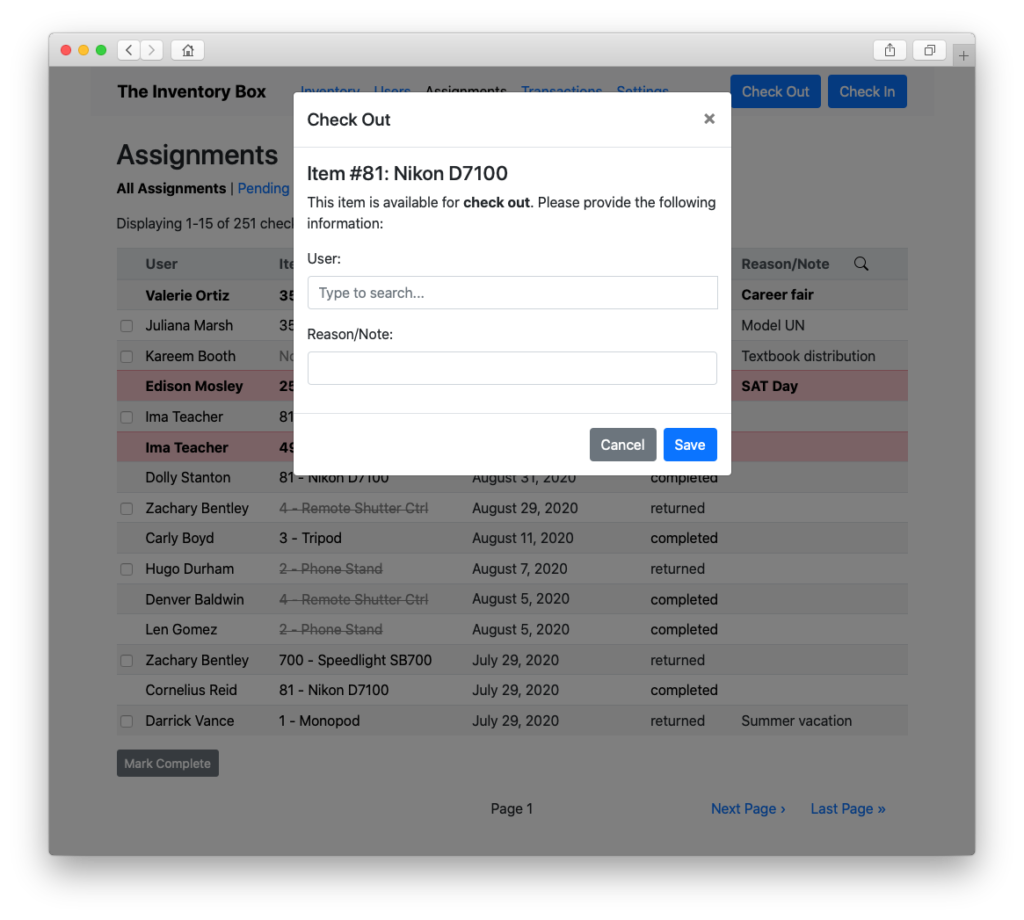
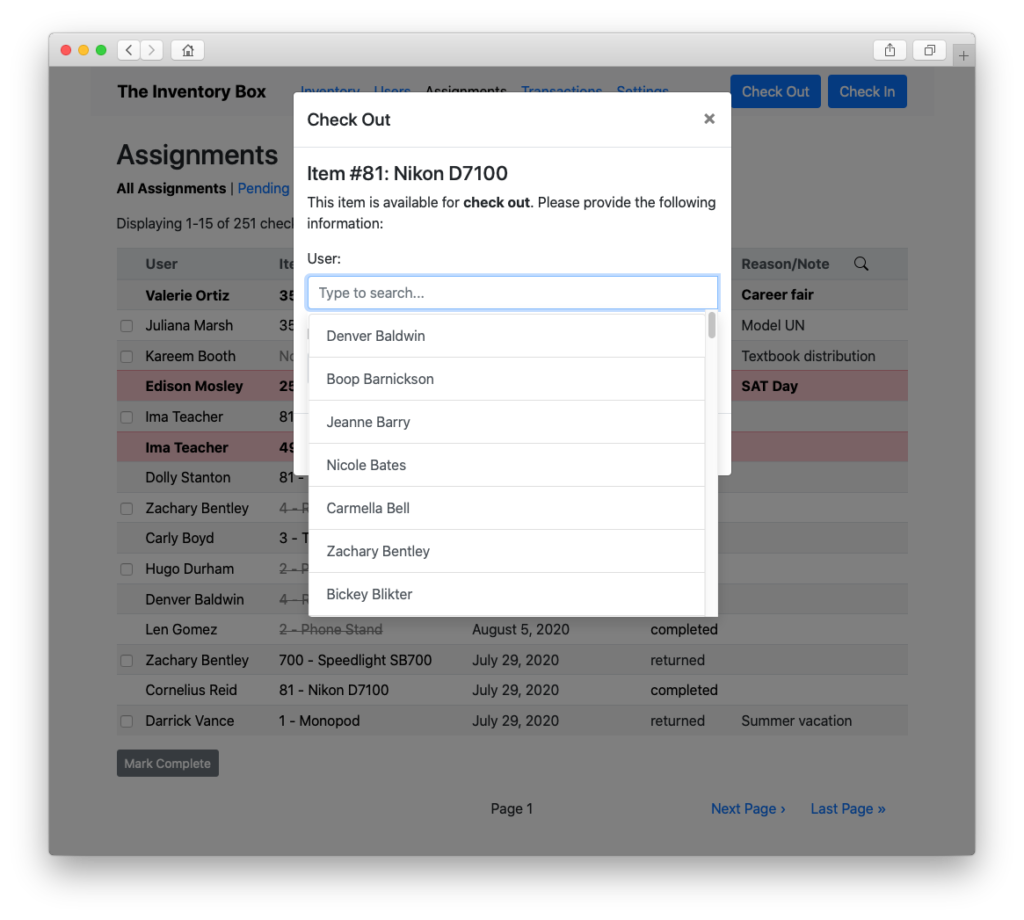
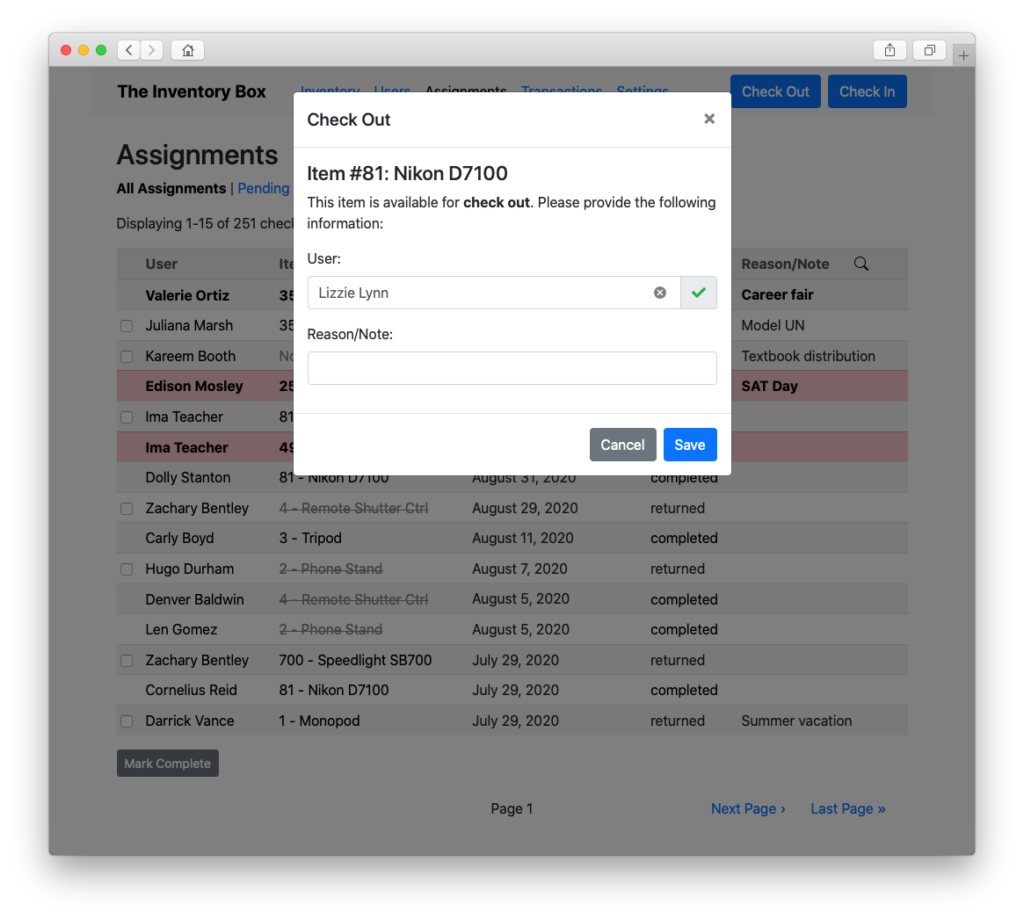
Besides providing more modern looking tables, buttons, and other elements, the combination of Bootstrap and Vue made it possible to implement dialog boxes to handle a lot of the functionality (like checking out equipment or searching for a particular log entry) that previously required loading separate pages.
This makes the process of interacting with the app feel a lot smoother and much more like the desktop and mobile software users are familiar with.
Putting It All Together
As you might guess from reading the above description (or perhaps treatise, depending on your sensibilities), this project ballooned nearly out of control. There were so many new concepts and tools to try to wrap my head around. I spent hours just reading documentation, wading through forum arguments about how to comply with various standards, and digging into source code before I could even begin writing any of my own code.
But by mid-September, I finally had a working re-implementation of most of the core functionality of the original program.
So what does that mean in practical terms?
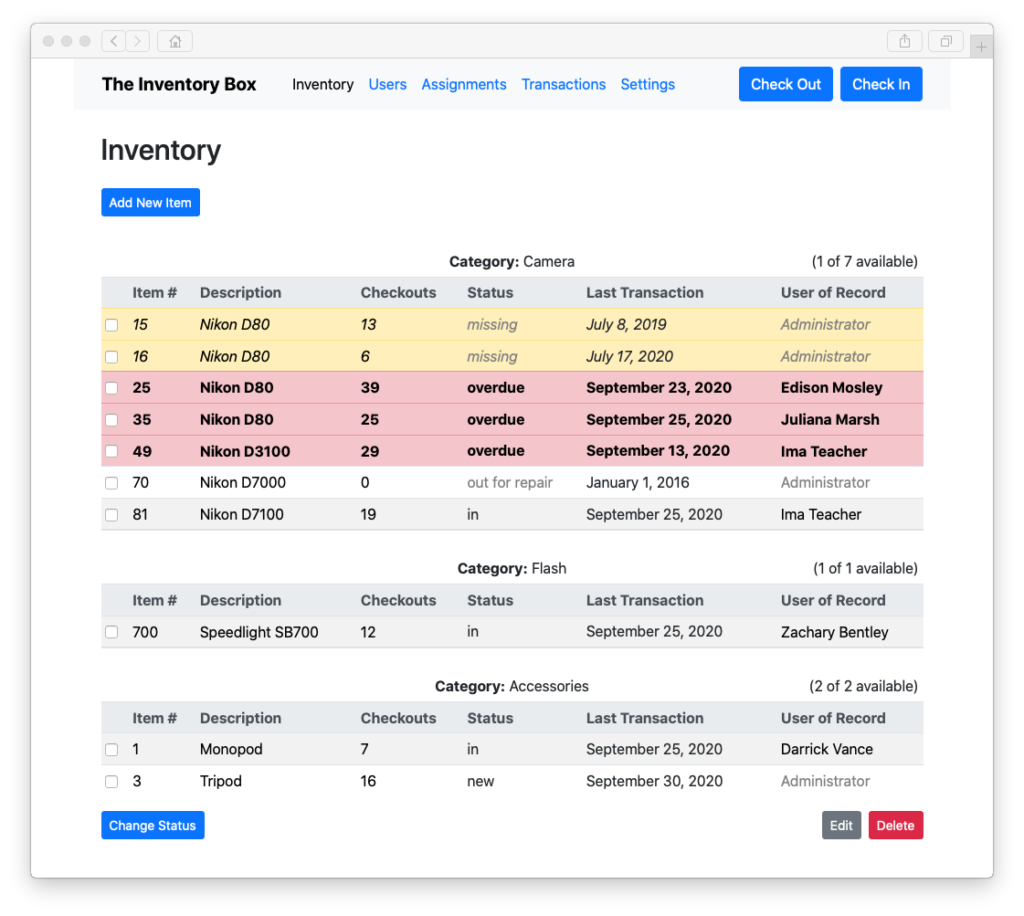
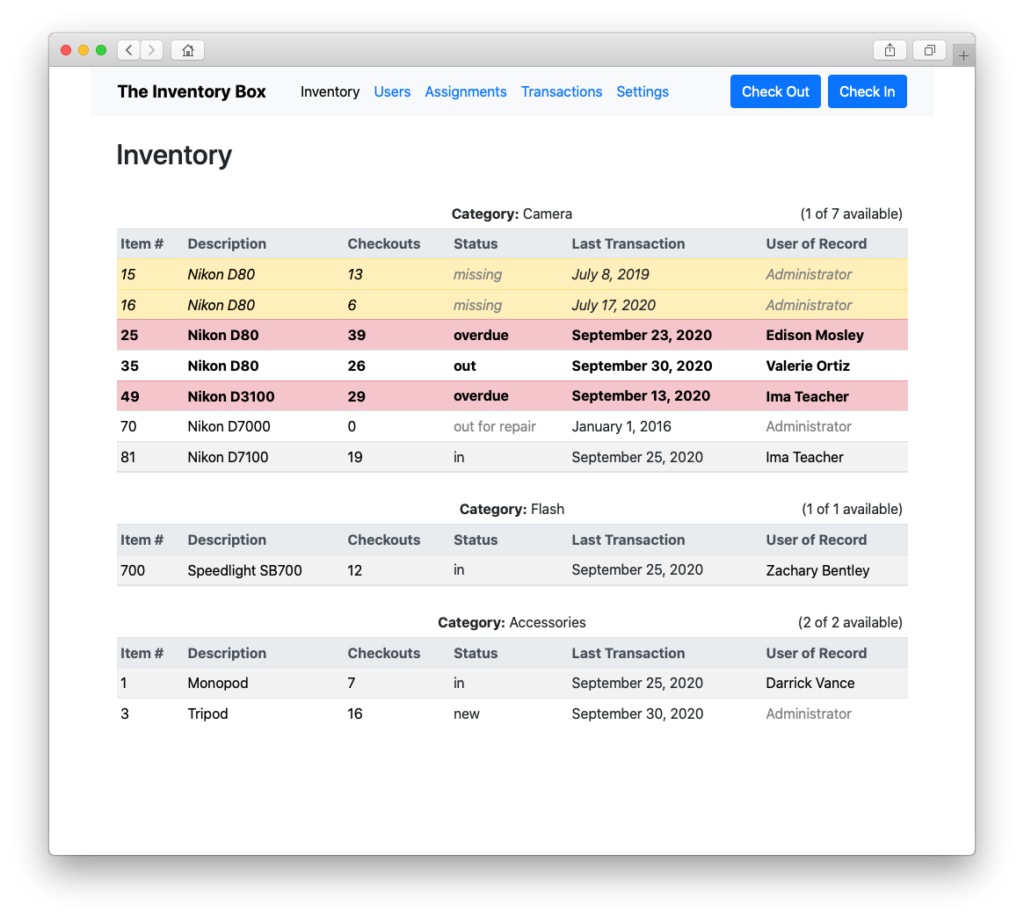
Well, you can add and organize assets…
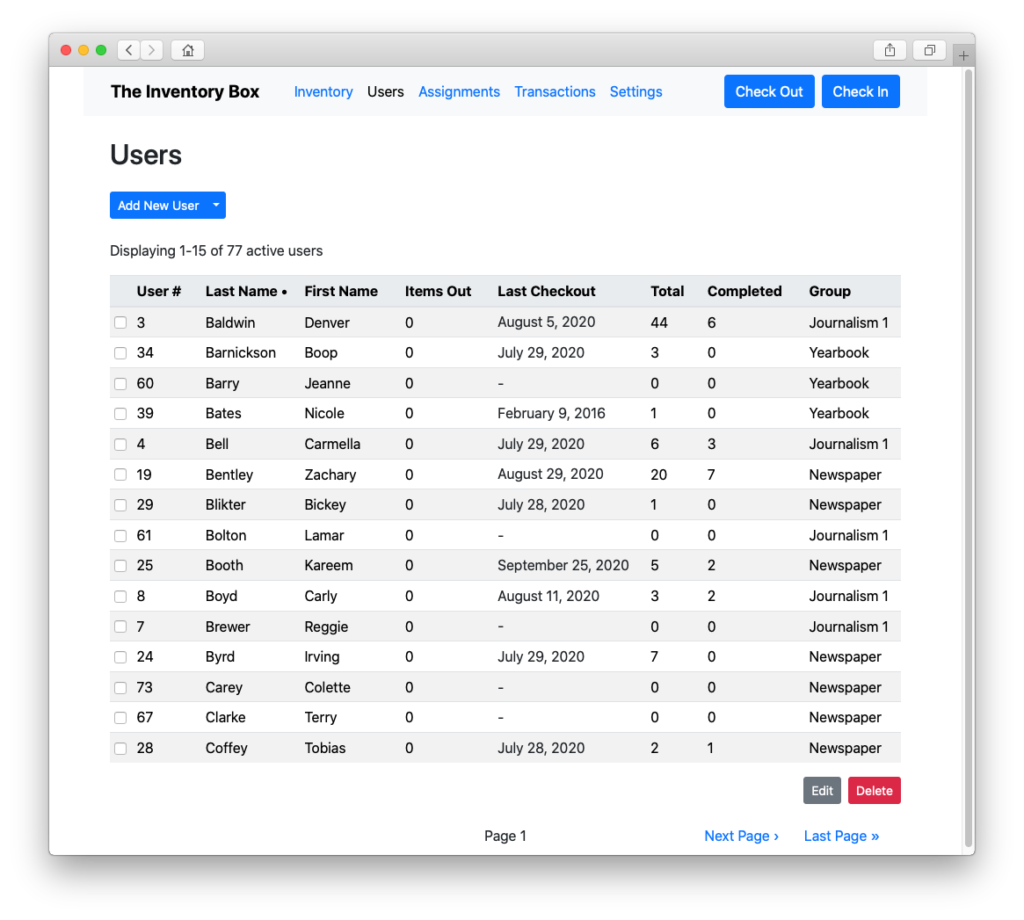
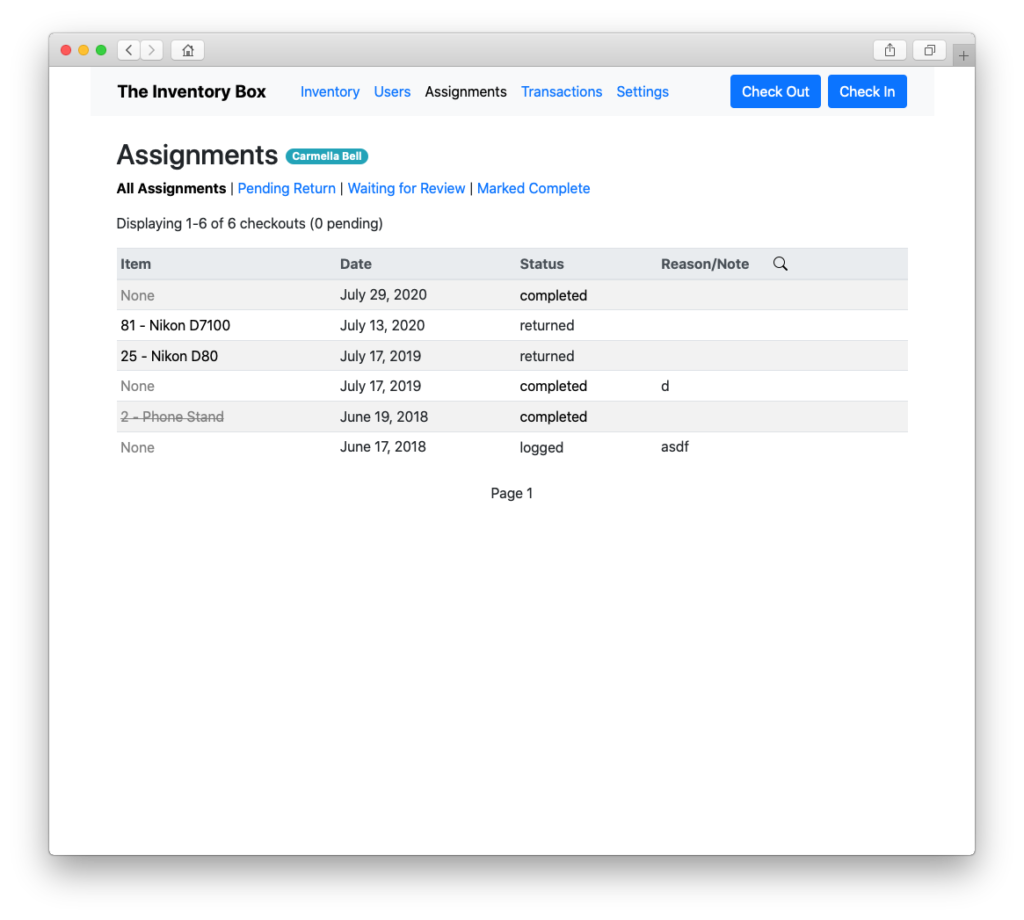
Manage users and track who’s checking out what…
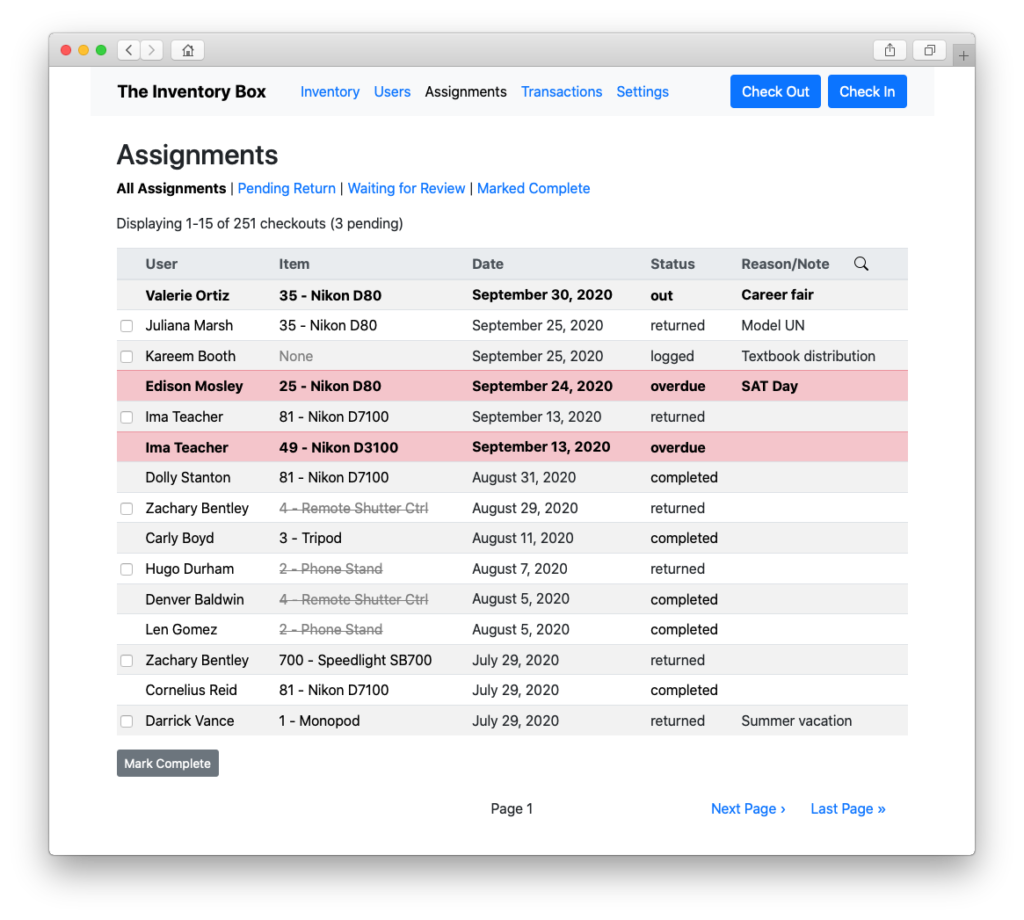
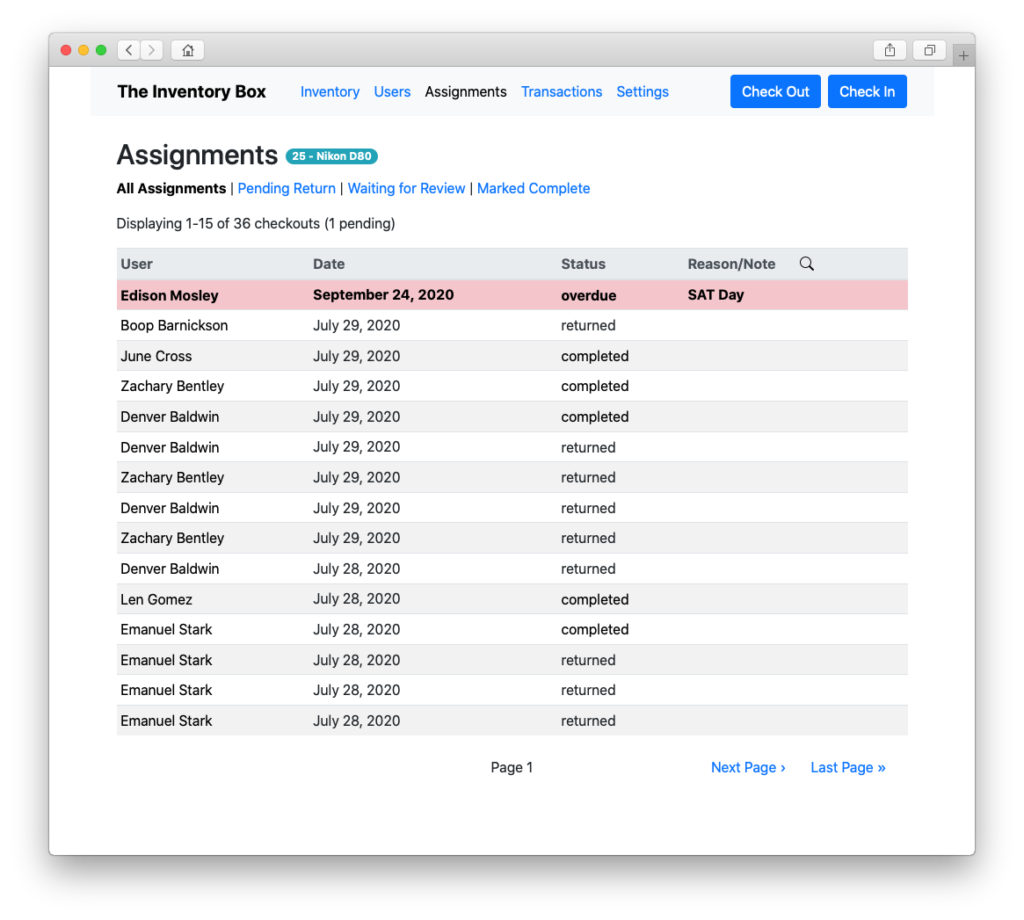
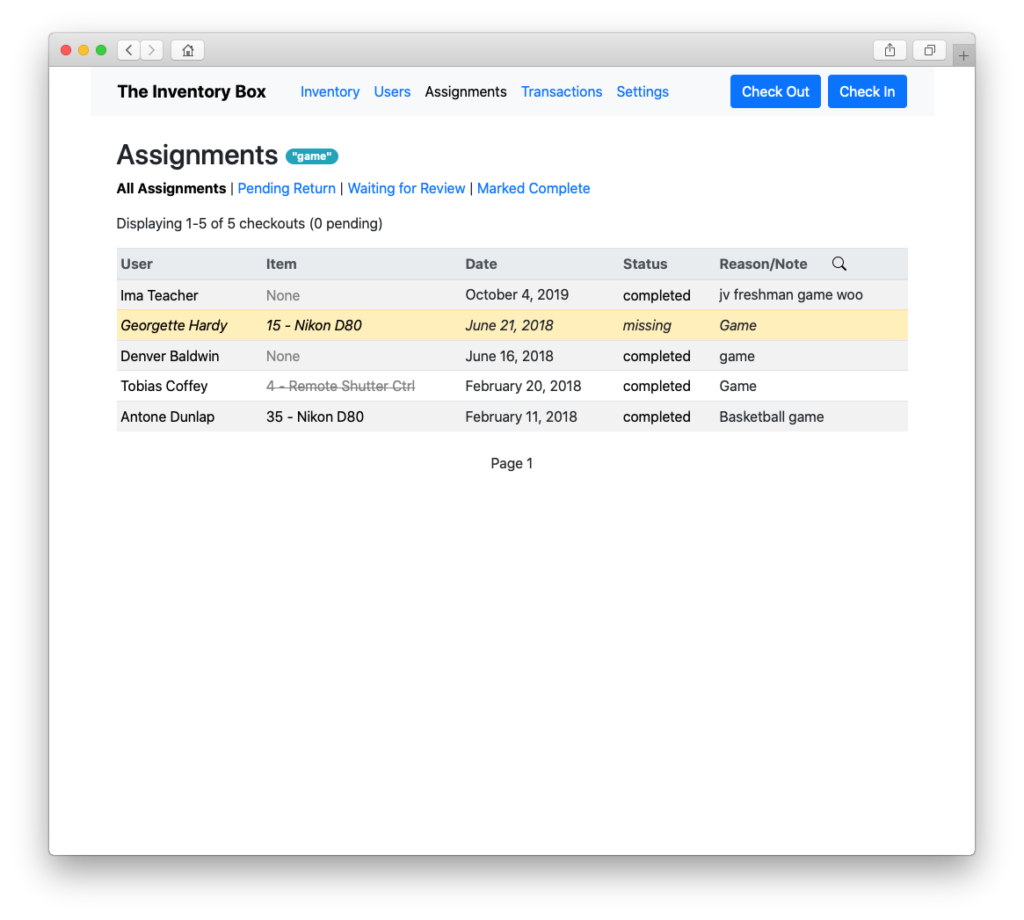
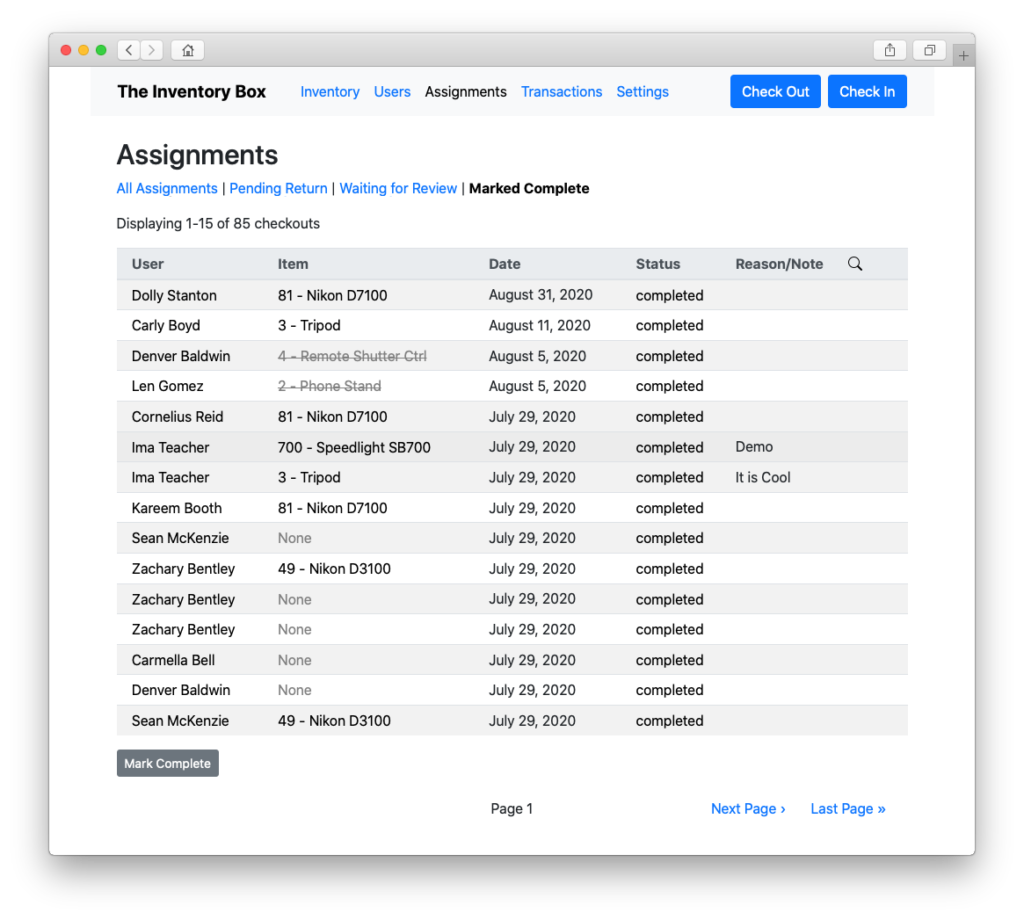
View the checkout log…
Filter the log by user, item, or assignment…
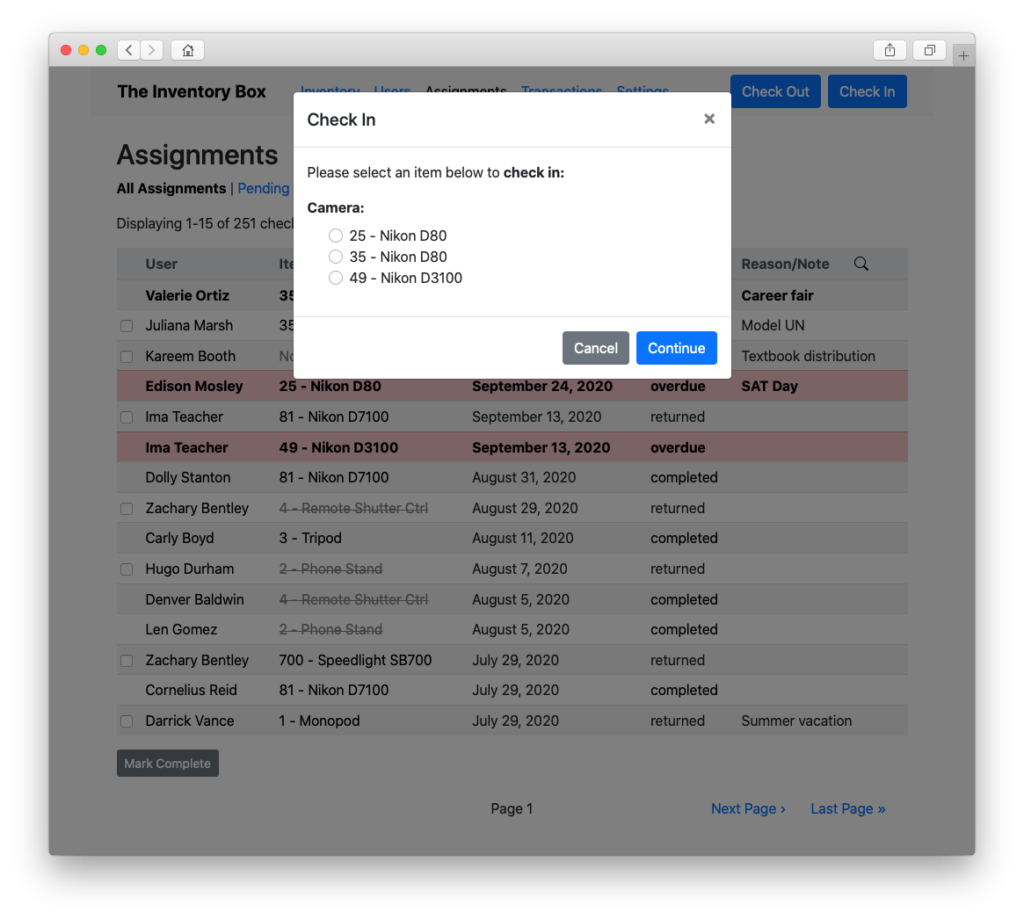
Check things out…
Track the status of those checkouts…

And, of course, check stuff back in!
Naturally, the app can also be “locked down” so that ordinary users (e.g. students) only have access to the checkout/checkin functionality and “read-only” views of all the other pages.
A future update may bring back experimental QR code checkout functionality that I never actually used. And another future update will almost certainly restore the ability to have the server send automatic email reminders to students to return equipment—a feature that I definitely used in my classroom. I also want to further improve the user interface and, now that I better understand how Vue works, make a number of changes under the hood to improve the application’s efficiency.
Wrapping Up
Needless to say, I’m once again quite proud of what I’ve been able to accomplish and how much I learned over the course of this project.
The only thing that would be better would be if this pandemic weren’t a thing and my school weren’t operating 100% virtually! Since it’s going to be quite some time before my students can even touch my classroom equipment, I’ll just have to patiently wait for the day when I can actually try out Inventory Box 2.0 “in the wild.”
Until then, I’ve got plenty more projects (like compiling a hundred or so electronic National Honor Society applications) to occupy my time…