The Background
Just a few days ago, I posted a tutorial explaining how you can use a spreadsheet app combined with Adobe InDesign to generate a slideshow based on a template.
I had previously used this technique when I had to create a presentation featuring the name and photo of 100+ students to play during a virtual induction ceremony for my school’s National Honor Society chapter.
Rather than having to create all 100+ slides by hand, I could automate the most tedious part of the job by making use of InDesign’s built-in Data Merge feature.
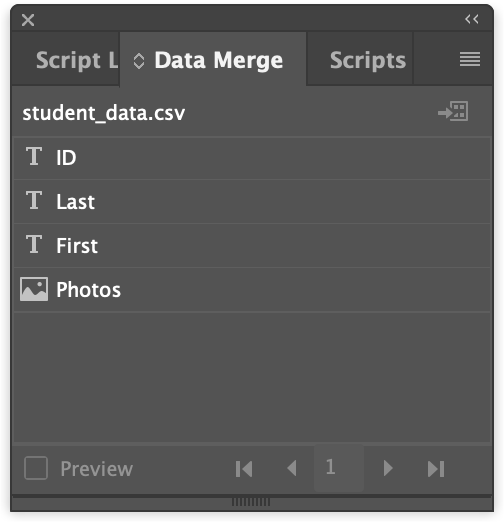
Similar to a mail merge in Microsoft Word, this feature allows you to create a template, import a data table from your spreadsheet, and then link each of the table’s columns to a placeholder on the template. Then, with the click of a button, InDesign can create a new file containing a page (or, in this case, a slide) for each row of the table.
The Problem
One of the coolest aspects of InDesign’s Data Merge is that it can handle image frames in addition to text boxes, so it really is perfect for my particular use case (i.e. awards slideshows).
That said, there is one major downside: as cool as I think the technique may be, it does still require Adobe InDesign—and for many people, that’s going to be a showstopper.
For those who may be unfamiliar, InDesign is a professional desktop publishing app. I’ve been using it (and teaching students how to use it) for over a decade, so the interface is second nature to me, but it can definitely be overwhelming for someone whose word processing and graphic design experience is limited to the Microsoft or Google office suites.
InDesign also requires a subscription if you want to use it beyond the seven-day free trial. Regular users have to pay $20.99 per month while students and teachers can access the entire Adobe Creative Suite for $19.99 per month. That’s actually a pretty good deal if you also need access to things like Photoshop or Lightroom, but that’s still not exactly cheap.
Meanwhile, Google Slides (along with the rest of Google’s office suite) is easy to use, ubiquitous, and essentially free for personal use. (I say “essentially” because, well, it’s Google. You’re “paying” for their services by giving up tons and tons of data and personal information…but I digress…) It’s also already being used by tons of school systems as part of a seemingly diabolical plan to…er, let’s just move on…
The Objective
I won’t quite call it the Holy Grail of slideshow automation, but I do think it would be even more cool if there were a way to auto-generate a slide deck from a spreadsheet without resorting to InDesign—bonus points if it could be done completely within the “free” Google ecosystem.
The Solution
Let’s get this out of the way right now: Google Slides does not have a built-in data merge feature. However, because Google would very much like to sell subscriptions of its non-free, enterprise-grade Google Workspace service to all the world’s businesses, they have, in fact, developed a number of powerful automation features. They’re just not particularly obvious to mere mortals.
One of these features is something called Google Apps Script, a system for writing your own sort of mini-applications that live in the cloud and can interact with the various components of the Google suite.
Solutions written in Google Apps Script are kind of like macros, automations that have long been part of Microsoft Office and similar desktop applications.
(Fun fact: Macros have picked up something of a bad reputation in recent decades since they are a prime attack vector for distributing viruses and other malware. Even though Microsoft Office now blocks them by default in files downloaded from the internet, they remain a significant tool available to power users and enterprises.)
Whereas a macro for Microsoft Word or Excel can be written in a language called Visual Basic for Applications, Google Apps Scripts are written in a language based on JavaScript. And since JavaScript is the language for front-end web development, it should be pretty easy for someone with a little bit of modern programming knowledge to jump right into Apps Script development! (Oh boy, I’m starting to sound like a salesperson. Maybe that diabolical plan is really working…)
As it turns out, I do have some prior experience using Google Apps Script to generate files from a template, so I definitely had a hunch that something similar could be done to merge data into Google Slides.
Then, while doing some research for my InDesign blog post, I came across a website called Spreadsheet Dev. Written by a guy who, much like me, identifies as both a developer and a teacher, the site’s goal is to “teach spreadsheet users to code using Google Sheets and Apps Script.” This author has written some great tutorials, but the one that really caught my eye was this: “Convert each row in Google Sheets into a slide in Google Slides using Apps Script.”
As you may be able to tell from the title, the script from this tutorial does almost exactly what I’ve set out to do here. The author also did a great job adding comments to his code so that you can understand the purpose of each line. That tutorial and all the earlier ones it links to are honestly a great way to learn about Google app automation. If you have any interest in this subject, I encourage you to take a look!
But, useful though that article may have been for my research, it was not exactly what I wanted for my solution. For one thing, I realized that all the field names were hard-coded into the example script. This meant that the script would have to be revised, based on the specific nature of the data, each time someone wanted to use it for a new project. A reference to the slideshow being used as the template was also hard-coded; a piece of the template’s URL would have to be pasted in for each new presentation. And perhaps most significantly, the script was not designed to handle a data merge with images, which meant it would not be usable for any future award ceremony slideshows.
Nevertheless, by reading that article, I now had a basic outline for how to handle data merges in Google-land. The process didn’t seem too off-the-wall, so I felt pretty confident that it would be possible to write my own script that could handle both text and images while also being flexible enough to work with all kinds of templates and data sets.
The Outcome
I spent some time reading the Google Apps Script documentation, mostly to figure out whether it’s even possible to manipulate images in Google Slides via script (it is), and subsequently, how to actually do it.
However, an interesting challenge that I ran into is that Google Slides doesn’t really allow you to add an empty image frame to a slide. I also wasn’t sure at first how I could designate a particular image to be replaced by a particular column from the spreadsheet. The solution I eventually came to was to just put a dummy image on the page and then add the field name from the spreadsheet as the image’s ALT text. (It’s a hack, but it works. See below for more info.)
I also discovered that Google Apps Script does not have a convenient, built-in way to display a document picker to the user. So in order to maintain my goal of not having any specific files or locations hard-coded into the script, I had to resort to using predictable files/folders rather than pickable files/folders. (It just means you have to give things certain names and put them in the right place. I still think that’s easier than editing the script each time.)
These small limitations notwithstanding, the script I created works almost exactly like my InDesign-based solution. You start by creating a template slide with {{placeholder}} tags wherever you need dynamic data. Then, you put all your data into a spreadsheet with column names that match those tags. Finally, you run the script and—voilà—you have a slideshow!
The Takeaway
If using custom code to get a job done feels a little unsettling, even if all you need to do is copy and paste that code without editing it, fear not: there are pre-written add-ons available in the Google Workspace Marketplace that can handle data merges and presumably do other fancy things, no coding required.
Personally, I like using my own code whenever possible because I can see exactly what it does and not have to wonder what the app/developers might be doing with my data behind the scenes. So even if there are free add-ons out there that have already been written by other people, I’m more comfortable using my home-brewed solution. And if you’d like to use it too, then I invite you to keep reading!
The Script
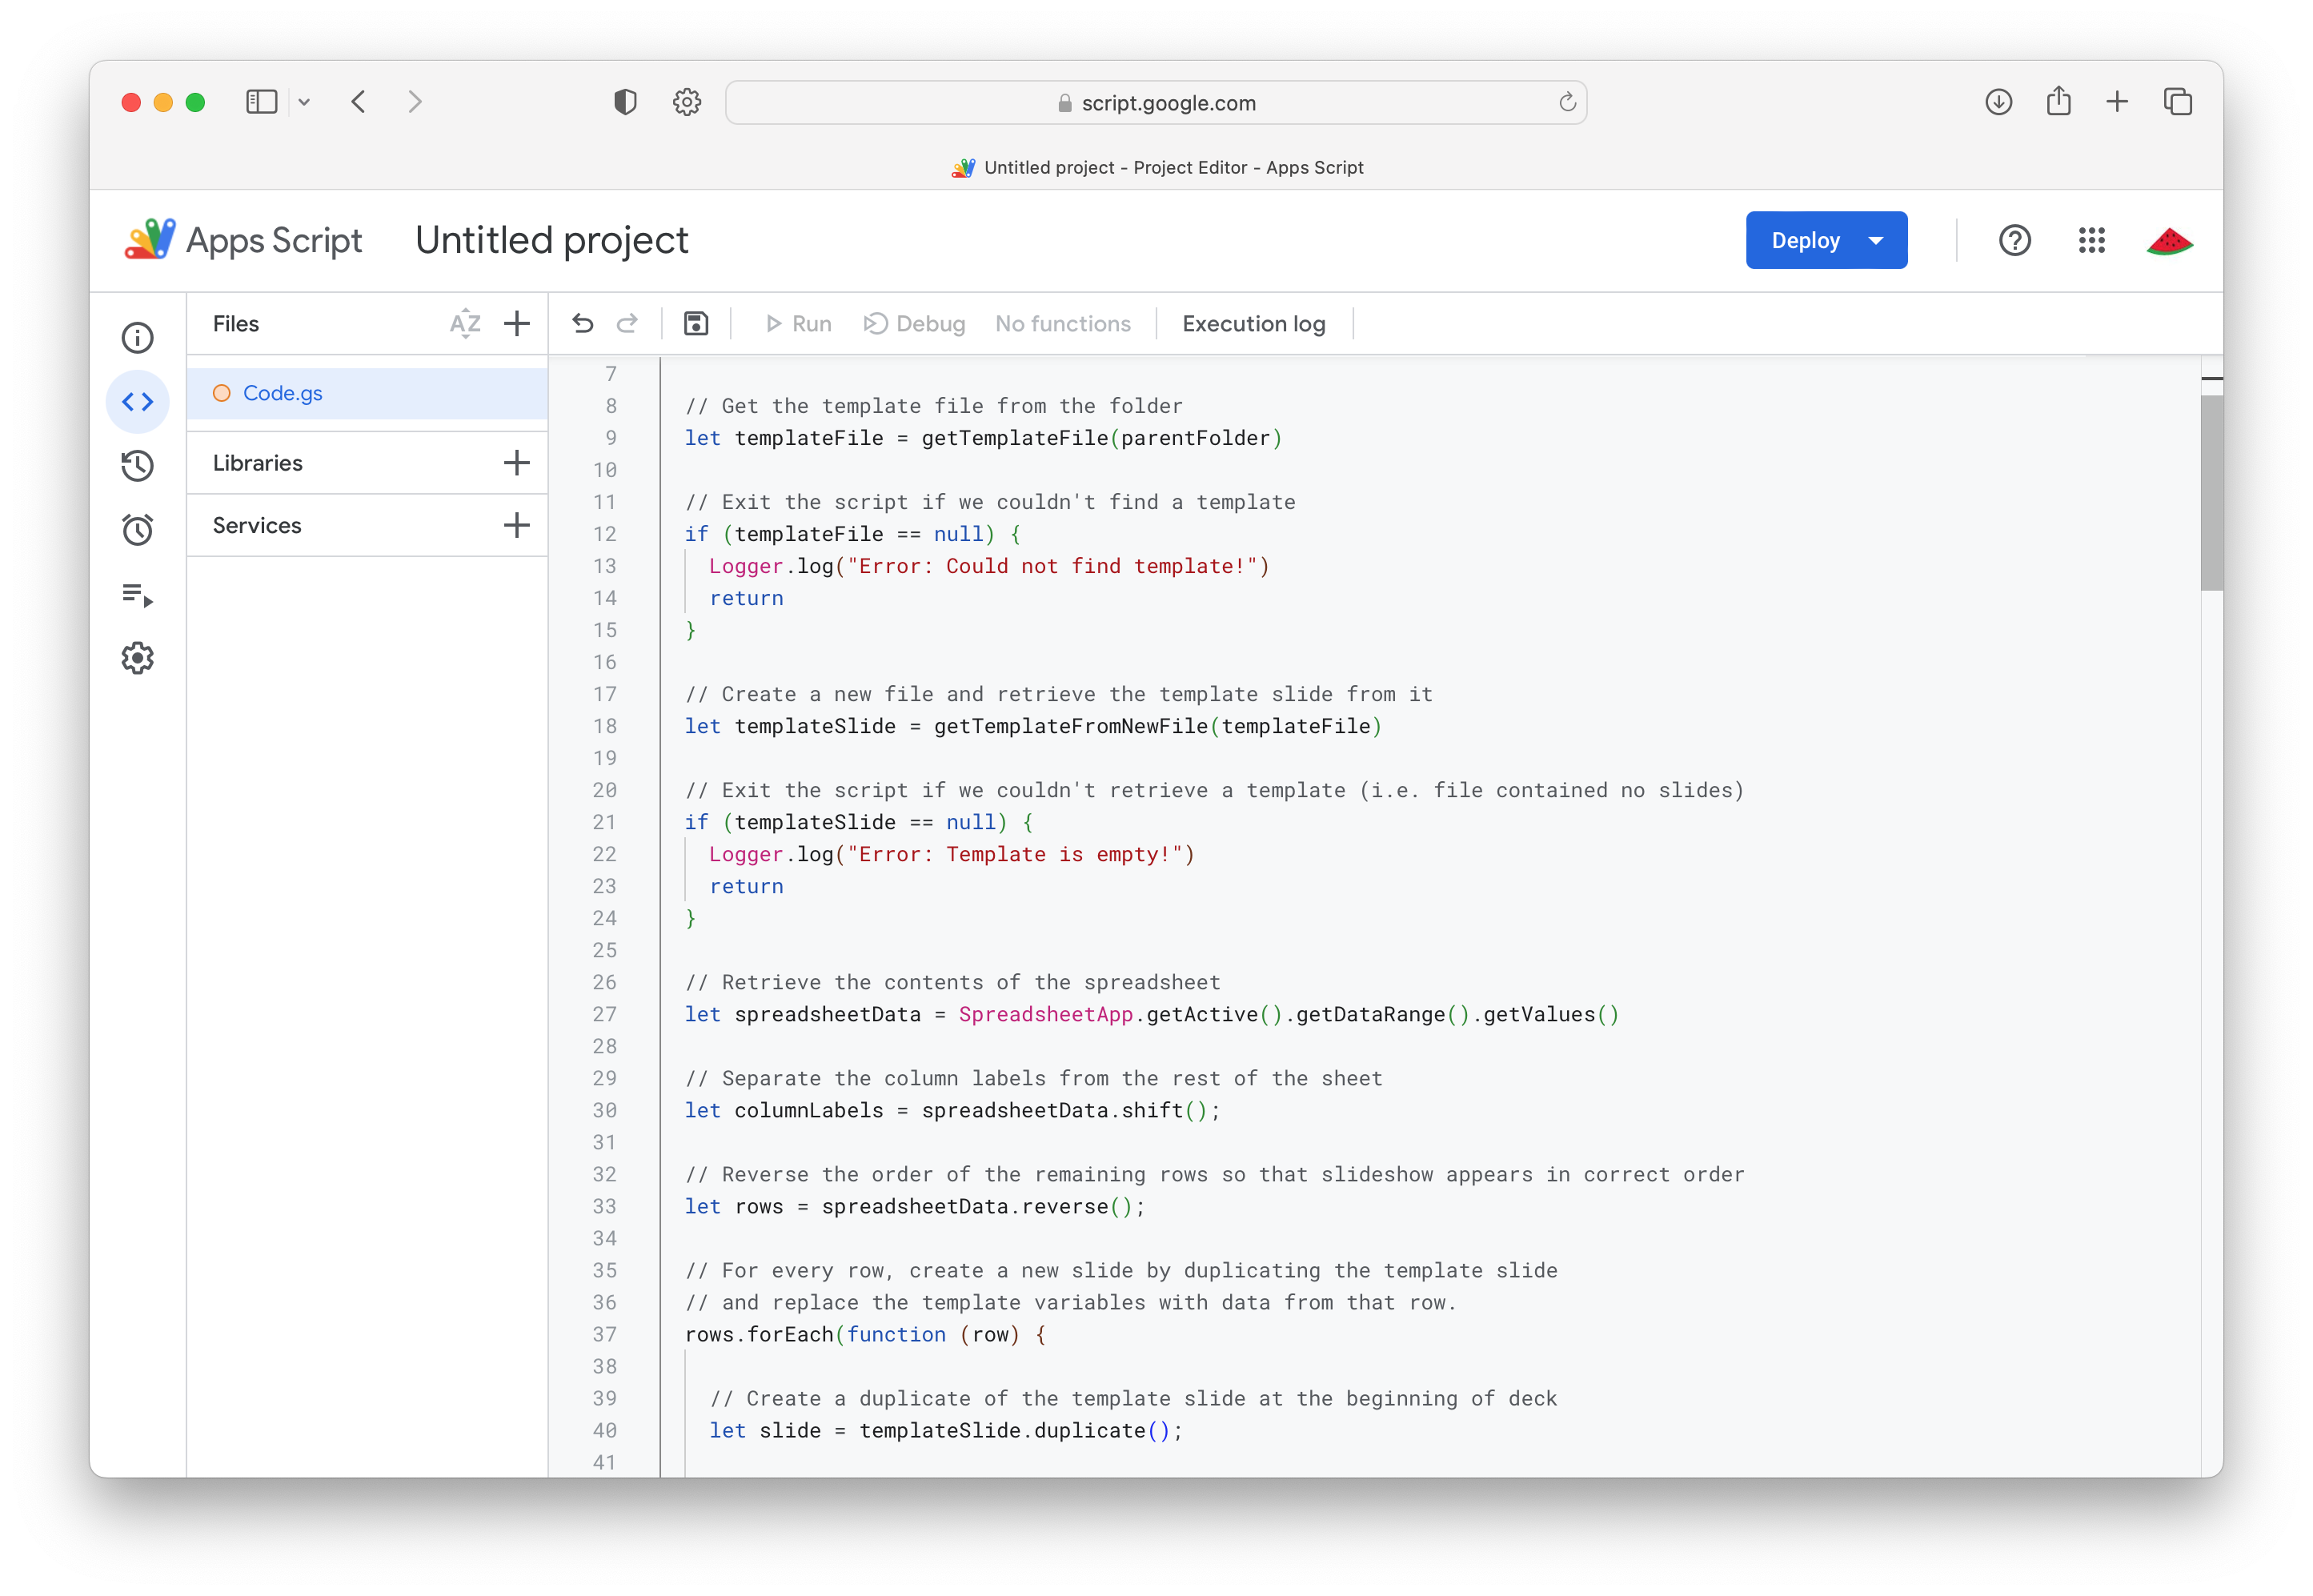
So, first things first, here’s the actual script I created:
// This function loops through each row of the sheet and performs the data merge
function createDeckViaDataMerge() {

  // Get the folder containing the spreadsheet
  let sheetId = SpreadsheetApp.getActive().getId()
  let parentFolder = DriveApp.getFileById(sheetId).getParents().next()

  // Get the template file from the folder
  let templateFile = getTemplateFile(parentFolder)

  // Exit the script if we couldn't find a template
  if (templateFile == null) {
    Logger.log("Error: Could not find template!")
    return
  }

  // Create a new file and retrieve the template slide from it
  let templateSlide = getTemplateFromNewFile(templateFile)

  // Exit the script if we couldn't retrieve a template (i.e. file contained no slides)
  if (templateSlide == null) {
    Logger.log("Error: Template is empty!")
    return
  }

  // Retrieve the contents of the spreadsheet
  let spreadsheetData = SpreadsheetApp.getActive().getDataRange().getValues()

  // Separate the column labels from the rest of the sheet
  let columnLabels = spreadsheetData.shift();

  // Reverse the order of the remaining rows so that slideshow appears in correct order
  let rows = spreadsheetData.reverse();

  // For every row, create a new slide by duplicating the template slide
  // and replace the template variables with data from that row.
  rows.forEach(function (row) {

    // Create a duplicate of the template slide at the beginning of deck
    let slide = templateSlide.duplicate();

    // Loop through the fields to make replacements
    columnLabels.forEach(function (fieldName, index) {

      // Process field based on whether its column holds text or a photo filename
      if (isPhotoField(fieldName)) {

        // It looks like this is a photo field, so grab the filename from this column
        // of the current row.
        let fileName = row[index]

        // Now, let's drop the image prefix ("#") from the field name
        let fieldNameWithoutPrefix = fieldName.substring(1)

        // Use the new filename and modified field name to attempt an image subsitution
        processFieldAsImage(slide, parentFolder, fieldNameWithoutPrefix, fileName)
      }

      else {
        // It looks like this is a regular text field, so grab the substitution text from this column of current row
        let newText = row[index]

        // Now use that text to perform a substitution
        processFieldAsText(slide, fieldName, newText)
      }
    })
  });

  // Remove the template slide from the final output
  templateSlide.remove()
}

// This function finds a file named "TEMPLATE" in the given folder and returns it
function getTemplateFile(folder) {

  // Look for slide decks with the name "TEMPLATE"
  let templateFiles = folder.getFilesByName("TEMPLATE")

  // If we found any template files, use them
  if (templateFiles.hasNext()) {

    // Return the first found template file
    return templateFiles.next()
  }

  // Return nothing if we couldn't find a template
  else {
    return null
  }
}

// This function duplicates the given template file and returns the first
// slide (i.e. the template slide)
function getTemplateFromNewFile(templateFile) {

  // Duplicate the template file
  let newFile = templateFile.makeCopy()
  newFile.setName("Generated Slide Deck")

  // Open the new file
  let newDeck = SlidesApp.openById(newFile.getId())

  // Get the slides from this deck
  let slides = newDeck.getSlides()

  // If the deck has any slides, return the first one
  if (slides.length > 0) {
    return slides[0]
  }
  else {
    return null
  }
}

// This function replaces any text on the given slide that matches the field name
function processFieldAsText(slide, fieldName, newText) {

  // Use the fieldname to build the placeholder text (e.g. "{{fieldName}}") that we'll look for on the slide
  let placeholderText = "{{" + fieldName + "}}"

  // Do the replacement
  slide.replaceAllText(placeholderText, newText)
}

// This function checks whether the field name is preceded by a # symbol,
// in which case that field's column will be assumed to contain the names of image files.
function isPhotoField(fieldName) {
  return fieldName.substring(0,1) == "#"
}

// This function looks for a folder alongside the spreadsheet that matches the given field,
// and if it finds one, it tries to start the image replacement process.
function processFieldAsImage(slide, parentFolder, fieldName, fileName) {

  // Look for a folder inside the spreadsheet's folder that matches the given field name
  let matchingImageFolders = parentFolder.getFoldersByName(fieldName)

  // Proceed ONLY if we were able to find a match
  if (matchingImageFolders.hasNext()) {

    // Get the first folder from the set
    let imageFolder = matchingImageFolders.next()

    // We're looking for an image whose ALT text matches "{{fieldName}}",
    // so let's create a variable to hold that search string
    let placeholderText = "{{" + fieldName + "}}"

    // Handle the image replacement
    handleImageReplacement(slide, imageFolder, placeholderText, fileName)
  }
}

// This function looks for an image on the given slide whose ALT text matches
// the given placeholder text. If it finds one, it attempts a substitution.
function handleImageReplacement(slide, imageFolder, placeholderText, fileName) {

  // Get all the images from the template slide
  let slideImages = slide.getImages()

  // Loop through each of the images we just got
  slideImages.forEach(function (image) {

    // Check whether the current image's ALT text matches the placeholder text
    if (image.getDescription() == placeholderText) {

      // We found a match, so attempt to replace it
      replaceImage(image, imageFolder, fileName)
    }
  })
}

// This function looks for an image with the given filename in the provided folder.
// If it finds one, it replaces the provided image with the new one.
function replaceImage(oldImage, newImageFolder, fileName) {

  // Look for a photo in the folder with the given filename
  let foundImages = newImageFolder.getFilesByName(fileName)

  // Check whether we actually found any images that match the fileName
  if (foundImages.hasNext()) {

    // We foud a match, so let's get just the first one from the set
    let newImage = foundImages.next()

    // Replace the placeholder image with the new image
    oldImage.replace(newImage)
  }
}

function addMenuToSheet() {
  let menu = SpreadsheetApp.getUi().createMenu("Data Merge")
    .addItem("Do Merge", "createDeckViaDataMerge")
    .addToUi()
}

function onOpen() {
  addMenuToSheet()
}
What to do with it…
Now, if you’d like to actually use that script, here’s how:
- Create a folder for your project in Google Drive. Call it whatever you’d like!
- Create a Google Slides document with just a single slide. You can use a built-in design or a third-party template. Just make sure to put the document in that folder you created. And make sure the document is named TEMPLATE. (This is case-sensitive, so make sure it’s in all-caps.)
- When designing your slide, any elements that will look the same on every slide (logos, boilerplate text, etc.) can be added the same way you would for a normal slide.
- To add text that will change on each slide (like a student’s name or grade), create a placeholder tag like one of these:
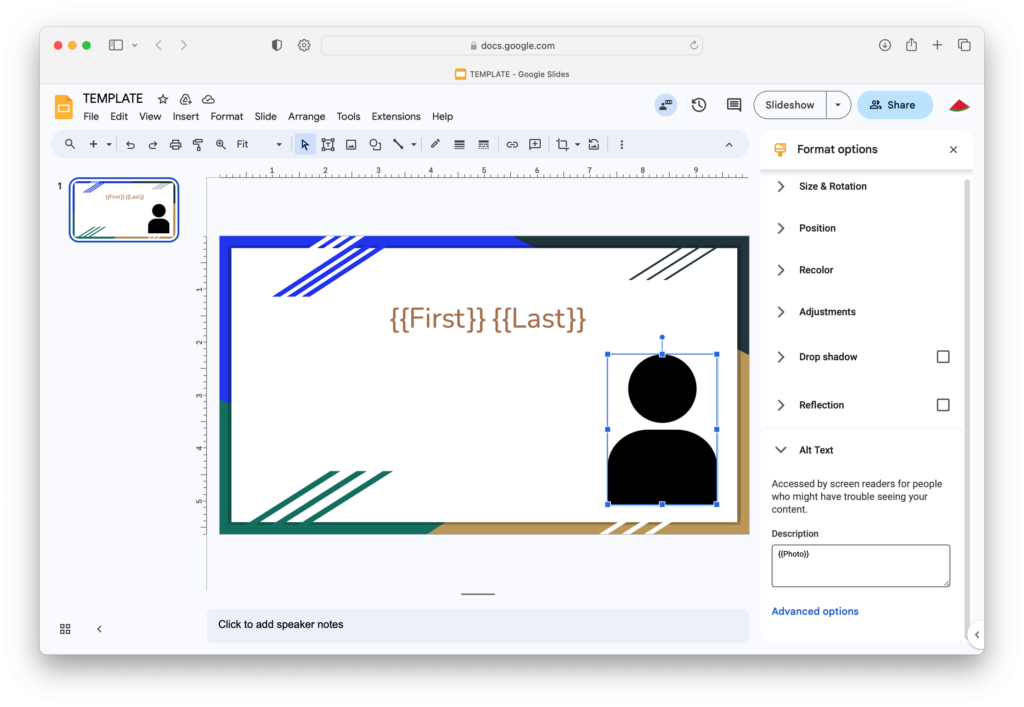
{{Name}}or{{First}} {{Last}}or{{Grade}}. (Your column names will vary depending on what your data looks like. Just make sure to include those curly braces.) - To add a photo or other image that will change on every slide, start by adding literally any image you want to the slide to serve as a dummy/placeholder. Just make sure to crop it to the actual shape/size you want on the final slides. (You could use one of your actual photos if you want to be certain the dimensions are correct.)
- Now click on that image and choose “Format Options” from the toolbar. A sidebar should appear on the right side of the window. At the very bottom is a section labeled “Alt Text,” and in that section is a box labeled “Description.” Type a placeholder tag (e.g.
{{Photo}}or{{Portrait}}or some other relevant name) into that box. Be sure to include the curly braces! - Next, create a folder in Google Drive with the same name as the placeholder tag (e.g.
PhotoorPortrait—but this time no curly braces). Make sure this folder is in the same parent folder as the template. Then, add, move, or upload the relevant images into that folder. (You can create more than one folder if you have multiple placeholders.)
- Now click on that image and choose “Format Options” from the toolbar. A sidebar should appear on the right side of the window. At the very bottom is a section labeled “Alt Text,” and in that section is a box labeled “Description.” Type a placeholder tag (e.g.
- If you already have a data spreadsheet, upload it or move it into the folder. Otherwise, create a new one. Make sure the column names for any dynamic text, like student names or grades, match your placeholder tags exactly (but without the curly braces).
- If your template includes any placeholders for images, make sure they each have a column in your spreadsheet.
- For the column name, use a pound sign (#) followed by the name of the folder you added the relevant images to. So, for example, if I had a placeholder in my presentation labeled
{{Photo}}, then I would upload the images to a folder namedPhotoand make sure to have a column in my spreadsheet labeled#Photo. - For your rows in this column, all you need are the file names for those images, e.g. 123456.jpg. (You do NOT need the paths/locations.) Make sure the names appear exactly as they do in Google Drive.
- For the column name, use a pound sign (#) followed by the name of the folder you added the relevant images to. So, for example, if I had a placeholder in my presentation labeled
- When your table is all set up, click on the “Extensions” menu and choose “Apps Script.” A new tab should open containing an editor interface.
- Delete the default script from the editor and paste in the one from the box above. Then, click the “Save” button in the toolbar. (It looks like an old floppy disk because everyone in 2023 knows what one of those is for…)
- Go back to the tab with your spreadsheet and refresh the page. A few seconds after it’s done reloading, you should see a new item labeled “Data Merge” appear in the Google Sheets menu bar.
- Click on that new “Data Merge” menu and then select “Do Merge.” A status notification will appear at the top of your window. Wait for it to indicate that the script has finished. (The longer your spreadsheet, the longer this will take.)
- Go back to your folder on Google Drive. You should see a new slideshow named “Generated Slide Deck.” Open it up. If all went well, you will see a slide for each row of the spreadsheet. Each of your placeholders should have been filled in with the appropriate text or image!
Wrapping Up
Thanks for following along on my Google Apps scripting adventure. Hopefully, you’ve enjoyed the opportunity to learn about this powerful automation tool, and perhaps you’ll even find a way to incorporate my slideshow generator into your own workflow!