The Background
When Apple announced that it was transitioning its computers to “Apple Silicon” processors, there was a lot of angst in the tech community over what this meant for virtualization on the Mac.

Because Apple Silicon processors (such as the M1 and M2 series) are based on the ARM architecture, it’s impossible to run software compiled for the x86 processors like those Intel and AMD are generally known for today. When Apple started releasing their new computers, this meant that retail versions of Windows, many Linux distributions, and other “legacy” operating systems could neither be installed natively on those machines via Boot Camp nor run via virtualization software such as Parallels.
The situation has improved somewhat since then. For one thing, the latest version of Parallels can automatically install a compatible version of Windows 11.

Meanwhile, an open source project called Asahi Linux has devised a method for natively booting an Arch Linux-based distribution on M1 and M2 Macs.
Over the past few months, I’ve successfully tested both of these solutions, but during this time, I also began to get curious about a seemingly less popular workaround to the virtualization problem: emulation.
Whereas virtualization allows multiple guest machines to share the hardware of the same host machine, emulation uses software to mimic a completely different set of hardware. This makes it possible to run x86 software, for instance, on a computer with an ARM processor—albeit with a notable performance cost.
The Problem
My first experiment with emulation on an M1-based Mac was an attempt to run MS-DOS using an app called UTM, which is essentially a graphical front end for the venerable QEMU emulator.
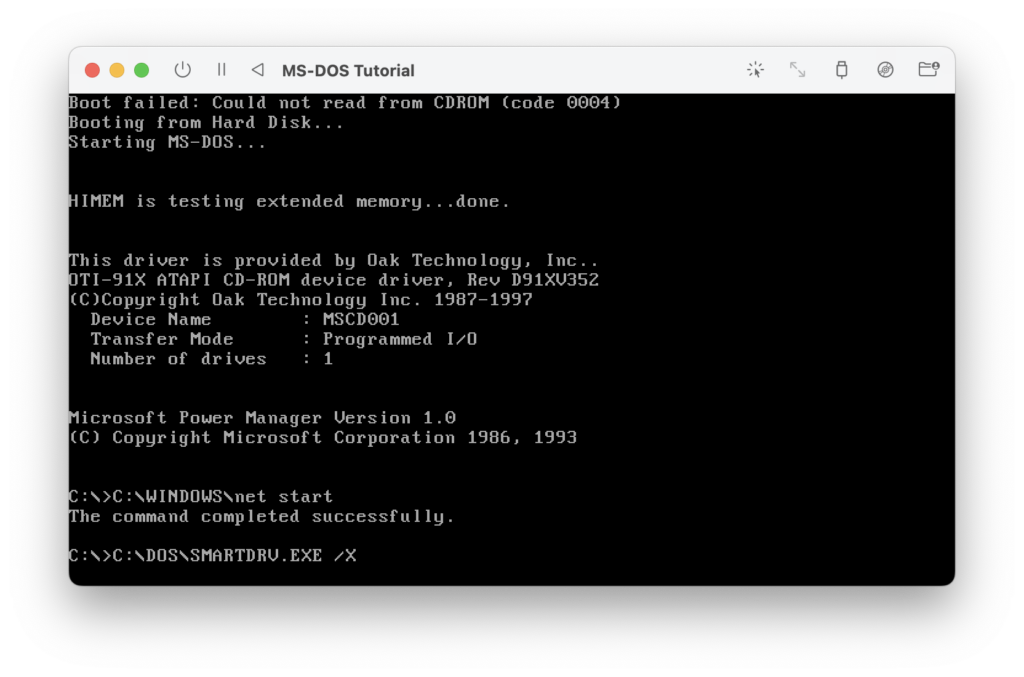
I documented this successful project in a tutorial and was even eventually able to run an old game, SimCity 2000, with fully functional sound and graphics.

After letting that project sit for a while, I decided to come back to it and try installing Windows 3.11 on top of DOS in the same emulated environment.
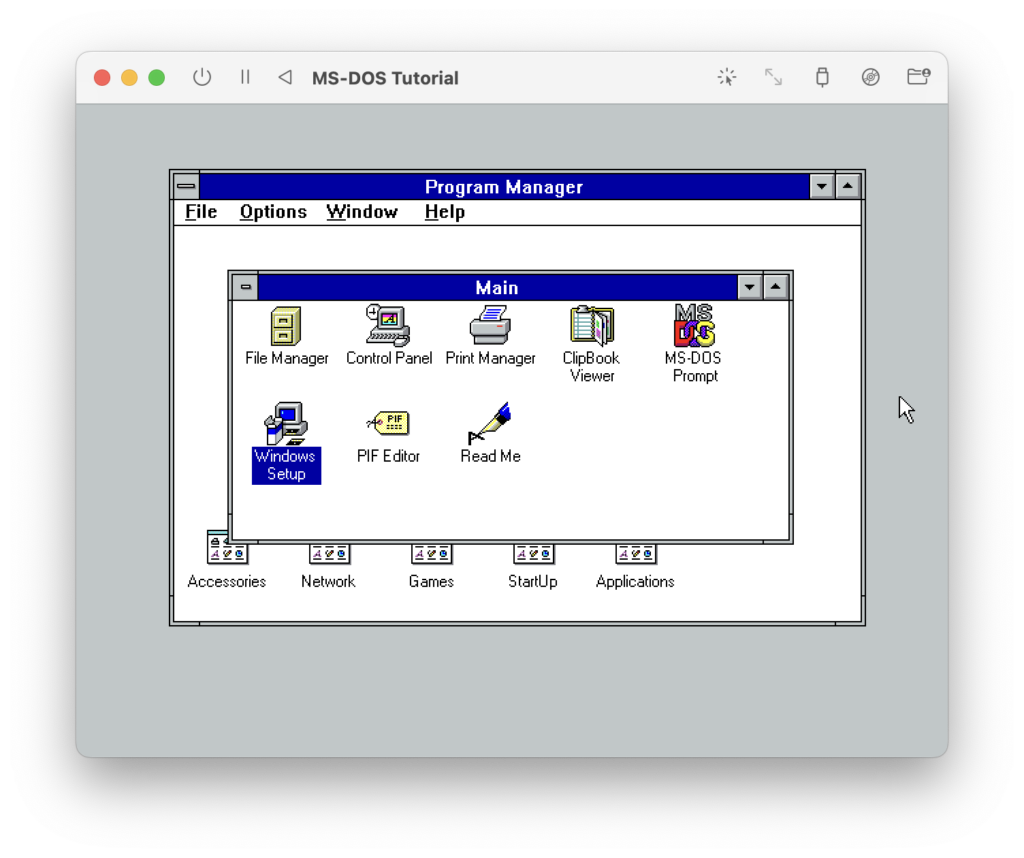
As I expected, this worked just fine, but it got me wondering about what other fun blasts from the past I might be able to run on Apple Silicon via emulation.
For instance, is it still possible to run the “classic” MacOS, an operating system that runs on yet another processor architecture—namely, PowerPC?
I had accomplished this once or twice before on an older Mac using a purpose-built emulator called SheepShaver, but until now had not investigated whether the tools exist to do it on a newer machine.
The Objective
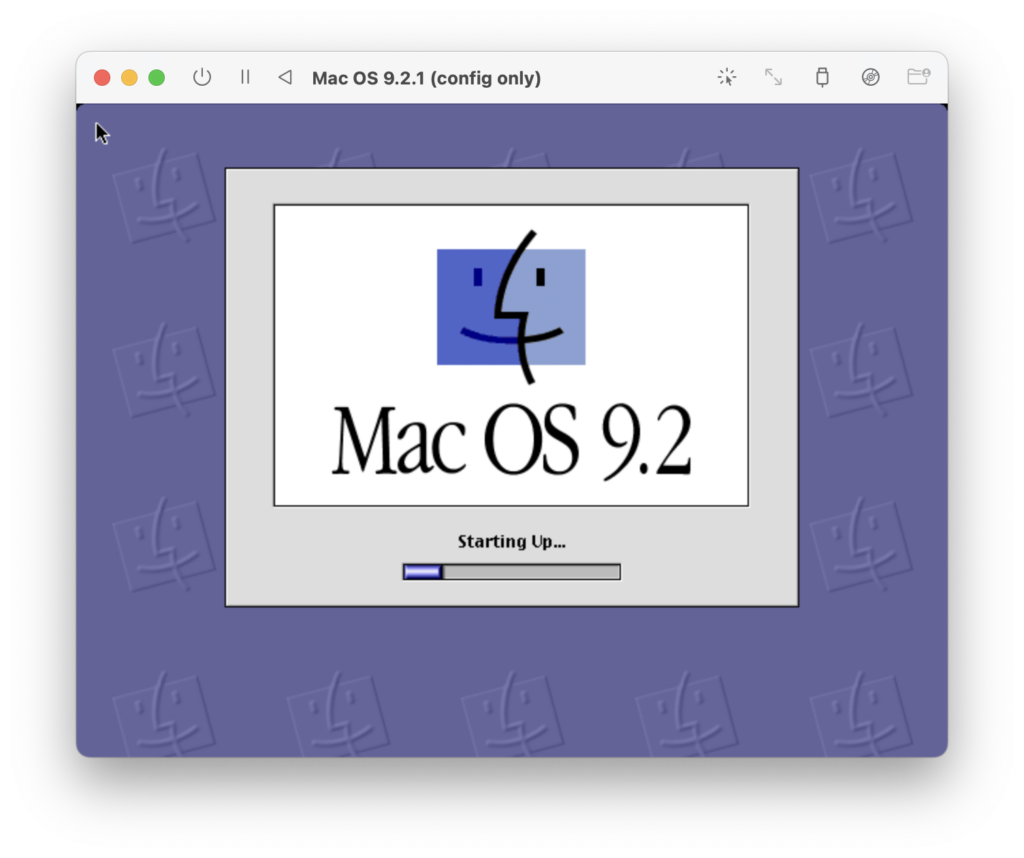
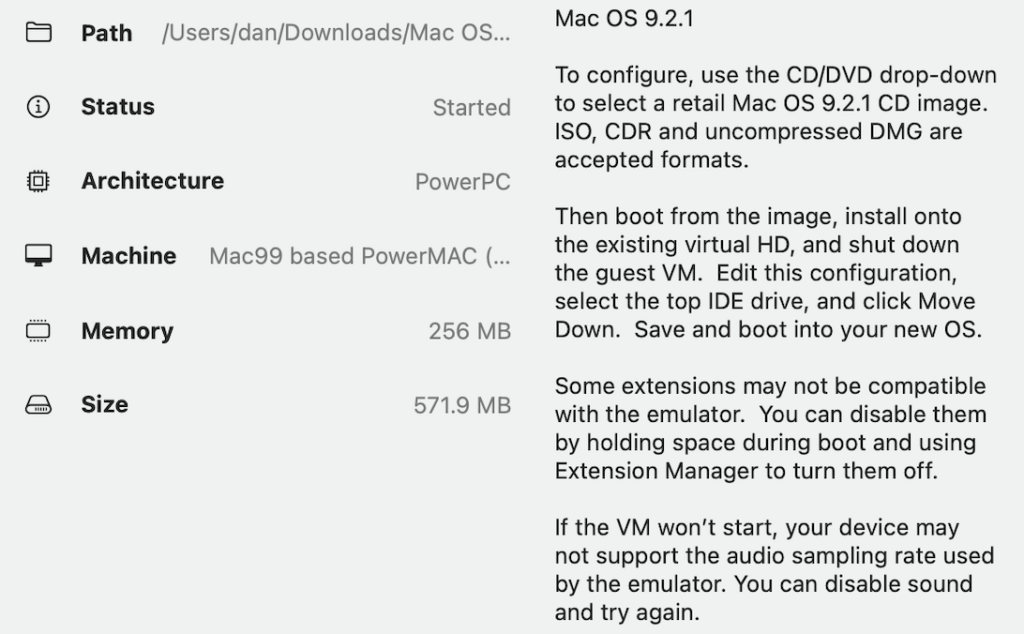
At bare minimum, for this project to be successful, I wanted to be able to boot some version of the classic Mac operating system. My preference would be a release from the MacOS 9.2.x series since these are the final and essentially most “complete” standalone editions of the software. (This is the same reason I went with MS-DOS 6.22 for my previous project.) That said, anything from the 9.x series would be acceptable.
Now, installing an operating system is useless if you can’t do anything with it. And while there’s plenty of abandoned Mac software available on the internet if you go searching for it, finding anything ultimately requires, well, the internet! So a secondary goal would be to actually be able to browse the web using this emulated machine.
The Solution
Path #1: SheepShaver
It turns out that not only is SheepShaver still around, but there’s actually a version out there compiled for Apple Silicon!

There’s really a community for just about anything out there somewhere on the internet, and classic MacOS emulation is apparently one of them. In this case, it’s E-Maculation, a wiki and forum “dedicated to emulation of the classic Macintosh computer in MacOSX/macOS, Windows and Linux.”
The E-Maculation site hosts versions of SheepShaver built for “modern” editions of the Mac operating system dating back to version 10.4 and for all the different processor architectures these have ever worked on (i.e. PowerPC, x86, x86_64, and of course ARM64).
The latest builds are all linked to this forum post. (Here’s a direct link for the version I used.) That post also links to this wiki page with instructions on how to set it up, which is a bit more complicated than one might expect.

For instance, in addition to downloading the application, you also must download a copy of the SheepShaver folder. (This is mentioned on the form post, but I missed it the first time.) Then, you have to put into that folder a copy of the SheepShaver application as well as a ROM file (i.e. an extracted copy of the firmware for an actual Mac compatible with whatever version of MacOS you are trying to run). Neither the forum nor the wiki provide links to download a ROM due to legal concerns, but the wiki page does provide some pretty clear instructions on where you are likely to find one. Finally—and this should be fairly obvious—you need a disk image for an actual MacOS installation disk. They don’t tell you where to find one of those either, but there are a number of websites that specialize in archiving old software. I’ve learned a lot about what’s out there via a site called WinWorld. Just sayin’…
One significant limitation of SheepShaver is that—at least according to all the documentation I’ve seen—it only works for versions of MacOS up to and including 9.0.4. I couldn’t get the emulator to boot from a 9.2.1 install image, so I’ll take that as confirmation.
However, as you’ll see in just a moment, it is possible run later versions of MacOS, such as the 9.2.x series, via a different emulator.
Path #2: UTM
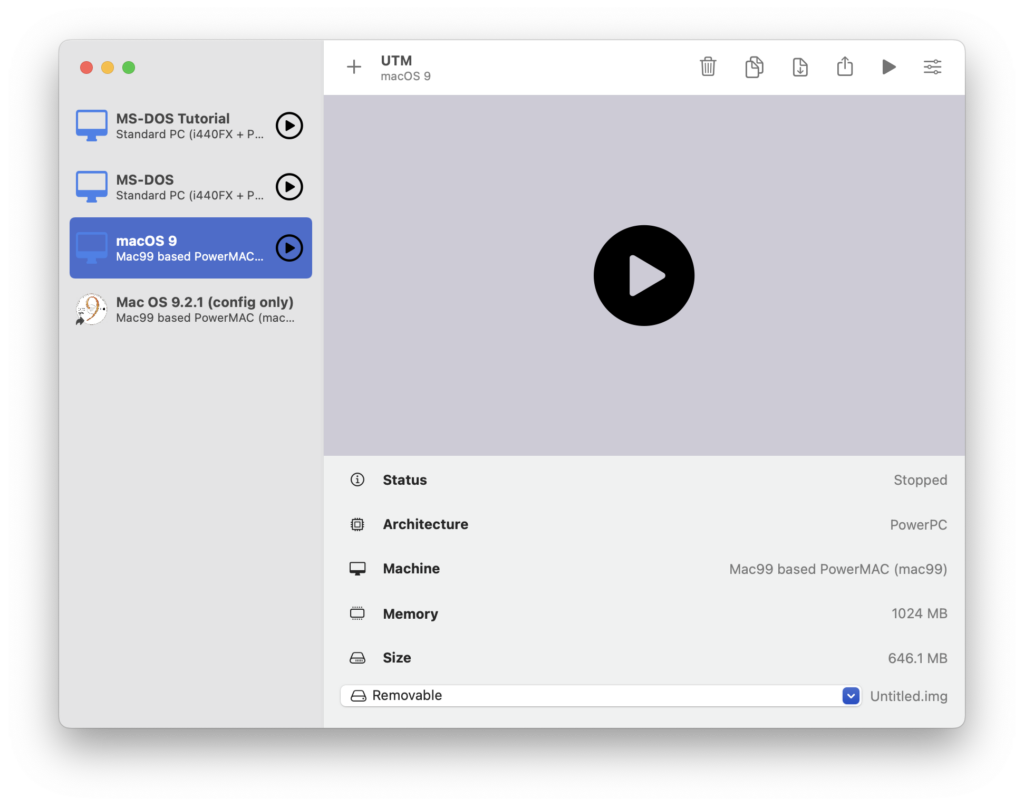
Despite the way I’ve laid out this article, I actually looked into UTM first, mostly because I had already spent a lot of time playing around with it while trying to install MS-DOS.
As I mentioned earlier, UTM is basically a wrapper for QEMU, which would otherwise need to be configured using complicated and sketchily documented command line arguments. (I also understand, based on my research, that the UTM developers incorporate some tweaks/patches to QEMU itself when they feel it’s appropriate.)
The nice thing about QEMU is that it can emulate a ton of different hardware, with plenty of architectures, processors, computer types, and peripheral models to choose from. I had never seen anything before about using QEMU to emulate old, PowerPC-based Macs, but apparently it does have this trick up its sleeve. A quick web search, in fact, brought me to this blog post, which provides a pretty thorough tutorial for how to configure UTM (and thus QEMU) to do it.
The tutorial works, with some caveats.
First, because the post is about a year old (as of September 2022), the instructions and screenshots are based on an older version of UTM. Some of the options and configuration pages have changed. And while the screenshots accurately portray the necessary settings, some of them seem to be skipped or glossed over in the instructions, so I ended up missing a few things the first time through.
That blog, however, included a link to the E-Maculation forum (which is actually how I first found it). As the blogger himself notes, UTM has only a small presence there—just a single thread, as far as I could tell—whereas SheepShaver and QEMU itself get entire categories. Nevertheless, that single thread led me to a GitHub repository with pre-configured UTM setups for every version of MacOS dating back to 9.1. It’s way easier to just download one of these and go from there. You just double-click the file, point UTM to your MacOS disk image (have I mentioned that WinWorld is a great source of information about old operating systems?), and click the run button.
You do have to make a small adjustment to the configuration after you finish installing, but the repository maintainer has set up the config files so that the instructions for this show up right there in UTM. Very clever!
The Outcome
What I can conclude from this experiment is that there are at least two pretty viable ways to get classic MacOS to boot (inside an emulator) on a Mac powered by Apple Silicon. Thanks to the existence of pre-built configurations and the fact that you don’t need any special firmware files, UTM is a great choice, particularly if your goal is to run MacOS 9.1 or higher. Meanwhile, despite being a little finicky to set up, SheepShaver remains a reasonable option for running earlier versions.
But what about that second goal—the one about browsing the web? Well…it’s complicated.
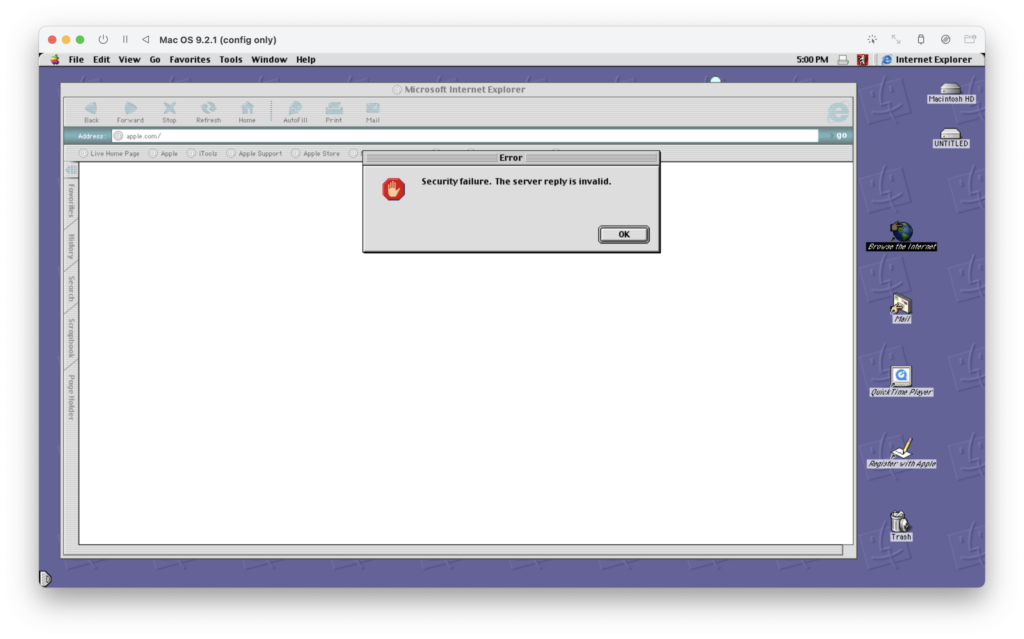
What I learned is that whether you install MacOS 9.0.4 in SheepShaver or MacOS 9.2.1 in UTM, you will get access to ancient copies of Internet Explorer (versions 4.5 and 5.0, respectively) and even…Netscape, but neither of these gone-but-not-forgotten browsers are going to be of much use. They’re both so old that they can’t even communicate with most modern web servers. And the reason for this, interestingly enough, is security.
In the two decades or so since MacOS 9.2.1 was released, newer and better encryption protocols have been introduced to ensure that our connections to web severs remain sufficiently private. In the interest of backwards compatibility, even as server administrators adopted these newer protocols, they usually left many of the older ones in place—which could be beneficial if you happened to be using, say, a 25-year-old computer. However, now that we are firmly in the 21st century and very few people are actually still using 25-year-old computers, the oldest of those protocols are rarely still available—and many websites don’t even allow un-encrypted connections anymore!
Out of the box, both the setups I explored could connect to Google’s homepage without problems. (The rendering left something to be desired, but that’s beside the point.)


Unfortunately, most other URLs I tried to visit resulted in errors because the server could no longer communicate using the types of encryption that the ancient browsers were fluent in.

That said, there is some good news on this front. For many years, a guy by the name of Cameron Kaiser maintained a very special browser called Classilla. As you might guess from its name, Classilla is a fork of Mozilla, the open source browser that succeeded Netscape and eventually gave rise to Firefox. This fork was specifically designed to work in classic MacOS. And because it traces its roots back to a version of Mozilla originally released in 2008, it is at its core five to seven years “newer” technologically than the last compatible versions of Netscape and Internet Explorer, respectively. Plus, it continued to received functionality improvements until the project was officially retired in 2021!

That’s the good news. The bad news is that even Classilla can’t handle the encryption protocols (namely, TLS 1.2 and 1.3) that dominate the World Wide Web of 2022. However, all hope is not lost. The final version of Classilla published before the browser was mothballed includes support for a wonky workaround named Crypto Ancienne. (Yes, that’s French they’re speaking…)
The Classilla website provides setup instructions and download links for Crypto Ancienne here. But because nothing can be easy, those downloads only work in some of the oldest versions of Mac OS X or in an obscure Unix-like virtualization environment for classic MacOS called Power MachTen. I understand the reason for this—since the whole point is to be able to use this browser on really old computers—but it doesn’t help me here. Thankfully, the source code for Crypto Ancienne is available on GitHub and, I can report, can be compiled rather effortlessly on an Apple Silicon Mac.
In order to follow Classilla’s “official” instructions, I also had to track down and compile the source code for a tool called micro_inetd. The micro_inetd program runs on the host computer and listens for requests for encrypted websites coming from Classilla. It then passes those requests on to a program named “carl” (yes, carl), which does all the heavy lifting. Together, these two components act as a rudimentary proxy server—a sort of middleman that (in simplified terms) sends the request out to the desired website’s server, translates the encrypted response into plaintext, and then relays the unencrypted data back to Classilla.
This is horribly insecure, but it does get the job done.
With this monstrosity of an internet setup in place, I was finally able to surf the web unimpeded. Well, sort of…
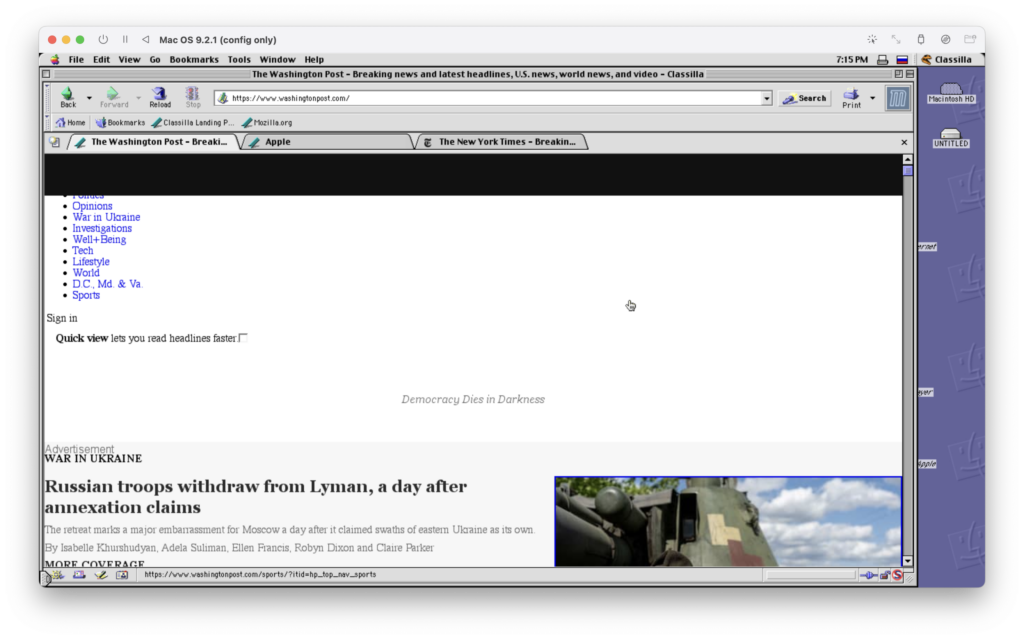
Web standards, especially CSS (responsible for layout) and JavaScript (responsible for all kinds of client-side fanciness), have evolved so much since the days of 2008 that in a great many cases, what Classilla ultimately renders on the page is an absolute mess.
By default, Classilla attempts to masquerade as the browser built into a Nokia “flip-phone” from 2005, but even this doesn’t really help. Thanks to advances in responsive web design and the ever-increasing power of modern smartphones, it is no longer all that common for websites to serve a completely different, stripped-down version of their content to mobile users. This means that what we’re left with, no matter what browser Classilla pretends to be (and it gives you options), is quite often unrenderable gobbledegook.
So what have we learned from all this? Well, for one thing, we’ve learned that it’s definitely possible to run three different web browsers in various versions of MacOS 9 via two different emulators running on macOS 12 on an Apple Silicon-powered laptop.
We’ve also learned that it’s possible (with some effort) to use one of those browsers to contact a modern web server and actually get back a response.
And as long as you don’t expect to actually be able to read that response, surfing the web like it’s 2001 can be a thoroughly rewarding experience!