Today, we’re going to talk about mail merge. This is far less technical—and far easier—than some of the other topics I’ve covered on this blog, but it is arguably one of the most useful tools in my box.
Once you know how to do it, you’ll feel like you’ve gained a new superpower. More importantly, you’ll be able to privately send a personalized email to dozens (even thousands) of users at once!
Sure, you can sort of do this with the BCC field on your email client. But if you do, you’ll need to send every user the exact same message. The brilliance of mail merge is that every user receives a unique message, based on a template, including information specific to that user.
For example, I use mail merge to send invitations to potential National Honor Society candidates. (It’s a much more professional touch to have the student’s name in the greeting line instead of a rather cold “Dear student.”)
I use it to contact students who haven’t bought a yearbook yet. I can tell each of them how many pages they’ve appeared on, show them the actual page numbers as proof, and then encourage them to buy—and only need to write one message (instead of 300)! And one of my favorite uses is to notify seniors of their photo appointments. Besides the personalized greeting line, the body of each email includes the date, time, and location for that specific student’s photo.
Objective
Our goal is to quickly send an email out to a large number of recipients while personalizing that message for each recipient.
Materials
The simplest way to do a mail merge is in Microsoft Office, using a combination of Excel, Word, and Outlook. You’ll need to have Office installed on your computer, and you’ll need to already have your email account set up in Outlook. (If you’re using a work computer for your mail merge, odds are you’re all set!)
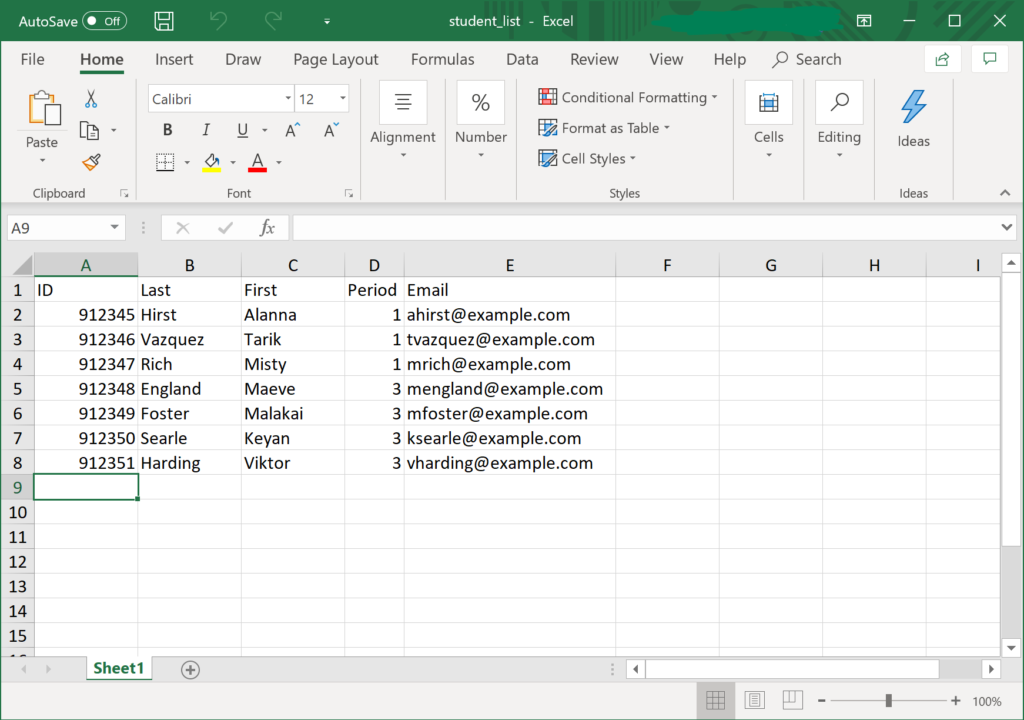
Step 1: Find, Export, or Create a Spreadsheet
The secret to achieving a mail merge is a good spreadsheet. It doesn’t matter where the data in the spreadsheet comes from. You can export it from your Student Information System, create it yourself, ask a colleague for it. Just make sure that you’ve got the data you need.
Your spreadsheet must be in Excel format. If you created it somewhere else (e.g. Google sheets), you can copy and paste it into a new Excel document. (Google Sheets also a has an option in the File menu to download the sheet in Excel format.)
At bare minimum, the spreadsheet should have one or more columns representing the recipients’ names and a column with each of their email addresses. Depending on the purpose of your mail merge, your spreadsheet may contain additional columns, such as appointment times or grades, that contain information unique to each student.
For this example, I’m going to use the same spreadsheet that appeared in my Digital Rubrics project.
Step 2: Import the Spreadsheet into Microsoft Word
You might expect us to use Microsoft Outlook to create the email. The truth, however, is that we must do it in Microsoft Word. So, once your spreadsheet is ready, save it in an easily accessible location and open up Word.
Then, find the Mailings tab, click on “Start Mail Merge,” and choose “E-mail Messages.”
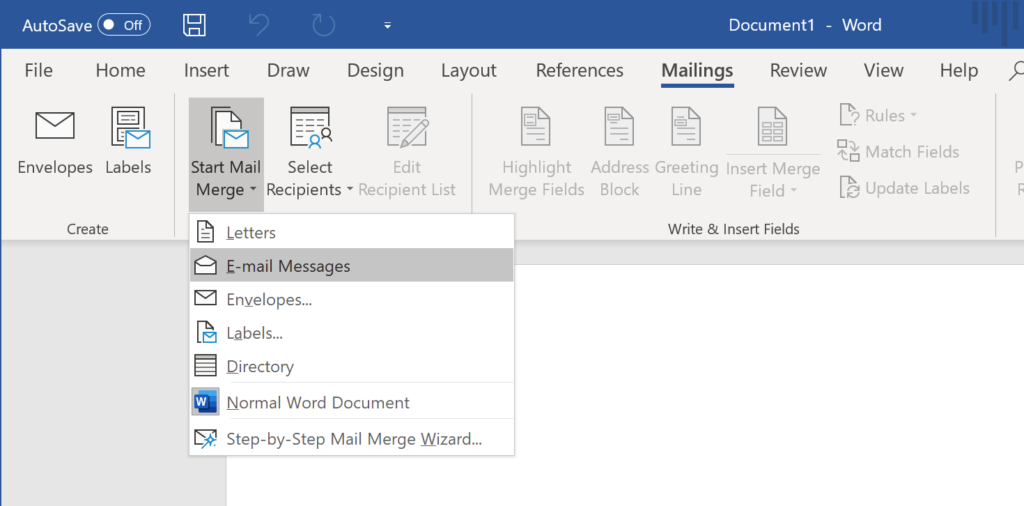
Not much will happen. But rest assured this was a meaningful step.
Next, click on “Select Recipients” and then “Use an Existing List…”
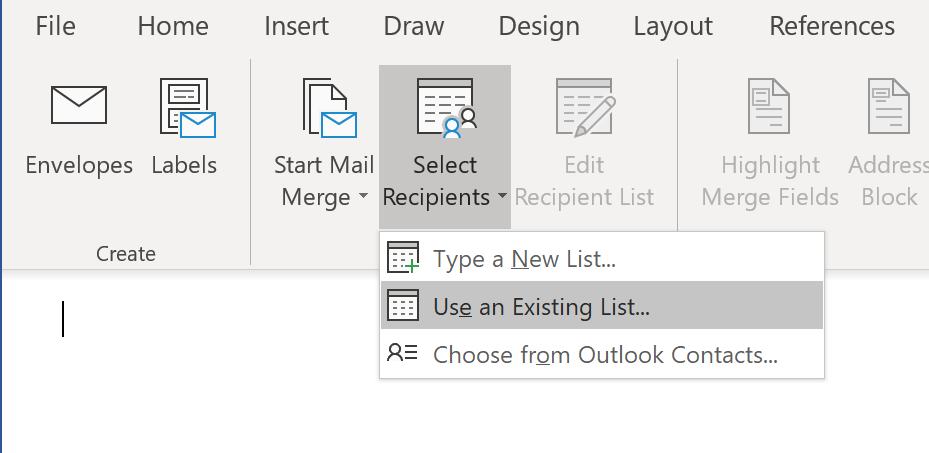
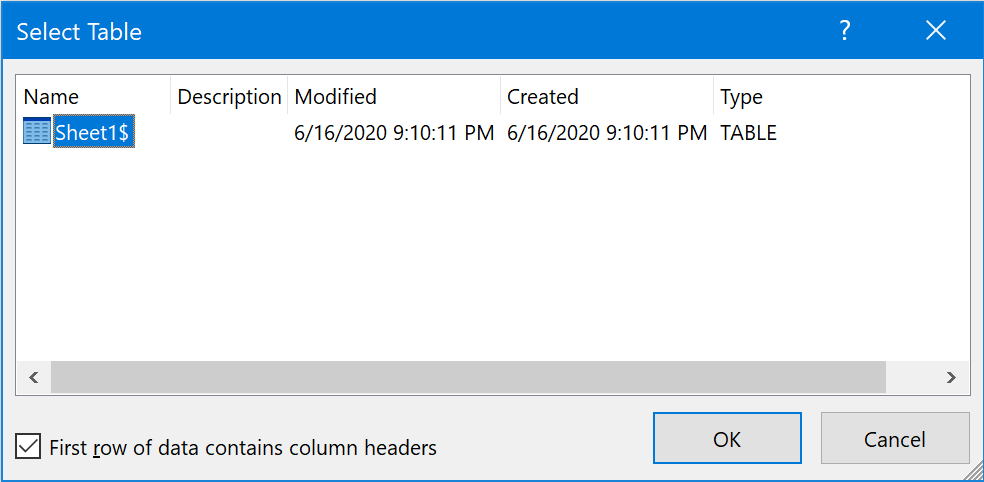
This will pop up a file chooser. Use it to select and open the spreadsheet from Step 1.
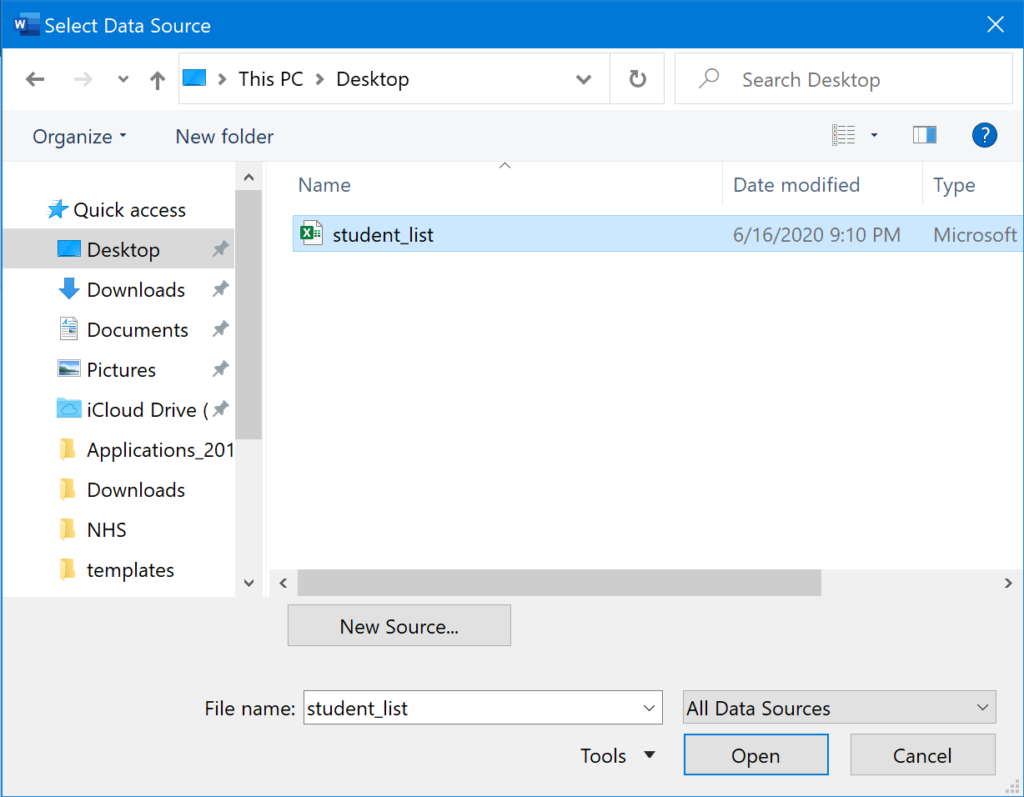
After you click Open, Word will ask you which tab you want to use. If you only have a single tab in your spreadsheet, don’t worry about it. Also make sure that the box labeled “First row of data contains column headers” is checked. (It’s rare that a spreadsheet wouldn’t have column labels in the first row.)
Step 3: Create an Email Template
Now that you’ve imported your data, you can create your message. Write it as though you were creating a normal email. However, when you get to a spot where you need to include a specific piece of information, such as a recipient’s name, use a placeholder instead.
Here’s how: In the toolbar, click on “Insert Merge Field,” and then just click the field you want to insert.
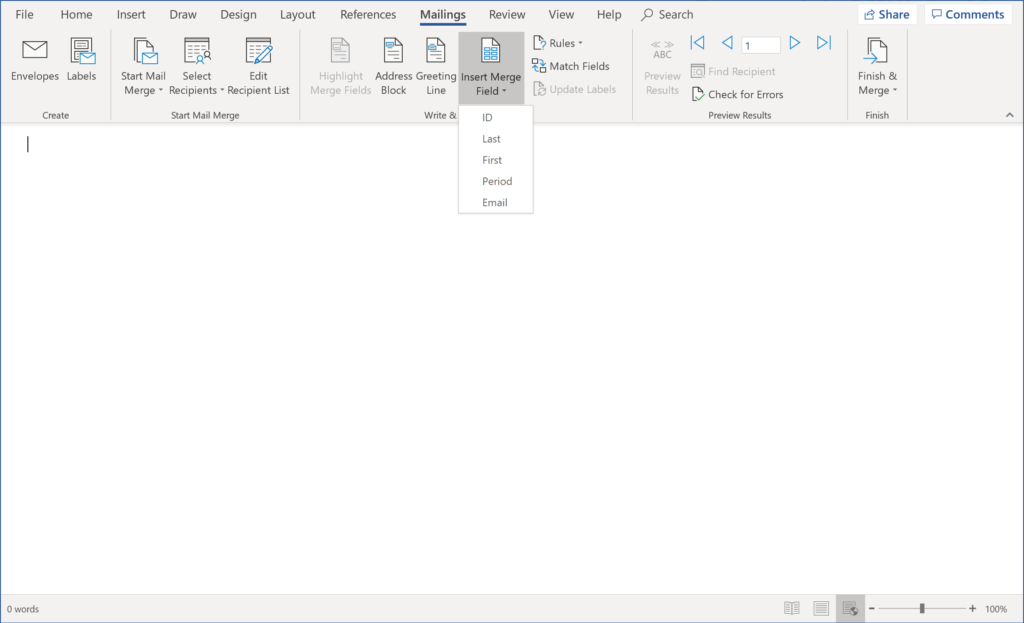
You’ll know that you’ve added a placeholder successfully because it will look like «this»:
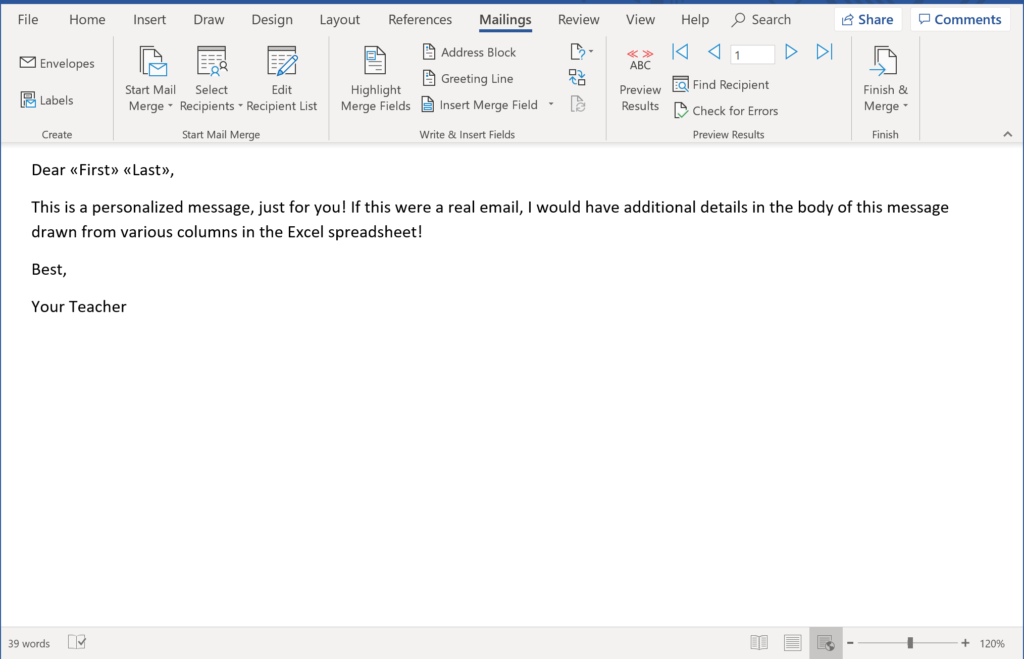
In the example above, I’ve personalized the message using the student’s first and last name. If I wanted, I could have added additional personalizations from the spreadsheet, like ID number or period.
Optional: Check Your Work
If you want to make sure you’ve set up your placeholders correctly, click the button labeled “Preview Results.”
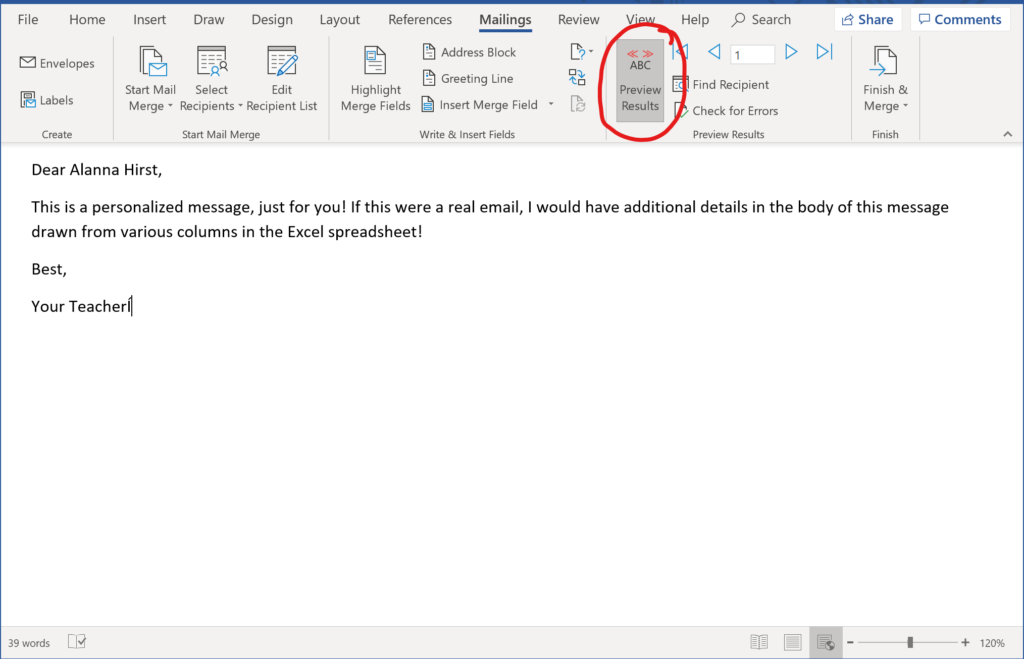
Now, the placeholders will turn into actual content from the spreadsheet. You can use the back and forward arrows near the “Preview Results” button to step through the rows of the spreadsheet and see what they will look like in your emails.
Step 4: Send the Emails
And now, the moment we’ve all been waiting for!
To send your emails, click on “Finish and Merge” and then on “Send Email Messages…”
This will pop up a dialog box where you can enter your subject line. More importantly, this dialog allows you to choose the column that contains the recipients’ email addresses. If it’s labeled something like “Email,” Word may select it on its own, but it’s a good idea to double-check.
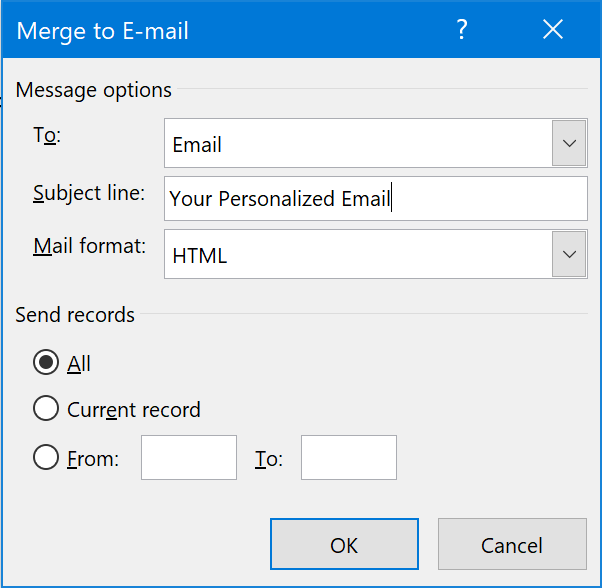
Once you click OK, Word will cycle through each row of the spreadsheet and use Outlook to generate and send the message. (The sent emails will show up in Outlook’s Sent mailbox just like a normal email.)
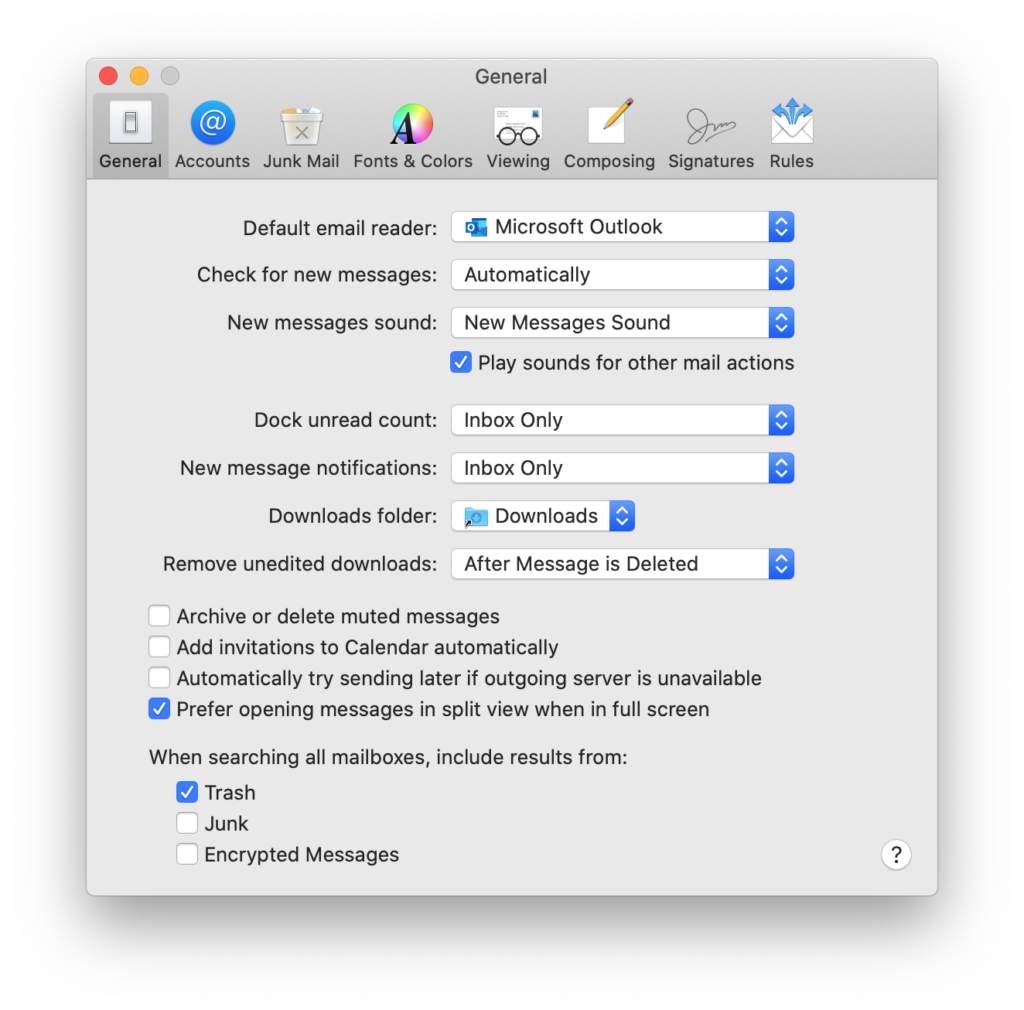
If the option to send an email is grayed out, you may need to make sure that it is set up as your default email client. This is necessary to do on a Mac. I’m not 100% certain it is a necessary step on Windows. On a Mac, you (ironically) need to open up the built-in Mail app and go to its preferences screen in order to set the default.
Depending on how many recipients were in your spreadsheet, it may take a few minutes for your computer to send all of your emails. Sit back, relax, and enjoy automation at its finest!
Now you know how to do a mail merge. I should also point out that this technique isn’t limited to emails. If you go back to the image in Step 2, you’ll notice that you can also use a mail merge for things like address labels, envelopes, and other documents!
Bonus: Where’s Waldo?
Before we go, here’s a game for you! Can you spot the inconsistency in Microsoft’s mail merge interface? Hint: it involves the ever-evolving style for writing the word “email.” (Or is it e-mail?)