This post is Part 2 of a multi-part series:
- How to Digitize Your Old Home Movies on a Mac: Equipment and Considerations
- How to Digitize Your Old Home Movies on a Mac: Doing the Video Conversion
- How to Digitize Your Old Home Movies on a Mac: Cleaning Up the Captured Footage
So my last post had a lot of narrative and setup. This time around, I want to get right down to business. As I suggested previously, there are a lot of ways to accomplish a project like this. The remainder of this tutorial will walk you through the specifics of how I did it. Consequently, the tutorial assumes you are using the same equipment and software that I used.
So let’s see, we left off at…
Step 5: Prepare the Capture Software
At this point, your video camera should be connected to your stabilizer (in my case, a VCR/DVD-recorder combo unit), and your stabilizer should be connected to the capture device (the HD PVR 2 Gaming Edition Plus). The capture box, meanwhile, is connected to the computer via USB.
Assuming this is all connected correctly (outputs to inputs, outputs to inputs, outputs to inputs), the next step is to fire up the capture software.
My edition of the HD PVR 2 GE+ did not come with any software in the box. Instead, there was an insert telling you where to go to download it. To use the device on a Mac, you need to install a piece of software creatively called HDPVRCapture. As best I can tell, this program was created by a third party specifically to allow the originally PC-only HD PVR line to work on Macs. Consequently, the only difference between the “Plus” model and the others seems to be that this one comes with a pre-paid license to use the app, which otherwise costs about $30.
So anyway, you’ll install the app from the supplied URL and then open it up. The light on the capture box (which has probably been flashing) should appear solid blue and the software should recognize your unit. If it complains, you’ll want to check all your USB connections.
To be perfectly honest, the software’s developer has a whole bunch of video tutorials that walk you through a lot of the product’s more esoteric features, so you’re certainly welcome to check those out. What I’ll show you here are the settings I used for each tab.
Inputs

Your first tab will look a little different from this screen shot. If all is set up correctly, an actual serial number should appear int he top left corner, and the two big graphics will indicate that an actual video and audio signal has been detected. If, on the other hand, your screen looks like mine does here, then you’ll need to check your connections, make sure all of your devices are turned on and set to the correct input channels, etc. (How to operate your camera, VCR, or other A/V equipment is beyond the scope of this tutorial.)
The main thing you want to do on this screen is use the video input and audio input drop-downs to make sure the right format is selected. Most likely, you’re looking for component video (that’s the one with three wires: red, green, blue) unless you used an older composite hookup (just a single yellow wire). As for audio, you’re probably going for plain old stereo audio—basically, whatever it defaults to. (It’s highly unlikely that your ancient video camera features “SPDIF Digital Audio.”
Video Encoder
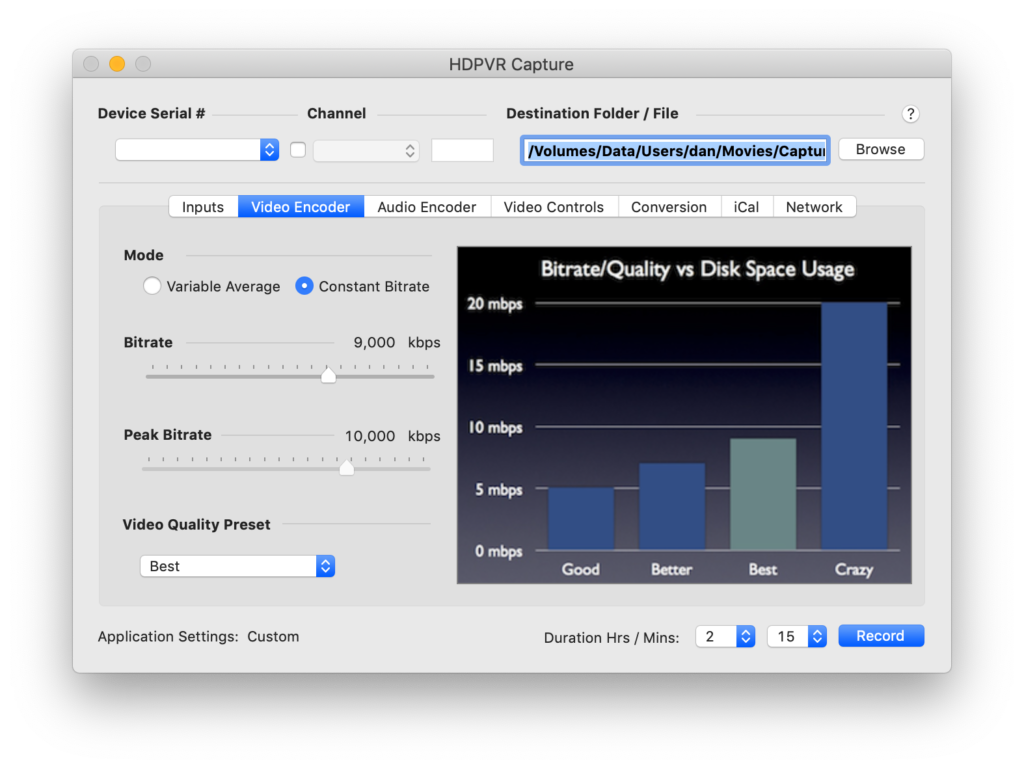
On this tab, you are essentially deciding between space and quality. The HD PVR captures video using an encoding format known as H.264. All you really need to know about that is that it is a compressed format, meaning that the encoder uses an algorithm to do a “good enough” capture (for the sake of saving storage space) rather than something resembling a perfect 1:1 map of the images on your cassette tape.
The higher the bitrate, the closer the final product will appear to a 1:1 map. The lower the bit rate, the lower the quality. At very low bitrates, you’re likely to see compression artifacts (blockiness) and other undesirable effects.
I chose the software’s “Best” preset, which is equivalent to a “Constant Bitrate” of 9,000 kbps, with a peak bitrate of 10,000 kbps. (Why two different numbers? Well, that constant bitrate is actually more like an average bitrate. Depending on what the box is taking in, the true bitrate will fluctuate. “Constant Bitrate” tries to keep it close to the specified average—but generally not higher than the peak—whereas “Variable Bitrate” allows for significant drops in bitrate if the signal at any given moment doesn’t require the specified number.)
Just remember that very high bitrate video consumes tons of hard drive space. If you don’t have dozens of gigabytes at a time to spare, keep it reasonable. I have a multi-terabyte external storage drive attached to my Mac, so “Best” was fine for me. Your needs may vary.
Audio Encoder
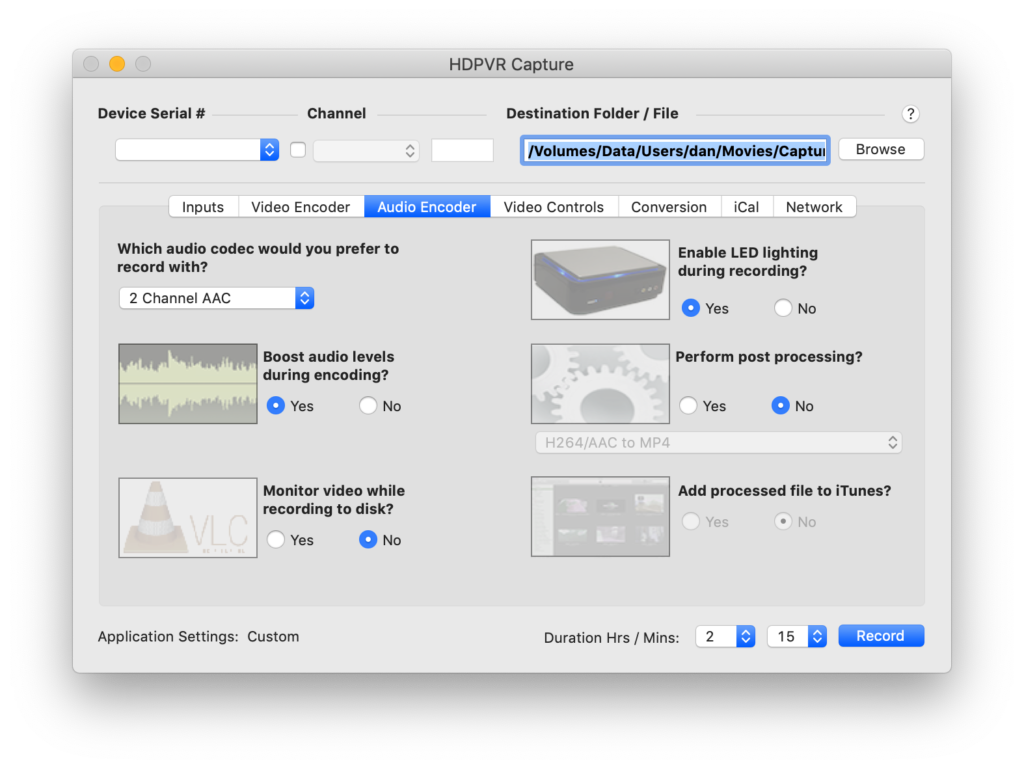
There’s not a whole lot to explain here. Go with the settings that you see. The one important thing is that you turn off post processing.
Okay, I’ll explain one thing. The post processing option (if you were to leave it turned on) doesn’t actually do a whole lot of post processing. What it mostly does is change the “container” format of the captured video. Because the video from your cassette tape is being captured bit by bit, frame by frame, the data is initially saved in a format that’s really good for arbitrary streaming data. It’s basically designed so that you can literally chop off the beginning or end of the file and still be able to play back what’s left. The post-processing option takes this file and turns it into a more self-contained MP4 file, which is almost the de facto standard for casual video consumption. (There are lots of other container formats out there that have their various pros and cons. The thing about MP4 is that just about everything, from old iPods to modern smartphones, knows what to do with it.)
So why not let it do the post processing? Well, as I will explain in Part 3, I discovered that there are some serious flaws with the initial capture that the box seems to produce. Since all that post processing does is change the container (rather than the actual encoded video), this doesn’t fix any of the flaws. Instead, we’ll ultimately have to do some post-processing of our own that re-encodes the video. But more on that in Part 3, as I said…
Video Controls
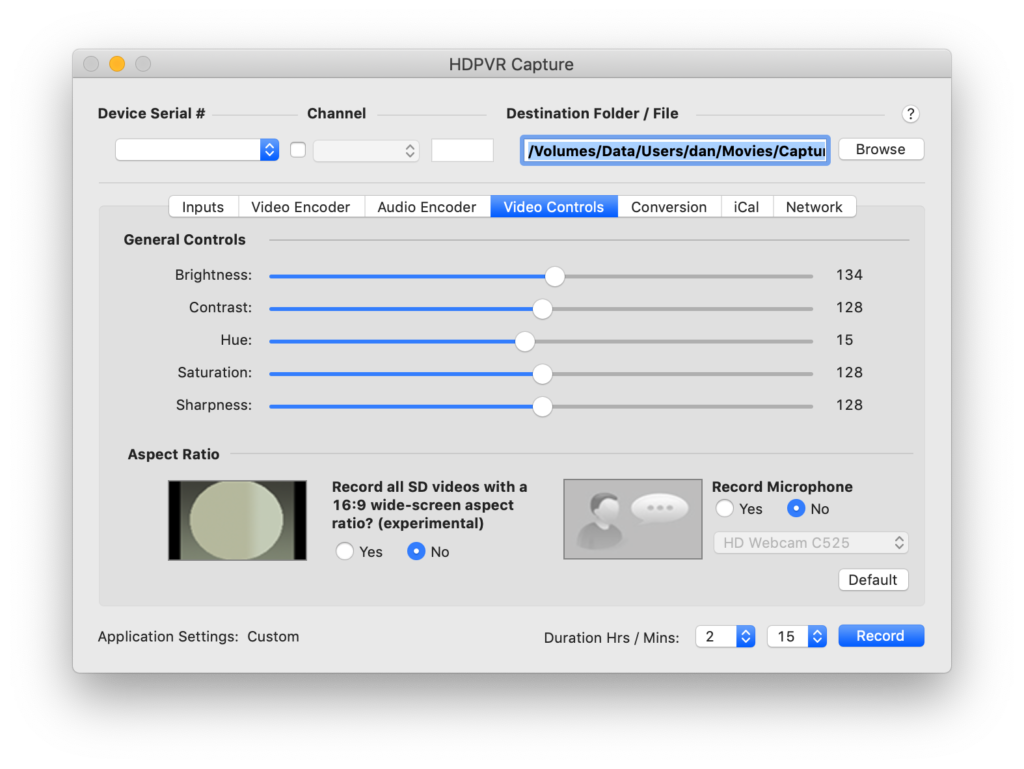
Feel free to play with all the sliders if you’re not in love with the brightness, contrast, etc. of your initial capture attempt. I just left everything at their defaults because in all honesty, this kind of fine tuning can drive me a little crazy. Also, I thought the default appearance looked fine. But your taste and/or original film quality may vary. So those controls are there if you need them.
The one thing that I did deliberately adjust on this page is that I set the 16:9 aspect ratio to “No.” My home videos use the 4:3 aspect ratio (think old-school televisions), so I didn’t really understand why I’d want to force them into 16:9 (widescreen, like the movies). There’s probably something here that I’m missing—but it worked out fine in the end, so I’m not going to trouble myself too much over it.
Anything Else?
You don’t really need to mess with the rest of the tabs. The very last one (“Network”) is cool if you want to try monitoring the capture in progress using external software capable of handling network-based video streams. If that sentence didn’t make all that much sense, then don’t worry about it. On the other hand, if you know what VLC is and you know how to use it, then check out that tab!
(VLC, by the way, is one of the most robust and powerful cross-platform video players in existence. It’s a great tool to have in your arsenal, but it’s way out of scope to get into right now. I might touch on it in Part 3.)
The last thing to do is to use the “Browse” button up top to choose a location for your captured file and to set the duration using the drop downs at the bottom. This will allow you to start the capture and then walk away without worrying that your entire hard drive will be consumed by five hours of end-of-tape static.
Step 6: Let the Capturing Begin!
Once all the settings are taken care of, hit the record button!
You’ll see a progress indicator with various statistics drop down from the top of the window. Once it looks like something is happening (i.e. those statistics start updating), go ahead and press “Play” on your playback device. (Doing it in this order helps make sure you don’t miss anything at the very beginning of the tape.)
Sadly, the app doesn’t have a live monitor of what’s going on. However, if you have VLC installed, you can use the “Preview” button to see what’s been captured so far. My suggestion is to just record a few minutes and hit the stop button. Then, find the captured file and play it back. (If you don’t have VLC, it should open just fine in QuickTime, which is the built-in video player on MacOS.) If you like what you see, rewind the tape, check your settings one last time, and then capture for real!
Looking Ahead
Hopefully, after a couple hours or so (depending on the length of your source material), you will have a mostly functional (albeit buggy) analog-to-digital conversion.
In the final part of this series, I’ll show you how I took that buggy conversion and turned it into one that worked without any trouble. It involves playing with some command line tools and other interesting software, so I’ll give you some time to take a breath and get ready for it!