This post is Part 2 of a multi-part series:
- How to Install Windows and Linux on a Mac: Materials
- How to Install Windows and Linux on a Mac: Installing Windows 10 Externally
- How to Install Windows and Linux on a Mac: Adding Linux to the Mix
There are really three ways to use windows on a modern Mac such as the Mac mini 2018. In some ways, the easiest is to use a virtualization program like VMware Fusion or Parallels Desktop, both of which allow you to run Windows (and other operating systems) inside macOS. Both applications have evolved quite a bit over the past decade and are certainly viable options if you want to be able to run Windows and Mac apps side by side.
The next easiest option is to use Apple’s built-in Boot Camp Assistant.

Boot Camp Assistant will walk you through the entire process, including creating a Windows-formatted partition on your internal hard drive, downloading drivers, and starting the installation. While this will allow you to run Windows 100% natively, you’ll lose a good chunk of hard drive space. This just wasn’t a viable option for me on my 256 GB model.
The third option is to install Windows on an external drive (e.g. a reasonably fast SSD hooked up via USB). This definitely can be done, but neither Apple nor Microsoft technically supports it. The benefit of this approach is that you won’t lose any internal drive space; the downside is that you’ll need to implement a number of workarounds to get past the roadblocks that will crop up along the way.
This tutorial, of course, covers the complicated option. The procedure is based on the routine described by Tom Nelson of Other World Computing. Nelson’s process, however, is slightly outdated. Thankfully, Sven Kirsimäe has created an article detailing many of the changes necessary to get the process to work on the newest hardware and software.
My tutorial attempts to synthesize a definitive installation routine from these two articles while also accounting for some of the issues and challenges that I faced when trying to do it myself. I’ve further expanded on Nelson and Kirsimäe’s tutorials by adding a section on installing a third-party boot loader as well as some tips for dealing with post-installation complications. Finally, while those two tutorials were intended for fairly knowledgeable users, I’ve attempted to provide additional context and explanation along the way to provide a bit more guidance and education for novice users.
While I hope this article will help folks who are new to the world of dual- or triple-booting, I hope it might also be useful for experienced users who may have run into troubles accomplishing this themselves.
Finally, before going any further, please remember that if you choose to follow my instructions, you do so at your own risk. Although this procedure is intended to preserve your existing files, if something goes wrong, it could result in irrecoverable data loss. By choosing to proceed, you understand that I am not responsible for any damages or other liabilities that may occur.
Step 1: Disable Annoying Security Features
First things first: This step only applies to Macs with a T2 security chip. According to Apple, this includes the following machines:
- iMac Pro
- Mac Pro (2019)
- Mac mini (2018)
- MacBook Air (2018 or later)
- MacBook Pro (2018 or later)
It may not be necessary to make all the changes detailed in this step, but doing so will make it a lot easier to run any operating system of your choosing at any time. It should be noted, of course, that you are disabling security features, so you are technically making your Mac less secure. As always, YOU DO SO AT YOUR OWN RISK!
What we’re going to do is tell your computer that it is allowed to boot using code that hasn’t been signed (i.e. vetted) by Apple. This shouldn’t be necessary for Windows—Apple has made an exception for it—but it will be necessary if you choose to follow Part 3 of my tutorial, which walks you through installing Ubuntu Linux.
We’re also going to allow your computer to boot from external drives—since that is our goal, after all.
To make these changes, you will need to start up your Mac in recovery mode. Assuming it’s already turned on, you will need to restart it. As soon as the screen goes blank, hold down the Command and R keys. Continue holding down these keys until you see an Apple logo and a progress bar.
Once recovery mode is fully loaded, you should be asked to choose a language, and after that you’ll be greeted with he following screen:
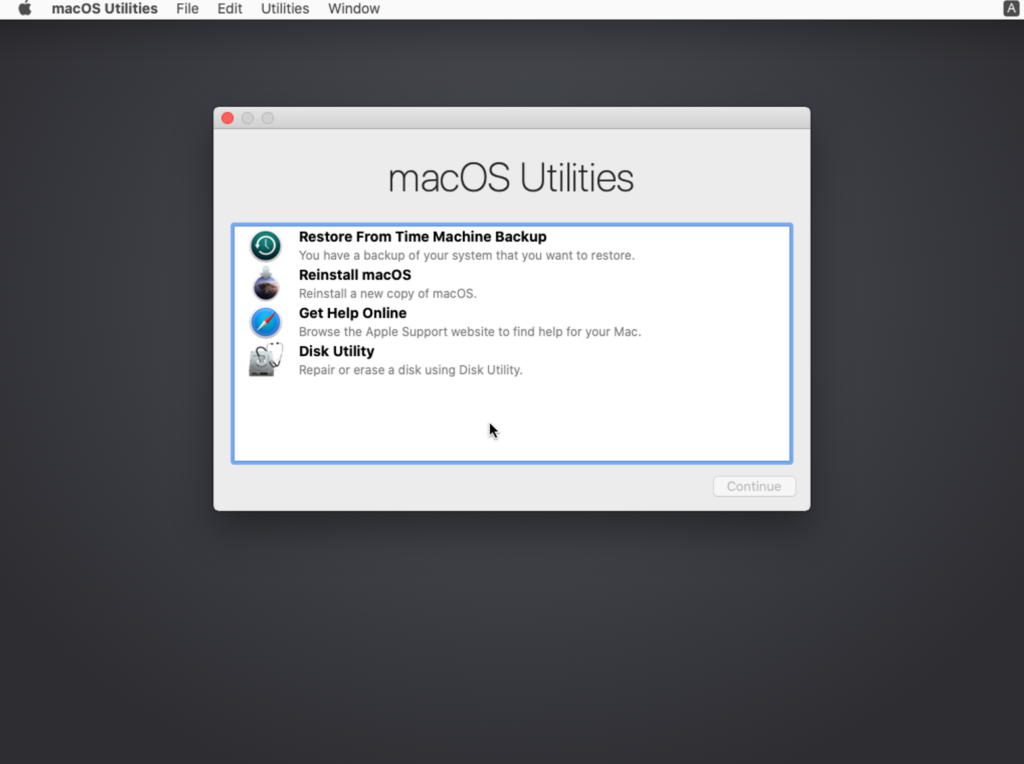
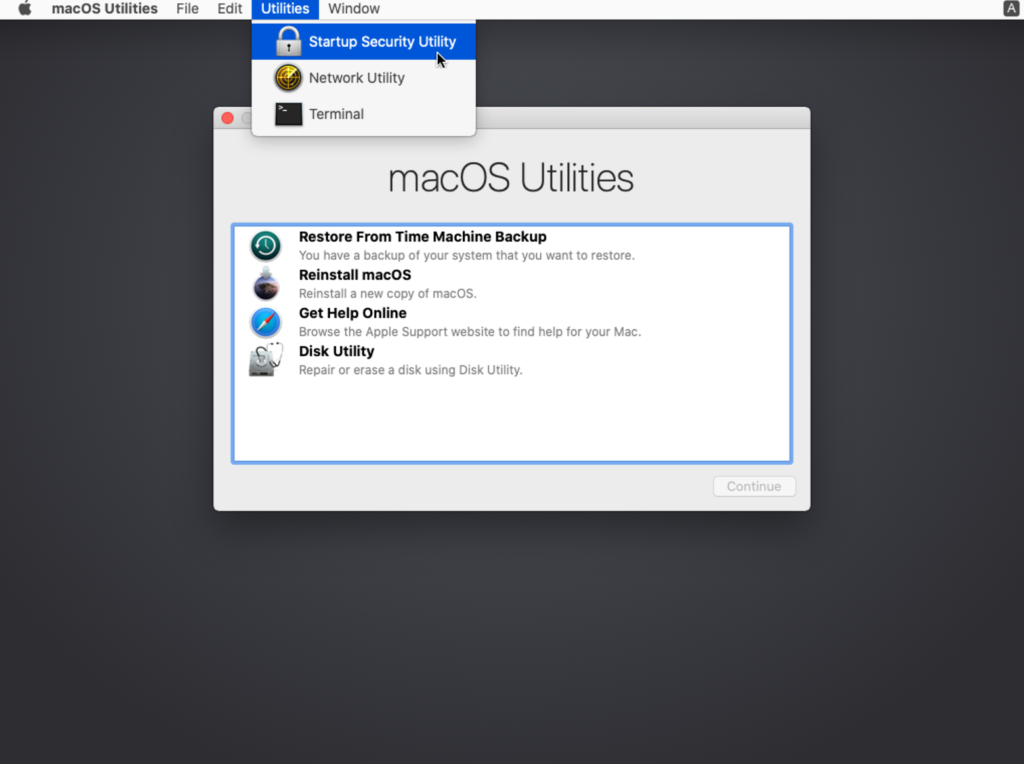
Ignore the options you see in the window and instead click on the Utilities menu at the top of your screen. Then, select Startup Security Utility.
In the window that pops up, under Secure Boot, choose “No Security.” (SEE MY WARNING ABOVE.)
Under External Boot, choose “Allow booting from external media.”
Once you’ve made the changes, you can close the window. Then, restart by clicking on the Apple logo and selecting Restart. This should allow you to boot back into your normal macOS setup.
Step 2: Download All the Things
Before you do anything else, make sure you’re logged into the computer using an administrator account.
Now, if you haven’t done so already, you need to obtain a Windows 10 disc image from Microsoft. Most new Macs don’t have CD/DVD drives, so a disc image is really the only option. The nice thing is that you won’t have to copy this image to a flash drive or anything like that in order to use it. We’ll be able to access it directly. Visit Microsoft’s Windows 10 download page to get your copy.
Next, pop a USB flash drive into an available port.
(Note: This flash drive needs to be formatted with the FAT32 filesystem. Most likely, it already is; most flash drives come that way. If you’re not sure, plug it into a PC that already runs Windows and see if it works. If your flash drive is not already Windows-compatible, you can follow this tutorial to format it. Warning: You will lose all data on your flash drive if you do this!)
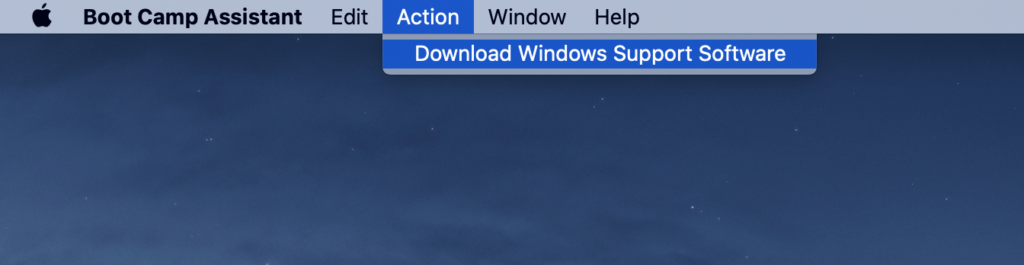
Then, open up Apple’s Boot Camp Assistant. The program lives in your Utilities folder (which, in turn, lives in your Applications folder). Or, you can just search for it in Spotlight or Launchpad.
You can ignore the Window that pops up with an introduction and a few buttons. Instead, go to the Action menu at the top of the screen and select “Download Windows Support Software.”
In the new window that pops up, go ahead and search for your flash drive. Then click “Save.”
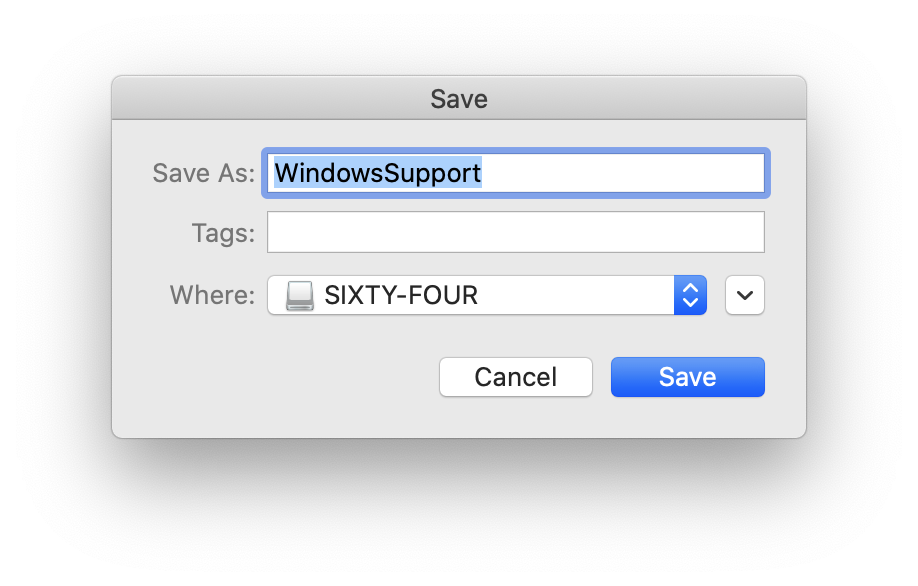
The Boot Camp Assistant will now download the various drivers needed by your Mac’s hardware to the flash drive. You will install these drivers later, after Windows is up and running.
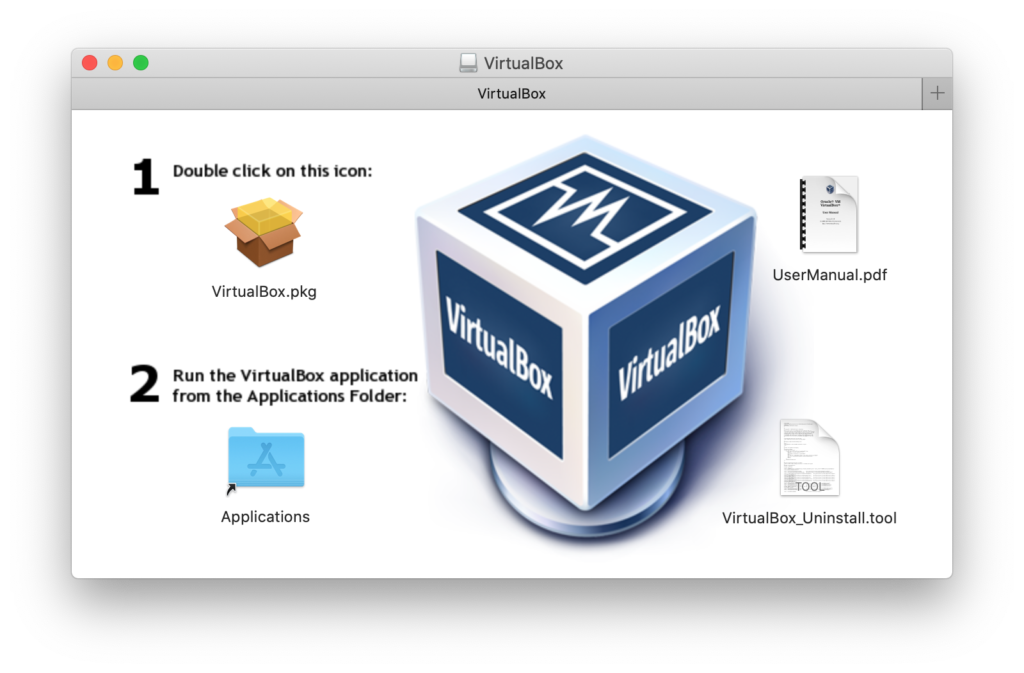
Finally, if you haven’t done so already, you’ll want to download—and install—a copy of Virtual Box. When you go to the website, choose the link for “OS X hosts.” When it’s finished downloading, open the disk image you just received and launch the installation program (“VirtualBox.pkg”).
Step 3: Connect, Erase, and “Virtualize” Your External Drive
Now for one of the wonkier (and more dangerous) parts of the tutorial. You’ll want to be very careful here because a mistake could result in IRRECOVERABLE DATA LOSS!
Getting the Right Format
You’ll need to open the Disk Utility app, which (unsurprisingly) lives in your Utilities folder. (You can also look for it in Spotlight or Launchpad.)
Your Disk Utility will almost certainly not look like mine. That is to say, you will probably not have nearly as many disks showing up in the sidebar. Let’s not dwell on that…
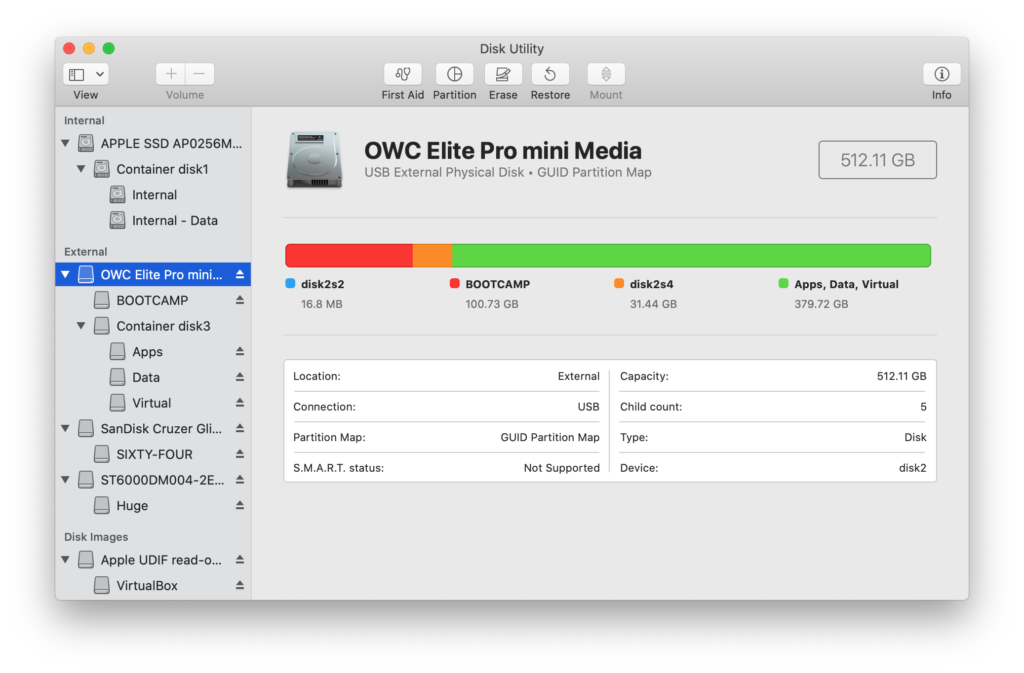
What you should do, however, after you’ve opened up Disk Utility is go to the View menu at the top of the screen and make sure that “Show All Devices” is checked. What you should see now is each physical storage device installed in your system, identified by a label resembling the manufacturer’s name for the device. Underneath each device, you will see the “Volumes” (also known as “partitions”) stored on that device. These volumes are the space where you store your data, and each operating system on your computer needs its own volume/partition.
Assuming your external drive is already plugged into the computer, the next step is to carefully select it from the list on the left. Remember to choose the device itself and not a volume. (It should be adjacent to the left edge of the window, will probably have a triangle next to it, and will hopefully have a helpful label.) In my case, I want the device labeled “OWC Elite Pro mini” (see the image above) since that is the name of the external enclosure that I bought.
If you’re not sure whether you’ve chosen the correct device, try unplugging it from the USB port. It should disappear from the device list. Then, plug it back in, and it should show up again. (Don’t forget to reselect it after doing this.)
Once you’re certain (and I mean CERTAIN) you’ve selected the correct device, click on the Erase button in the toolbar at the top of the window. Remember, you are about to ERASE everything on the chosen drive. Please make sure you’ve selected the right one!
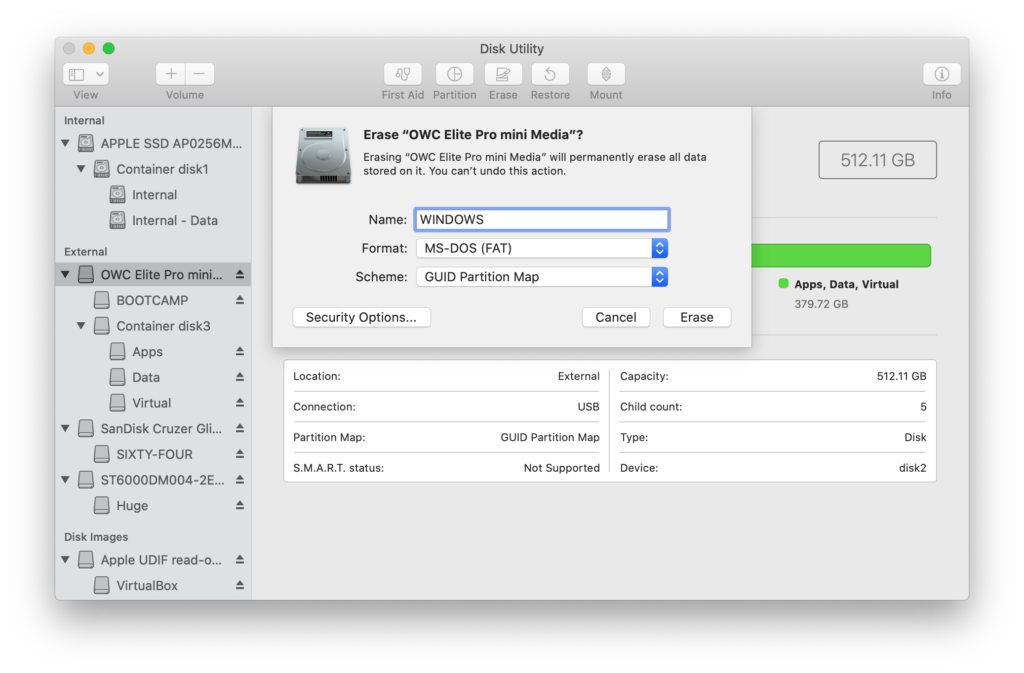
In the dialog box that pops up, give your drive whatever name you want (perhaps something like “WINDOWS”), set the format to “MS-DOS (FAT)”, and choose “GUID Partition Map” as the scheme.
In a few moments, whatever was originally stored on that drive will be obliterated and it will subsequently be ready to have Windows installed on it.
Assuming this procedure has completed itself successfully, you will now need to click the eject icon next to the name of the device you just erased. This unmounts (or disconnects) the drive from the system. You’ll know it worked if the volume name becomes greyed out.
Now, there’s one last thing you need to do in Disk Utility. Right-click your external device and choose “Get Info.” You will be presented with a table of information. The piece that you’re looking for is “BSD device node.” (I’ve highlighted it in red on the image below.)
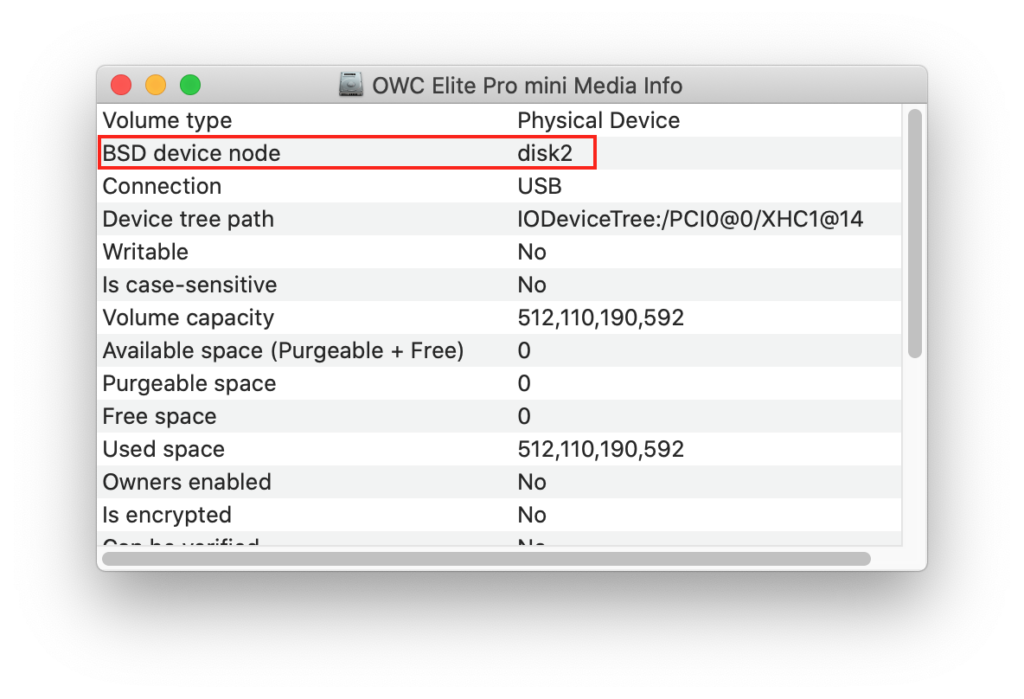
Next to “BSD device node” you’ll see a disk number (e.g. “disk2” or “disk3”). Double-check that you’re looking at the info for the correct device, and then write down that number somewhere.
You can close the info window now, but go ahead and leave Disk Utility open. Then, open the Terminal app (either via the Utilities folder or Spotlight/Launchpad) and get ready for some command line fun!
Creating a Virtual Device
Remember how we installed Virtual Box early on in this tutorial? Virtual Box is a free, open source virtualization platform, much like the popular commercial products, Parallels and Fusion, that I mentioned at the beginning of this post. It basically emulates a computer and allows you to run whatever operating system you want on that virtual computer.
We’re ultimately going to trick Windows into installing onto your external drive by making it think it’s being installed to the hypothetical internal drive of that virtual machine. In order to do this, we need to tell the virtual machine how to access our actual external drive. This can’t really be done from within Virtual Box’s normal user interface. But the application does come with some hidden Terminal commands that make this possible.
So, if you’ve been following along, at this point, you should have the Terminal app open.
You will need to enter the following code at the terminal prompt. However, DO NOT enter it exactly as written. Instead, replace the disk number at the very end of the code with the number you copied from the “Get Info” screen in the previous step. (Otherwise, you risk connecting to the wrong disk and destroying your precious files!)
sudo VBoxManage internalcommands createrawvmdk -filename bootcamp.vmdk -rawdisk /dev/disk2You will probably be asked to enter your administrator password after you hit the “Enter” key. Go ahead and do that, and then press the “Enter” key again. The software will now create a virtual disk that points to your actual external disk.
When I did this, the external drive reconnected itself after the process was complete. This will cause problems, so go back to Disk Utility and check. If the volume name underneath your external drive is no longer grayed out, click the eject icon to disconnect it.
Step 4: Creating the Virtual Machine
Now, go back to Terminal, and enter the following:
sudo /Applications/VirtualBox.app/Contents/MacOS/VirtualBox(You may need to enter your password again.)
This command launches Virtual Box as an administrator, which will allow you to get around any road blocks that would normally protect you from doing weird things to your drives. (Remember, we’re doing this tutorial because we want to do a weird thing to our drive!)
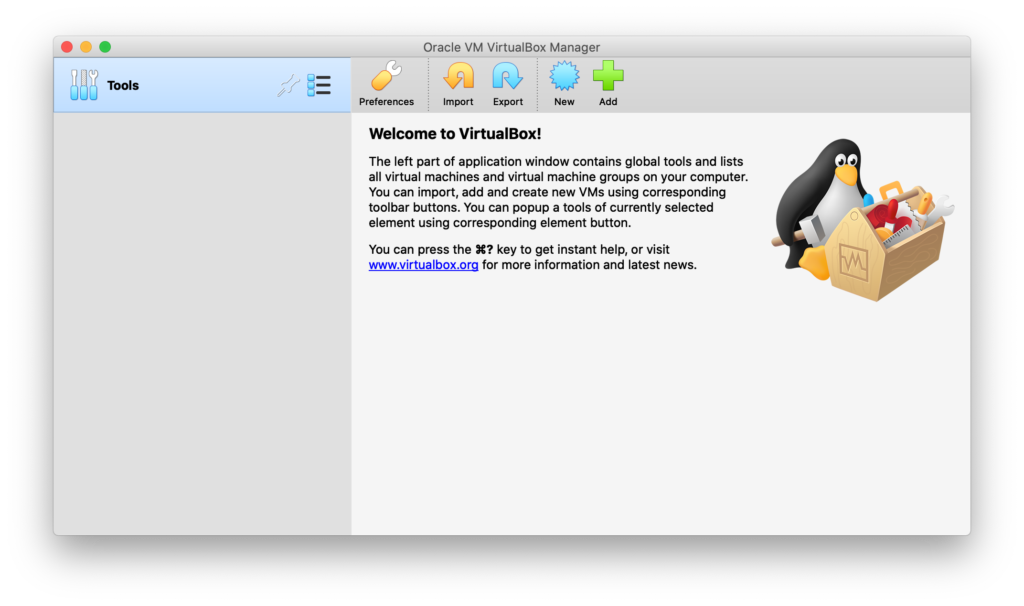
Click on the New button in the toolbar.
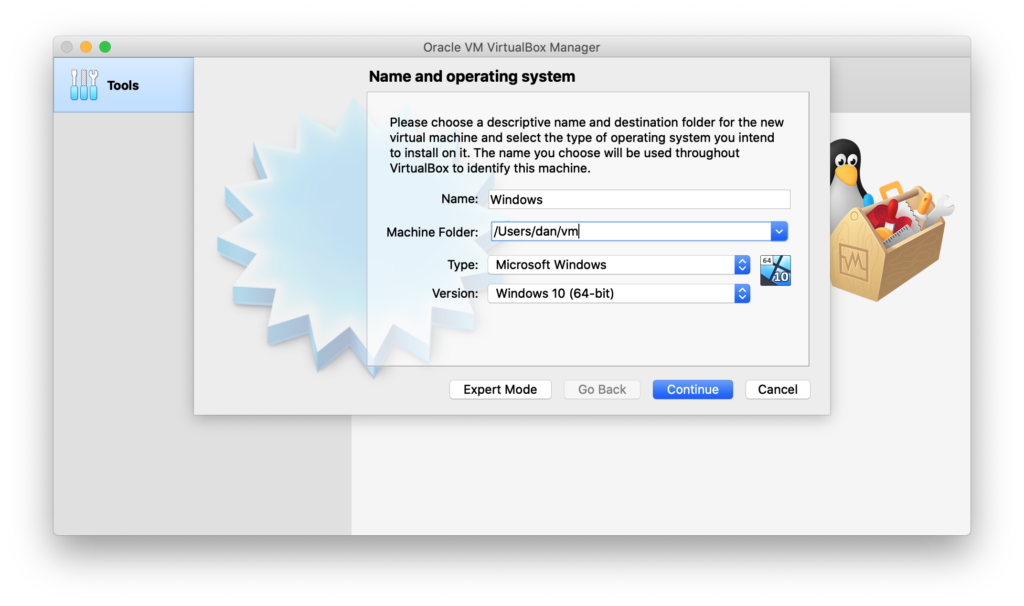
A sheet will slide down requesting some information. You can provide whatever name you want (e.g. “Windows”). The location also doesn’t matter, but I suggest choosing a location in your home directory. (It will default to the root user’s home directory, which is very hard to find.)
The type should be set to “Microsoft Windows,” and the version should be set to “Windows 10 (64-bit).”
After you click “Continue,” you’ll be asked to choose a memory size. The default is very small, but it should be fine. You don’t need much memory at all to run the Windows installer. So go ahead and click “Continue” again.
You’ll now be asked to choose a hard disk.
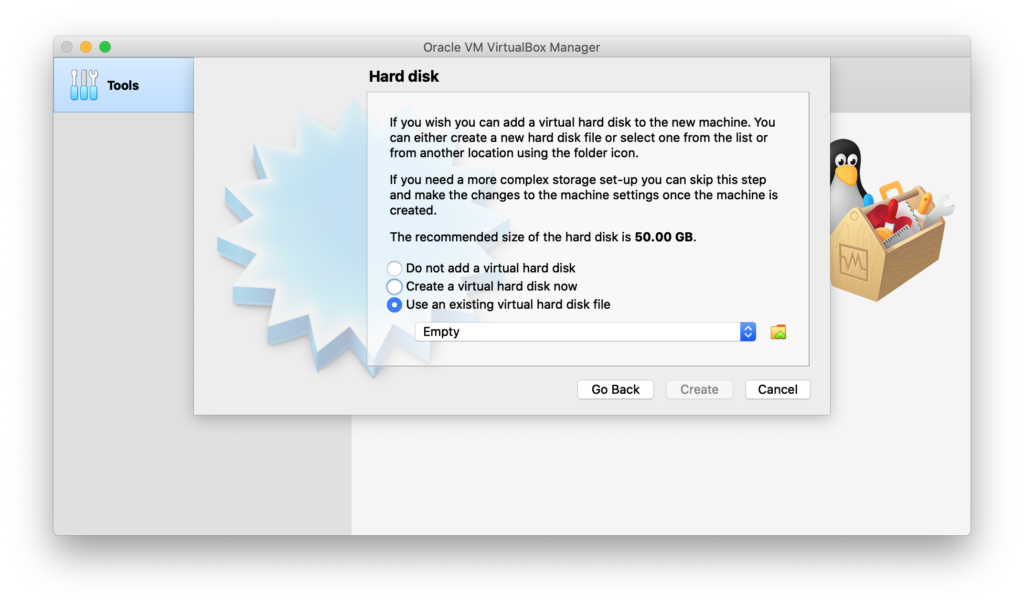
For this, you’ll want the third option: “Use an existing virtual hard disk file.” In this case, the existing file is the one you created using the Terminal earlier.
Make sure that third option is selected, and then click the folder icon right next do the drop-down menu.
You should now be presented with yet another sheet. This one has an Add button in its toolbar.
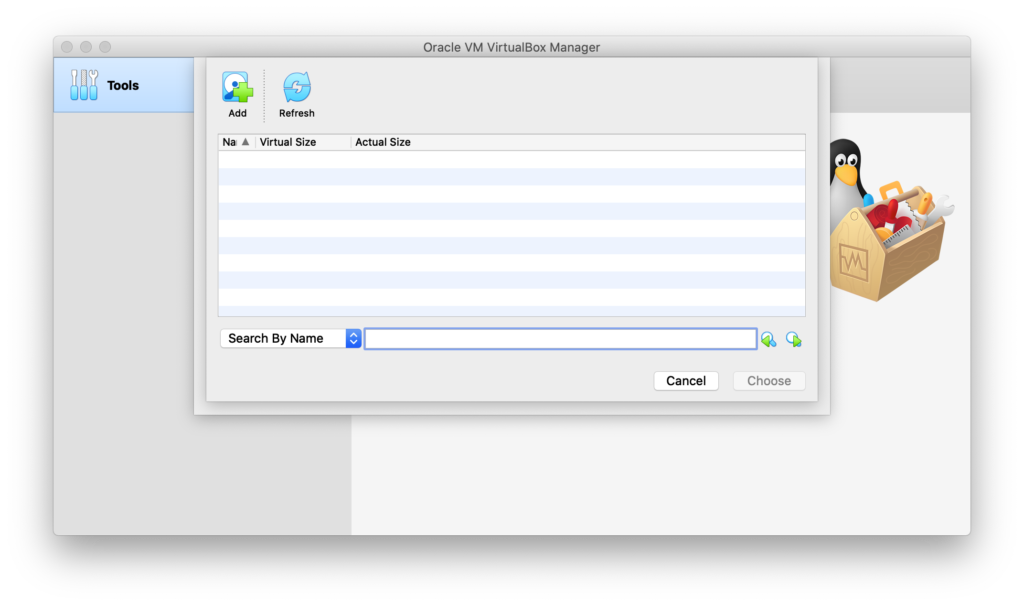
Click the Add button and browse for the “bootcamp.vmdk” file that you created at the end of Step 3. Unless you intentionally changed the location, it will probably be in your home folder. Once you find the file, click the “Open” button. Then, click on “Choose.”
If you encounter any error messages when selecting the file, it probably means that your external drive has reconnected. You can fix this by going to your Disk Utility and clicking the drive’s eject icon.
After you’ve chosen the drive, go back to Disk Utility one more time to make sure it’s still ejected. (I found that it reconnected itself nearly every step of the way.)
Step 5: Configuring the Virtual Machine
There’s just a couple more things you need to do to get the virtual machine up and running.
First, you need to connect the Windows installer image that you downloaded from Microsoft to the machine. You do this by clicking on “[Optical Drive] Empty.” (See the red box below.)
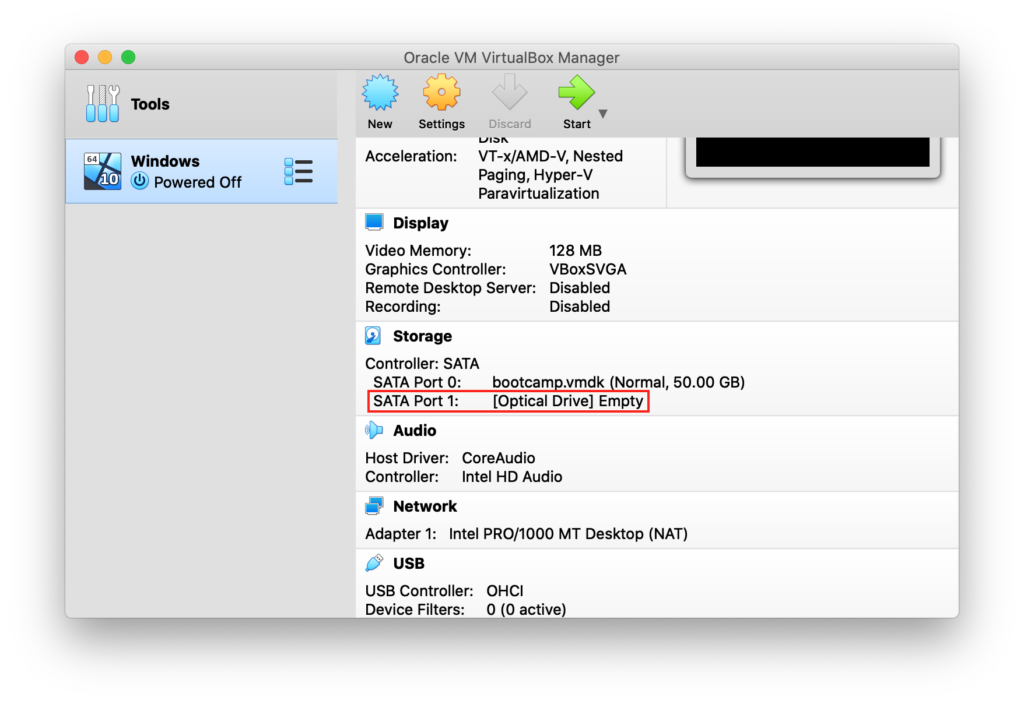
Then, you click on “Choose a disk file…” and browse to the file that you downloaded. (It will probably be in your “Downloads” folder.)
The second (and final) piece of configuration requires that you click the Settings button in the toolbar. Then, go to the System tab.
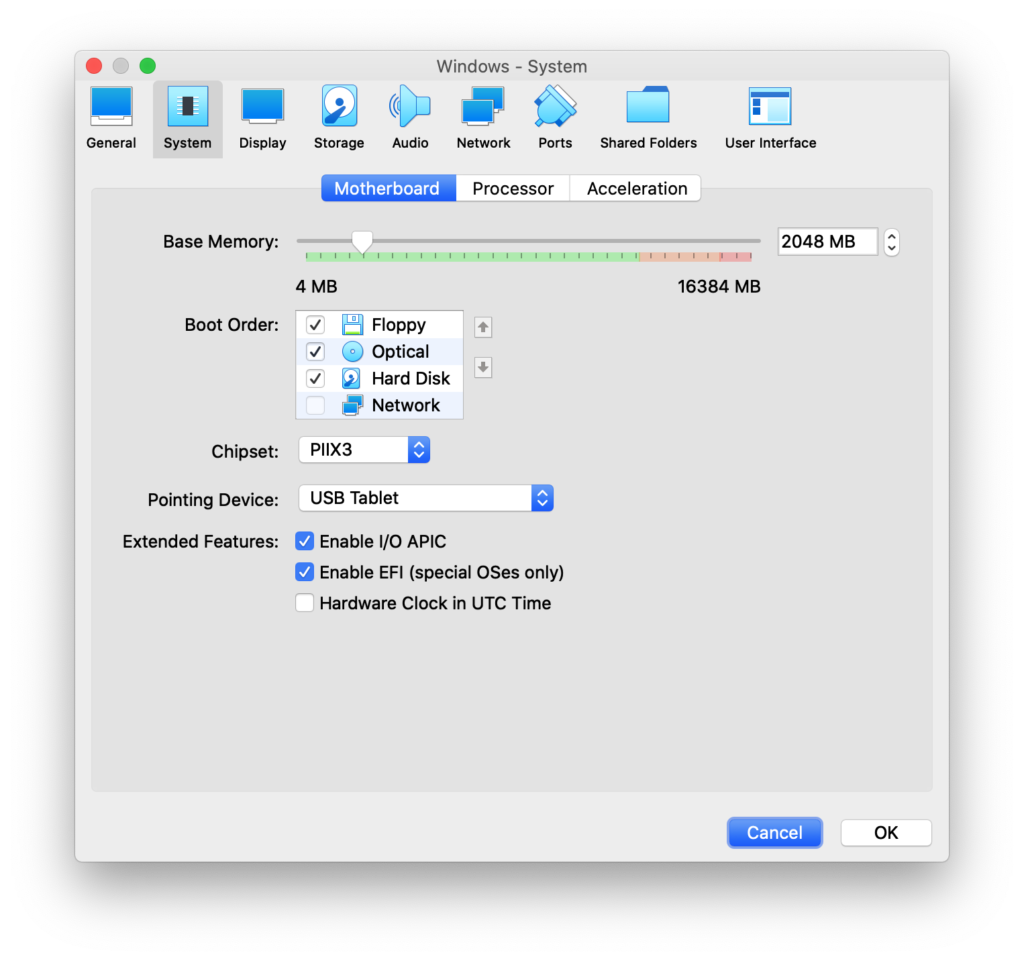
Make sure that “Enable EFI” is checked. Then, click “OK.” Your virtual machine should now be ready to use.
Step 6: Starting the Virtual Machine
Shockingly enough, you can start the virtual machine by clicking the Start button in the toolbar. Once you do, a window will pop up representing your virtual machine’s display.
You will hopefully see a message asking you to “Press any key to boot from CD or DVD.” Look carefully; it may show up underneath one or more informational overlays. (These overlays can be dismissed by clicking the blue “X” button.)
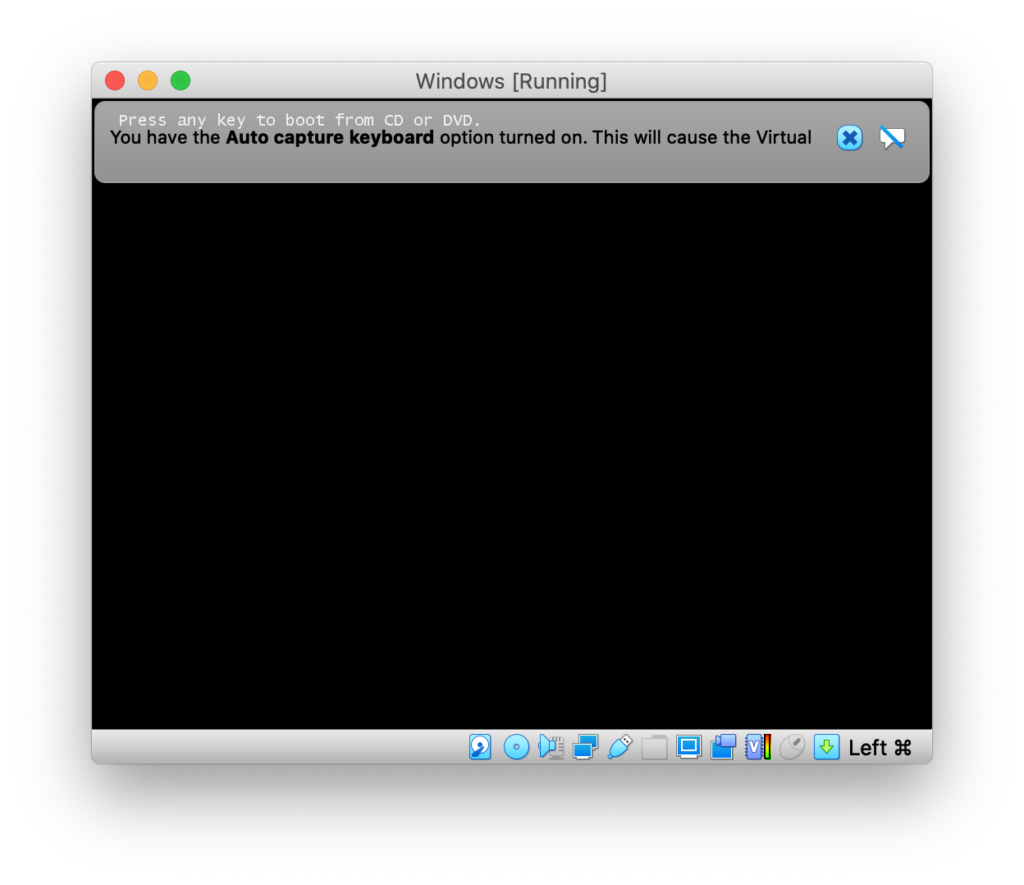
Once you see the message, you need to click the blank area of the display to “capture” your mouse and keyboard. Then, like it says, press any key.
If you don’t see that screen or wait too long, you might see the firmware shell instead, which looks like this:
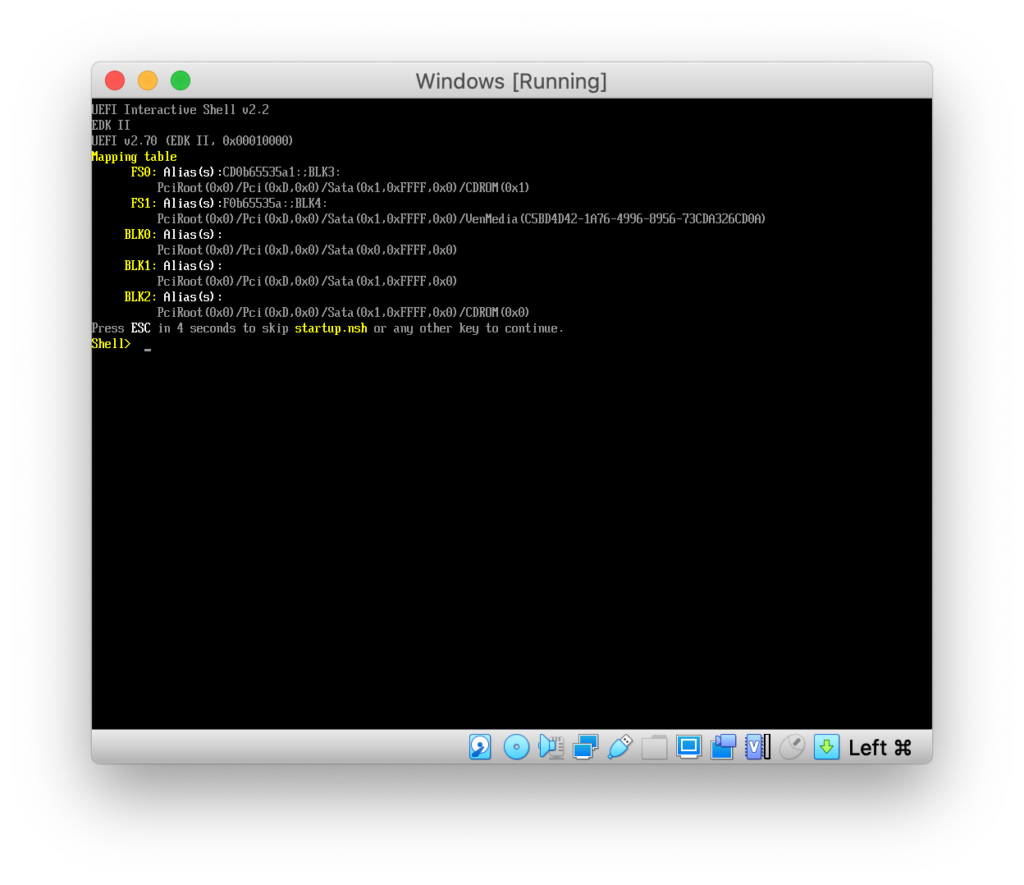
If that happens, type “exit” (without the quotation marks) and hit the “Enter” key. This should take you to the firmware settings interface.
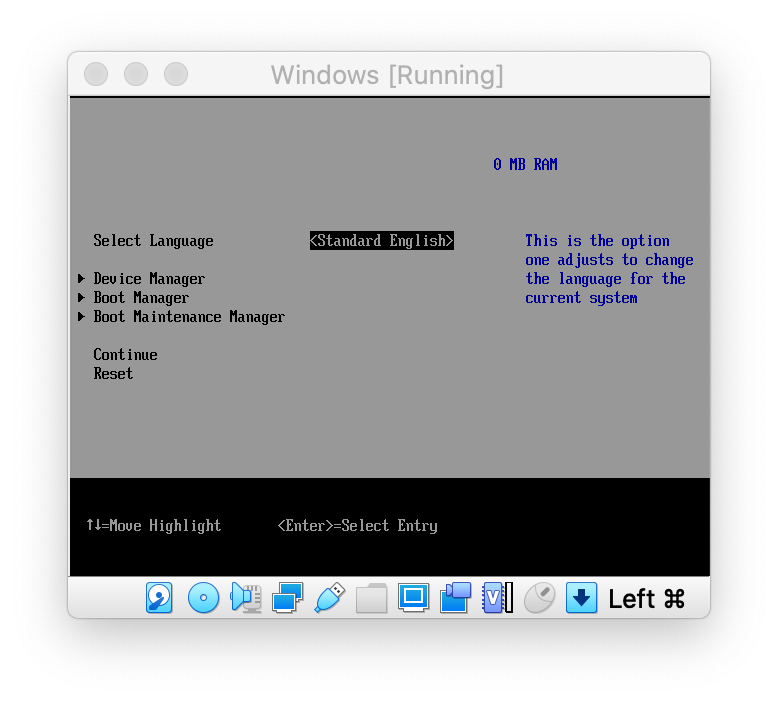
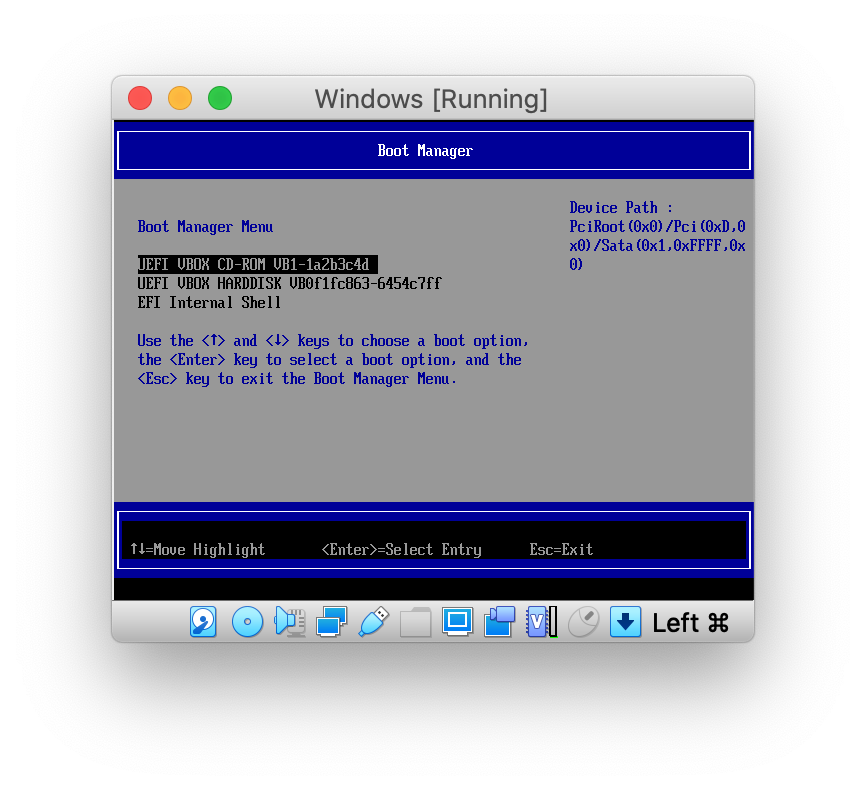
On this settings screen, you will need to select “Boot Manager” and then the CD-ROM device. (In the example below, this is the first option.) Note that this will all need to be done using your keyboard.
Once you do hit the “Enter” key, you should see the “Press any key to boot from CD or DVD.” As soon as you see that, press any key.
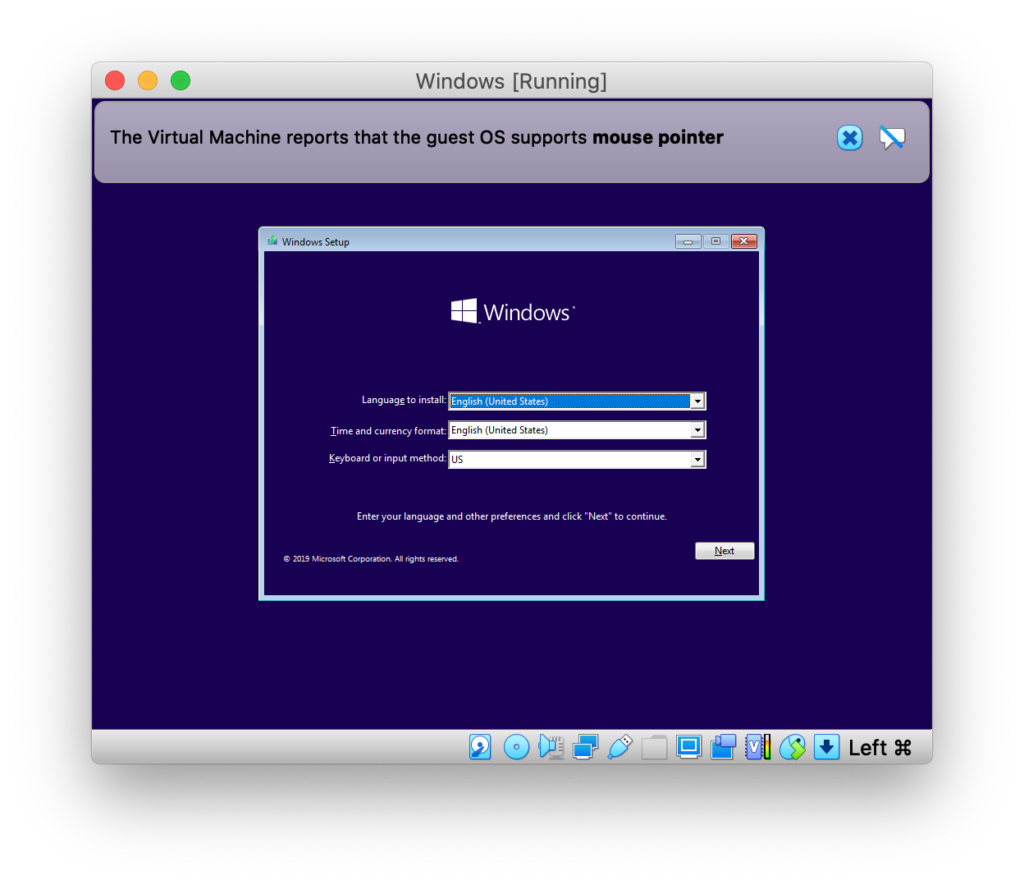
The Windows installer will boot up and, conveniently, you will be able to use the mouse again. (You may see a message to this effect, which you can dismiss using the blue “X” button.)
Step 7: Configuring the Installation
At this point, you’re mostly going to follow the prompts the way you normally would when installing Windows. There are just two things to be careful about:
- When given the option to choose between an “Upgrade” or a “Custom” installation, be sure to choose the custom option.
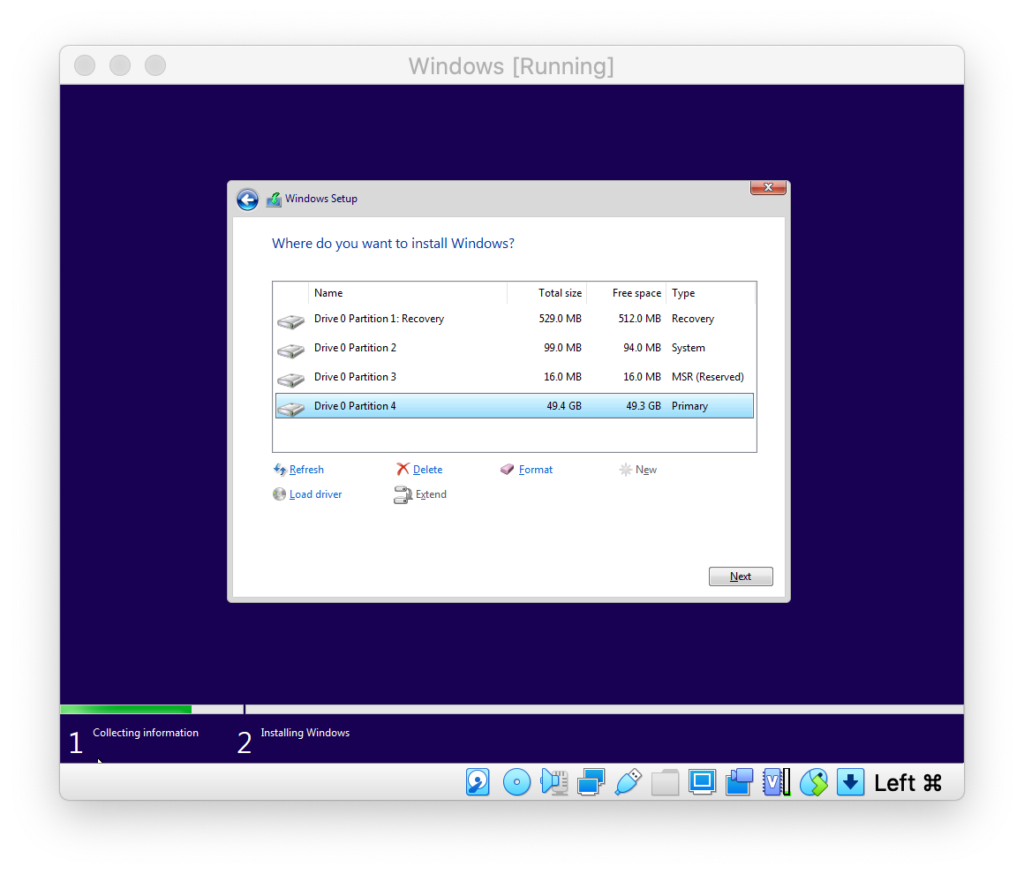
- When asked to choose a hard drive, you will need to select the volume you created back in Step 3. If you see multiple volumes, use the “Total Size” indicator to figure out which one is the right one. (It should be similar to the total size of your external drive.) Once you’ve found it, you’ll need to select the drive and click the “Format” option. If you see a warning message about data loss, just click the okay button (assuming you’re certain you’ve selected the right volume). The end result will look similar to the image below. But don’t be alarmed if you see a different number of hard drives!
After this, you should be able to click “Next” and let the installer do its thing.
You’ll need to monitor the installation carefully, however, because at some point, it’s going to try to restart the (virtual) computer. When this happens, you want to shut down the virtual machine by clicking the usual close button (i.e. the red button that appears in the top left corner of all macOS windows). In other words, don’t let it actually restart!
When you do this, VirtualBox will complain and ask you what you want to do. Choose the “Power off” option.
Step 8: Installing a Boot Loader
Many of the tutorials I’ve read suggest that all you have to do now is restart your machine and hold down the option key. Your Windows drive should then show up as a boot option. If so, you can select it and finish installing Windows.
In my experience, however, that doesn’t work. When I tried this, my computer did not detect the Windows drive on its own. To correct this, I needed to install a boot loader, which is a program that loads before your operating system and lets you choose which operating system you’d like to use. We’ll need the boot loader anyway if we also want to install Linux, so it’s a good idea to go ahead and do this now.
We’re going to use rEFInd, which is a powerful boot loader for Macintosh computers that gives you a ton of additional flexibility that your machine is not programmed to provide on its own.
Even though rEFInd appears to have been created around 2010 or so, its website is stuck in the ’90s. It’s also quite dense with technical documentation and instructions for all kinds of installation scenarios. It’s a great read if you want to learn more about how modern PC firmware works, but it’s not necessary for this project.
To keep things simple, here’s a direct link to download the program. That link will give you version 0.11.4 of the program. The newest release is version 0.12, but I ran into trouble when I tested it with this routine. I had much more success with version 0.11.4.
rEFInd comes with an install script that does the work for you, but for the purposes of this project, I actually think it’s easier to do it manually. The first step is to find the special (normally hidden) location where the program needs to be installed.
What we’re looking for is your external drive’s EFI System Partition. This is a place on your hard drive that is designed primarily for boot loaders. Whether you’re using a Mac or PC, the firmware that powers your computer’s motherboard knows how to find and launch boot loaders that are stored on the ESP. These boot loaders, in turn, find and launch your operating system (e.g. Windows, Linux, macOS, etc.).
So what we need to do is figure out the device name of the ESP for your external drive. If you have not yet rebooted your computer, this will be the “BSD Device Node” that you copied down from Disk Utility back in Step 3 (e.g. disk2) with the characters s1 appended to it. So, in my example, this would be disk2s1.
If you’ve rebooted your computer before getting to this step (or if you’re feeling paranoid), you will need to double-check that this is accurate. So go into Disk Utility and right-click your external device. Choose “Get Info,” and take a closer look at the table of information. As we discussed earlier, the thing you’re looking for is “BSD device node” (once again highlighted in red below).
The ESP should be this name with s1 appended to it. So in this example, it’s disk2s1.
Once you know the name of the ESP, you can make it visible by going into your Terminal and typing the following code. (Don’t forget to replace disk2s1 with the name that YOU just figured out.)
sudo diskutil mount /dev/disk2s1After hitting the “Enter” key, you should be asked for your password. Type it in and hit “Enter” again. If all went well, you should see a message in your Terminal that a volume has been mounted. (On my computer, this volume was called “NO NAME,” according to the message.)
You should now be able to browse to this new volume. By default, newly connected devices show up on the Mac’s desktop. If this is how yours works, go ahead and double-click it. If you’ve turned that feature off, find your device using whatever method you usually use to access flash drives or external hard drives. (On my computer, I use the sidebar in Finder.)

The ESP should contain a single folder named “EFI.” This folder will likely contain two folders of its own, “Boot” and “Microsoft.” At least one of these should have been created by the Windows 10 installer.
If you don’t see a “Boot” folder, create it yourself. If you do see one, go ahead and delete whatever’s inside it. (Or, if that scares you, copy the files to a safe location on your regular hard drive.)
Now, use a new Finder window to go to your downloads and unzip the rEFInd file that you downloaded earlier (if your computer didn’t do it for you automatically). Then, enter the rEFInd folder. (It’ll have a name like “refind-bin-0.11.4,” depending on the version.)
Next, find the file named “refund.conf-sample” and open it. The computer may ask you to choose which application to open it with. Any text editor (even TextEdit) will do. Once it’s open, find the line that looks like this:
#spoof_osx_version 10.9This line, like many in the file, is “commented out,” or disabled. To enable the setting, we just need to delete the pound sign at the beginning of the line and change the number to match the version of macOS running on the computer (e.g. 10.15 for Catalina). This line basically tricks your Mac’s firmware into thinking it’s running macOS when the computer is actually booted into some other operating system. The rEFInd documentation suggests that this may or may not be necessary and that each option comes with its benefits and drawbacks. I found that my peripherals, especially those hooked up via Thunderbolt, were more likely to actually work upon startup when the spoofing feature was enabled.
Next, find the line that looks like this:
#scanfor internal,external,optical,manualBy default, rEFInd will look for all kinds of operating systems to load, including ones that use old-school booting methods that predate the concept of EFI firmware. We don’t need that, so this line overrides the default behavior by removing so-called “legacy” booting from the list of options.
Go ahead and delete the pound sign to enable the setting. You don’t need to make any additional changes here. So once you’ve done that, you can save the file and close your text editor.
Now that we’ve edited the rEFInd configuration file, we’re ready to install the software. Specifically, we’re going to drag the following files and folders from the refind folder over to the ESP’s boot folder (the one we were looking at earlier):
- refind_x64.efi
- refind.conf-sample
- drivers_x64 [folder]
- icons [folder]
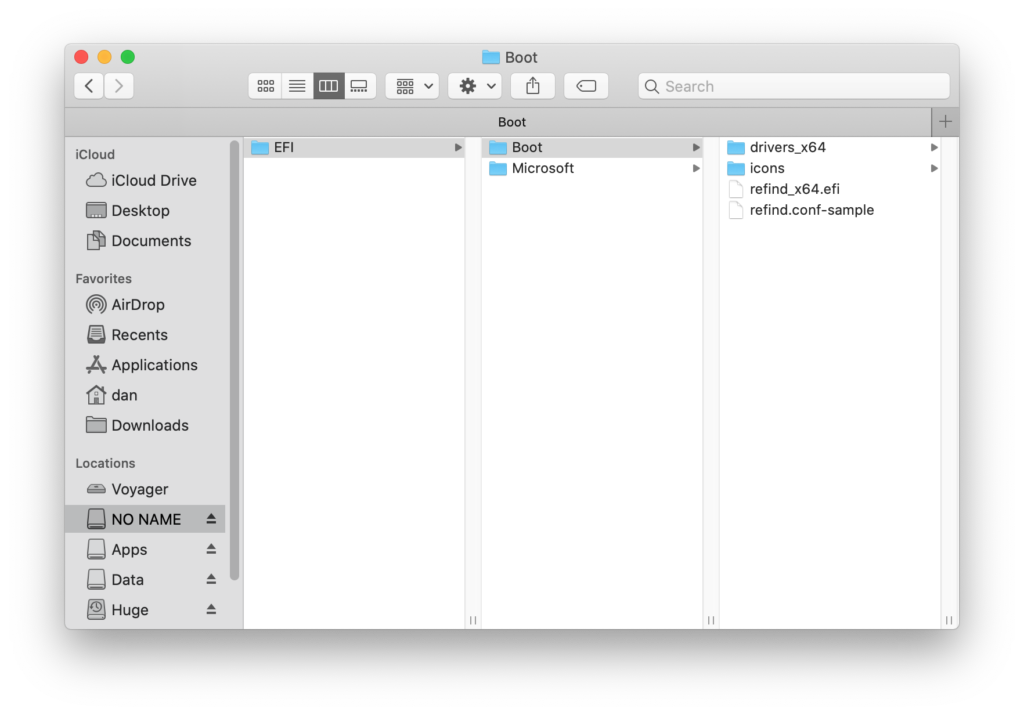
After this, you must rename two of the files:
- refind_x64.efi => bootx64.efi
- refind.conf-sample => refind.conf
Here’s what’s actually going on. When you install an operating system, it usually saves its own boot loader into a location of its choice on the ESP (e.g. the “Microsoft” folder). It then talks to your motherboard’s firmware to tell it where to find that boot loader and (commonly) sets it up as the preferred loader. But if for some reason your motherboard doesn’t know what operating system to boot, it searches for a fallback boot loader in the “boot” folder. So what we’ve done is to set up rEFInd as that fallback!
Step 9: Booting from the External Drive
If you’ve done this all correctly, it should now be possible to boot your Mac off of either the internal or external drive.
Let’s try it out!
Restart your computer as you normally would. As soon as the screen goes blank, hold down the “Option” key on your keyboard. (If you’re using a PC keyboard, try the “Alt” key.) Keep holding this key down until eventually a screen appears that allows you to select a boot device.
If all goes well, you should have two devices to choose between. One should be your internal hard drive. The other, which will most likely sport an icon with a yellow colored device, is your external drive. Use the keyboard to select this device and hit the “Enter” key. (You may also be able to use your mouse.)
A few moments later, you will see the rEFInd boot menu.
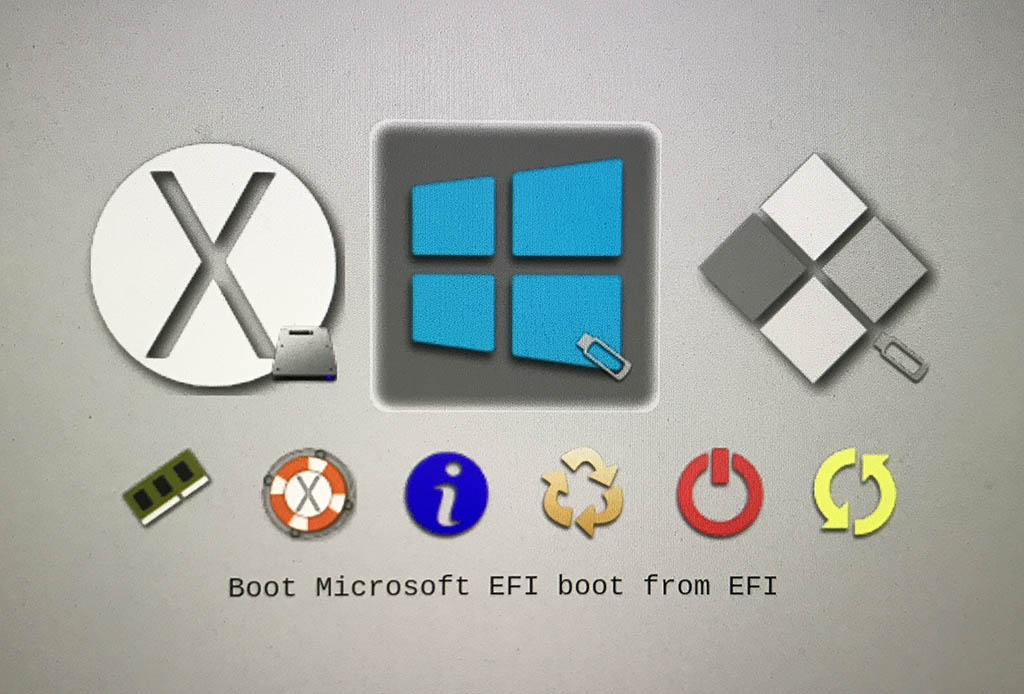
There will probably be several items present. The one you’re looking for should have a blue icon resembling the Windows logo. Use your keyboard to select it and hit the “Enter” key. Windows should boot up and continue the installation, which you will recall that we cut off several steps ago.
Step 10: Getting Updates and Drivers
At this point, you should be able to follow the normal Windows installation routine without requiring any unusual interventions. If the computer decides to reboot at all during the process (which is normal), just be sure to hold own the “Option” key to enter rEFInd like before and select the Windows icon.
When the installation is completely finished and you find yourself at the Windows desktop, the last thing you need to do is install all the necessary updates as well as a bunch of drivers.
Normally, Apple tells you to install their Mac drivers (also known as the Boot Camp drivers) as soon as you finish installing Windows. I had trouble with this. I found that installing the Boot Camp drivers went much more smoothly after I had installed all of the Windows updates.
This is a bit of a catch-22, however, because you probably won’t have an Internet connection at this point. This is because the driver for the Mac’s WiFi card is not available by default. You have a couple options to work around this hurtle:
- If your Mac has an Ethernet jack (or you have an Ethernet adapter), connect the Mac directly to your broadband modem or router using an Ethernet cable.
- If you have a USB WiFi adapter, plug that in and hope that Windows already has the drivers for it.
- If neither of these options work, you’ll just have to install the Boot Camp drivers first and hope for the best.
I’m not going to go into the details of using Windows update as I’m going to assume that most people reading this article are already familiar with it. If not, there are plenty of resources available on the web to help you out.
To install the Boot Camp drivers, plug in the USB flash drive to which you downloaded the files way back in Step 2. This drive will have a folder on it named “WindowsSupport” (unless you changed the name for some reason when you downloaded it). And in that folder, you’ll find a file named “Setup” which you can double-click to get the ball rolling. Follow the prompts and let Apple do its thing. You may be asked to reboot the computer, in which case you should probably do so. Remember to follow the instructions above for using rEFInd in order to get back into Windows. After you reboot, find Apple Software Update in the Start menu and use it to install any updates if they are available.
Note: If the Boot Camp installer hangs the first time you try to run it, you will need to restart the computer. If you’re lucky, the WiFi driver and Apple Software Update will have gotten installed before this happens. If so, when you reboot the computer, you should be able to connect to the Internet, which will allow you to install the Windows updates. After you’ve done that, you may be able to use Apple Software Update to download a newer version of the Boot Camp drivers and complete the process. If not, try installing them again from the flash drive.
Step 11: Wrapping Up
Once you’ve installed any updates and all of Apple’s drivers, you’re all finished! Any time you want to run Windows, you can hold down the “Option” key as your computer turns on, select your external drive, and then use rEFInd to boot into Windows. If you want to boot into macOS, you can just leave the computer alone and let it do its thing.
If, however, your computer gets confused and starts booting into rEFInd on its own instead of macOS, here’s how to fix it:
- Boot while holding down the option key to access the boot selector.
- Choose your internal drive (instead of the external one).
- macOS should now boot like normal.
- Once you’ve reached your desktop, open System Preferences.
- Click on the Startup Disk icon.
- If you see a note at the bottom of the window that says, “Click the lock to make changes,” go ahead and do that. (You will need to enter an administrator password.)
- Click on the icon for your Internal drive.
- Click the “Restart…” button to reboot your computer.
- Don’t hold any keys down. If your computer boots straight into macOS, the problem is solved.
If all you want to do is be able to boot your computer into macOS or Windows, then you can stop reading now. You’ve done it!
But if you’d like to try triple-booting your computer by adding Linux to the mix, you’ll want to check out the third and final part of this tutorial (coming soon).
And, of course, if you have any of your own tips or tricks for this process, feel free to share them in the comments.