This post is Part 3 of a multi-part series:
- How to Use Automation to Conveniently Relink and Export Dozens of Yearbook Spreads: Introduction
- How to Use Automation to Conveniently Relink and Export Dozens of Yearbook Spreads: Exporting the Yearbook’s Photos
- How to Use Automation to Conveniently Relink and Export Dozens of Yearbook Spreads: Exporting the Spreads to PDF
- How to Use Automation to Conveniently Relink and Export Dozens of Yearbook Spreads: Creating JPEG “Slides” of Each Spread
In the previous part of this series, we exported all of the yearbook’s photos to a bunch of folders labeled with the appropriate page numbers. We’re going to continue right where we left off. This means you’re going to need to open the command prompt again (if you didn’t leave it open) and navigate back to the folder where all your ZIP archives are saved. If you need a refresher on how to do that, check out Step 3.
And so, without further ado…
Step 8: Extract the InDesign Files
We’ve got one last round of extraction to do before we’re done with the command prompt for the rest of this project. This time, we need to extract all the InDesign files from those proof archives.
We’ll use a similar command to the one we used before. However, this time we’re only looking for *.indd files. We’ve also removed the output (-o) parameter because we want to dump all the files directly into the main folder.
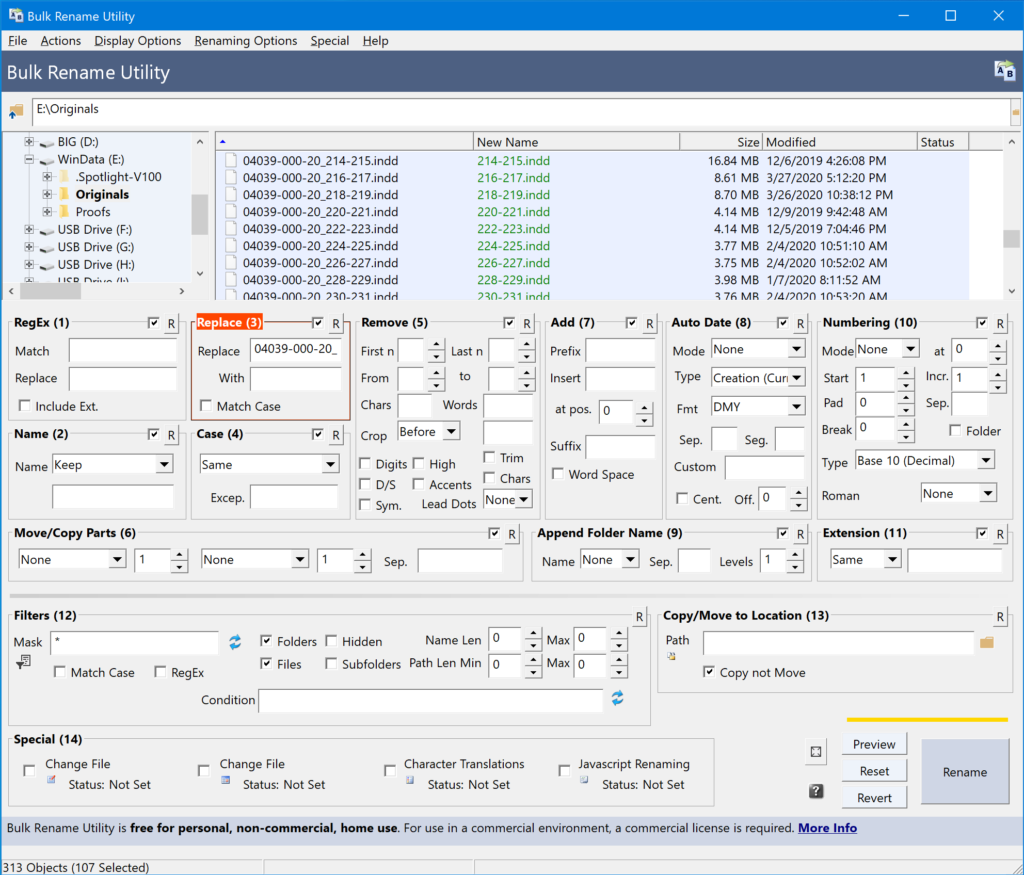
FOR %A IN ("*.zip") DO "C:\Program Files\7-Zip\7z.exe" e "%A" *.indd -rWhen this command finishes, we go back to the Bulk Rename Utility for the umpteenth time to clean up the file names again. Just like in Step 5, I’m going to remove the prefix from the InDesign file names so that they are just the page numbers.
Step 9: Move the ZIP Files Out of the Way
We are now done with the extractions, so you can go ahead and move the ZIP files out of the folder just like you did before. When all is said and done, you should have a folder with the following two things in it:
- A whole bunch of subfolders, with page numbers as their file names, each of which contains the images that belong to those pages.
- A whole bunch of InDesign files, with page numbers as their file names, each of which represents the final submitted version of those pages.
Step 10: Install Some InDesign Scripts
Assuming this is your first time following this procedure, you will need to install a couple InDesign scripts on your computer. These scripts are basically bits of code that any user can write to extend the functionality of InDesign. In our case, we want to add two important new functions to InDesign:
- Batch Processing: We don’t want to have to open each individual file by hand in order to fix the links and then export to JPEG or PDF. That would be a pain! So we need a batch processing plugin to loop through all the files and do all the work for us.
- Image Relinking: Although InDesign has some automatic relinking functionality built in, I have found that it’s not particularly well suited to a bulk operation like this. Instead, we’ll use an automatic relinking plugin that plays a bit more nicely with the batch processor.
For batch processing, we’re going to use Peter Kahrel’s Batch-Processing Script for Indesign. Here’s a direct link to download the file.
For image relinking, we’re going to use a modified version of Jeremy Howard’s InDesign Relinker Script. But don’t download the file available on that web page. I’m only providing the link for attribution purposes. Instead, please use this version that I have modified myself.
(The original version pops up various dialog boxes to ask you questions and report results, which means it’s not ideal for an automated routine. My modified version doesn’t require any user interaction. It works by looking for a folder in the same location with the exact same name as the InDesign file. This is why we took all that time earlier to rename all the files and make sure they were saved in the right place.)
This article from InDesignSecrets provides a pretty good explanation of how to install scripts. So rather than my recreating the wheel, I’m just going to ask you to follow Anne-Marie Concepcion’s instructions to get your two new scripts ready for action. Just scroll down to the section titled “Installing Scripts in the InDesign Scripts Panel.”
Step 11: Set Up InDesign
It’s time to finally open up InDesign! But before we can use our brand new scripts, we need to do a little housekeeping.
First, press CTRL+K to open up the Preferences dialog. Then, go to the File Handling section.
Here, towards the bottom of the dialog, there is a checkbox labeled “Check Links Before Opening Document.” Make sure this box is unchecked.
(Normally, I like having this box checked because it lets me know if there are any missing links as soon as I open the document. But because we want to automate this process, we don’t want to be interrupted by any of these alerts along the way. Instead, we’ll use a log file for this, which I’ll explain later.)
Click OK to save your changes. Next, open any of the proof files that you exported. It doesn’t matter which. Once it’s open, click the following menu item: File > Adobe PDF Presets > [High Quality Print]…
InDeisgn will ask you where you want to save your PDF. Pick whatever location you want because we’re not actually going to be saving anything. Instead, we’re just using this screen to create a brand new preset.
High Quality Print is usually a safe bet for PDF exports. The only problem is that it defaults to outputting each half of a spread on its own page. This technically makes sense, but it’s obviously not an optimal way to view a yearbook. So we need to tell it to output one spread at a time instead. You’ll find the setting (a radio button) about half-way down the page.
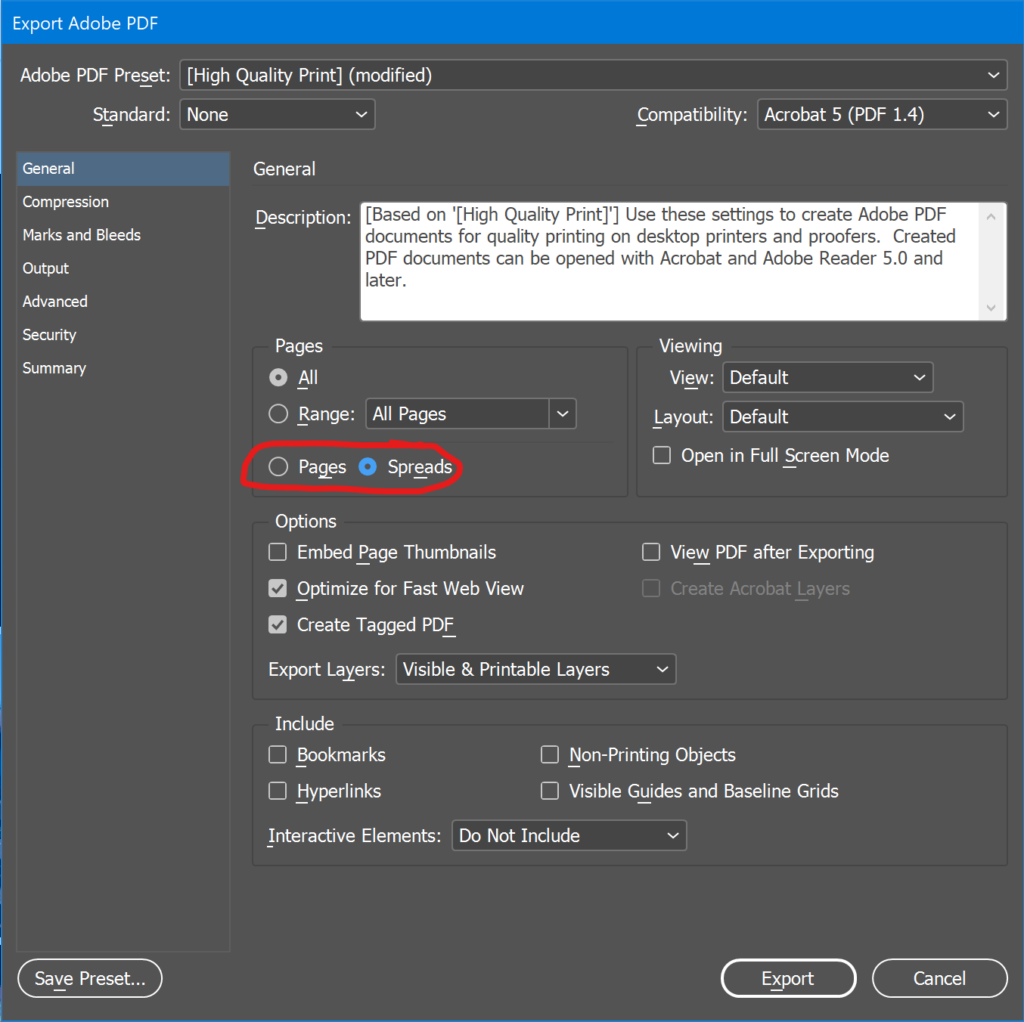
Make sure that “Spreads” is selected. Then, click the Save Preset… button.
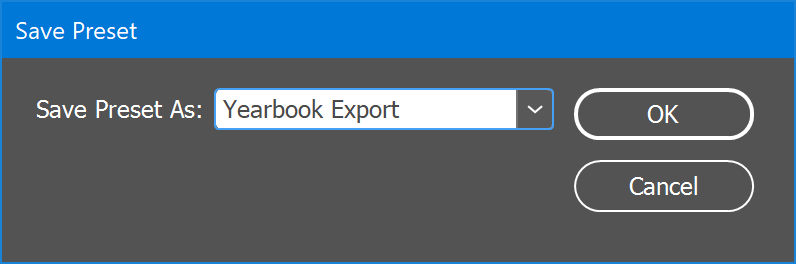
Give it whatever name you want and click OK. When you’re back at the main dialog box, you can click Cancel. You can also close the spread you had opened.
Step 12: Run the Scripts
And now, to export all those spreads! We’ll start by exporting to PDF.
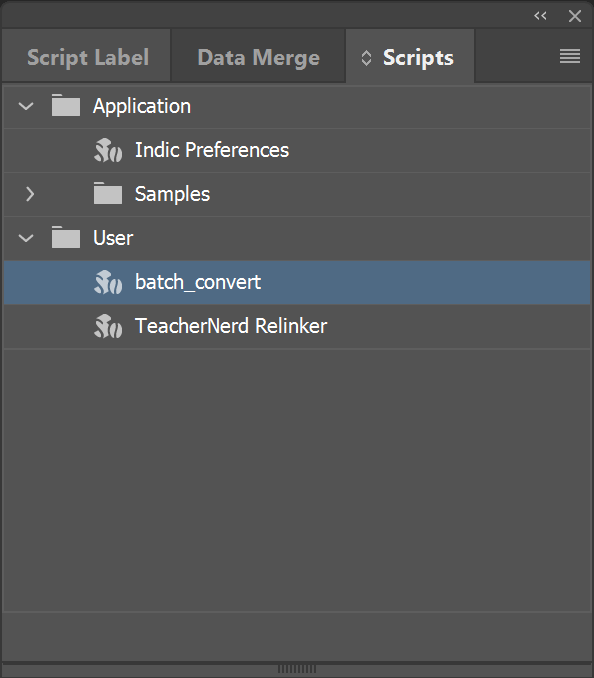
You should still have InDesign open, but make sure that you don’t have any files open. Then, press CTRL+ALT+F11 to open the Scripts panel. The two scripts that you installed earlier will most likely be in the User folder. Their names are “batch_convert” and “TeacherNerd Relinker.”
Double-click on “batch_convert.” This will open up the following dialog box:
Then, adjust a few settings:
- Click the icon next to Input folder to find the location where you saved all the InDesign files you extracted from your ZIP archives.
- Click the icon next to Output folder to find a good place to save the exported files
- Make sure Source format is set to “InDesign” and Target format is set to “PDF.”
- In the PDF Preset section, find the preset that you created earlier, and select it.
- Check the box next to Run a script.
- Click the folder icon near Run a script and find the TeacherNerd Relinker script that you installed earlier. It doesn’t actually matter where this script is saved. If you still have a copy in your Downloads folder, you can use that. You can even re-download it if you’re having trouble finding it.
- Check the box next to Save changed documents on closing. This ensures that your files stay relinked!
When you’ve adjusted all the settings, it should look something like this:
Once it’s ready, click the OK button. Then, sit back and relax as InDesign opens each one of your files, relinks all the images, and exports to PDF. (The files will close automatically when InDesign is done with them.) This will take a few minutes.
Step 13: Check the Log for Errors
After some churning, the script will have relinked your files and exported all the yearbook spreads to PDF. Feel free to open a few of those PDFs to confirm.
In my case, however, there were a handful of spreads whose files didn’t relink correctly. This was either because the printing plant changed the name for some reason or, despite all my best efforts, the file was just legitimately missing from the expected folder. (As I mentioned earlier, the relinker script will only look for links in a folder with the same name as the InDesign file and which is saved in the same location.)
It’s actually easy to figure out which spreads didn’t work because I added a feature to my modified script that records this information to a log file. You should be able to find this log in your Documents folder. It’ll be named TN_Relinker_Errors, followed by a date stamp.
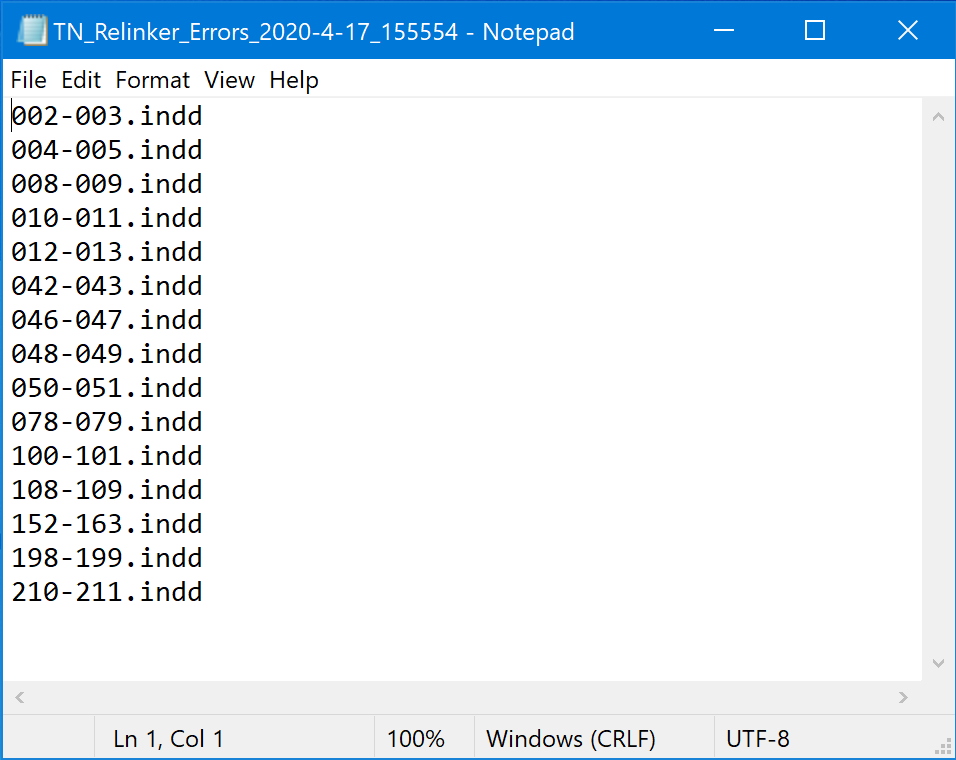
Just open up the log. (It’s a standard text file.) If you see any file names listed, you know that something on that spread wasn’t relinked correctly. Hopefully, as in my case, there won’t be too many.
Once you know which ones had trouble, you can go into each of those spreads individually and fix whatever needs fixing. Then, you can either manually export the PDF or run the batch converter again.
Step 14: Create an “Action” to Crop the PDFs
The templates that my publisher provides for designing our pages and editing our proofs have a nearly two-inch tall section at the bottom of the document with space for notes, technical specifications, and other content that is not actually part of the finished product. This needs to be cropped out before the PDFs can be shared. I also like to trim the other three edges a bit as well to get the finished dimensions a little closer to the actual product.
We can automate this process as well by creating a custom action in Adobe Acrobat.
If you have access to InDesign, you (or your school) probably has a subscription or other licensing agreement for Adobe Creative Suite, which also includes Acrobat, the venerable program for creating and editing PDF files.
What you need to do here is open up one of those exported PDFs in Acrobat. (Be sure you’re opening it in Acrobat, not Adobe Reader!) Then, press CTRL+SHIFT+P to open the Set Page Boxes interface.
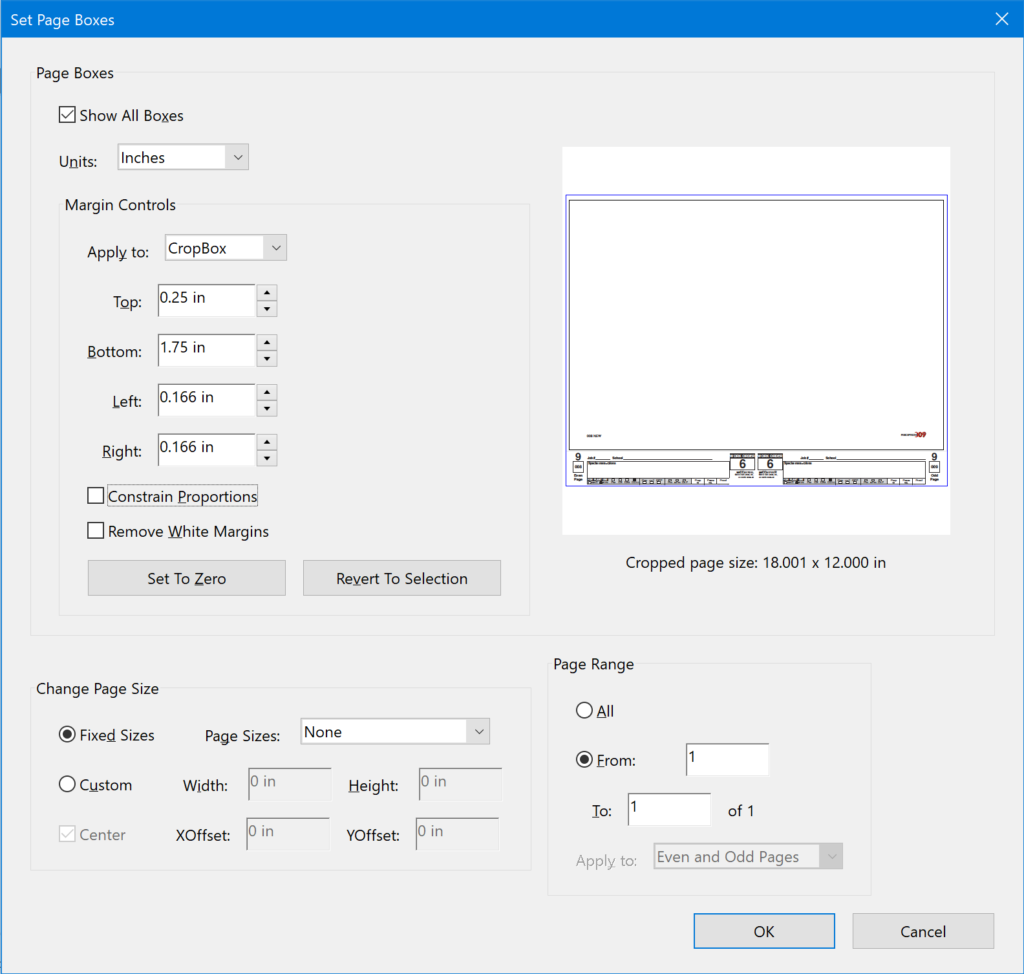
Make sure that Apply to is set to “CropBox.” Then, use the settings to the left of the preview box to set how wide you want your margins to be. As you increase or decrease the numbers, the preview will show you how much content will be cropped off. When you think you’ve got it right, click OK. If you don’t like the results, try it again! (Nothing actually gets deleted; when you set the crop, the content is just hidden.)
Once you’re satisfied with the crop settings, jot them down somewhere. Then, close your PDF file. You don’t need to save it since, in a moment, it will get processed again along with all the others.
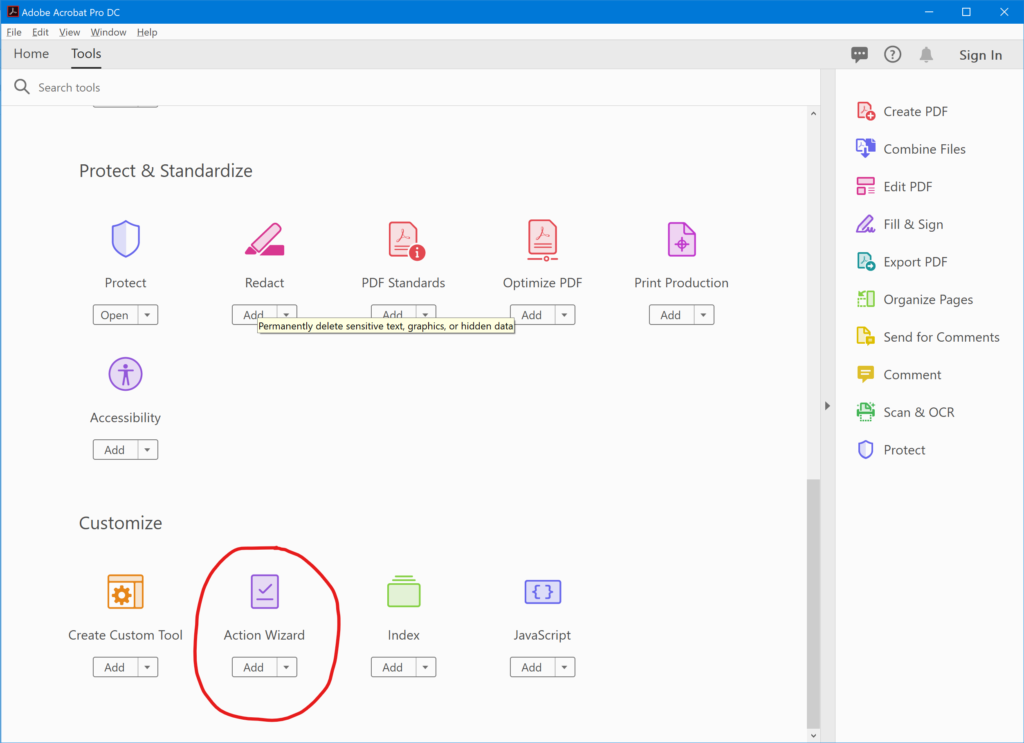
In order to apply these crop settings to all of the PDFs, we need to create what’s called a custom action. On the Tools tab, go ahead and select Action Wizard. (You will probably have to scroll all the way down to find it.)
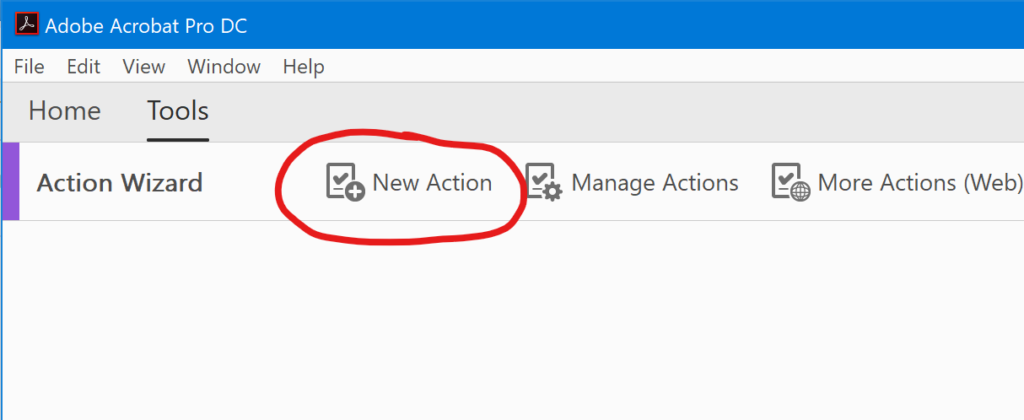
Then, in the toolbar, click New Action.
In the resulting dialog, click on Pages…
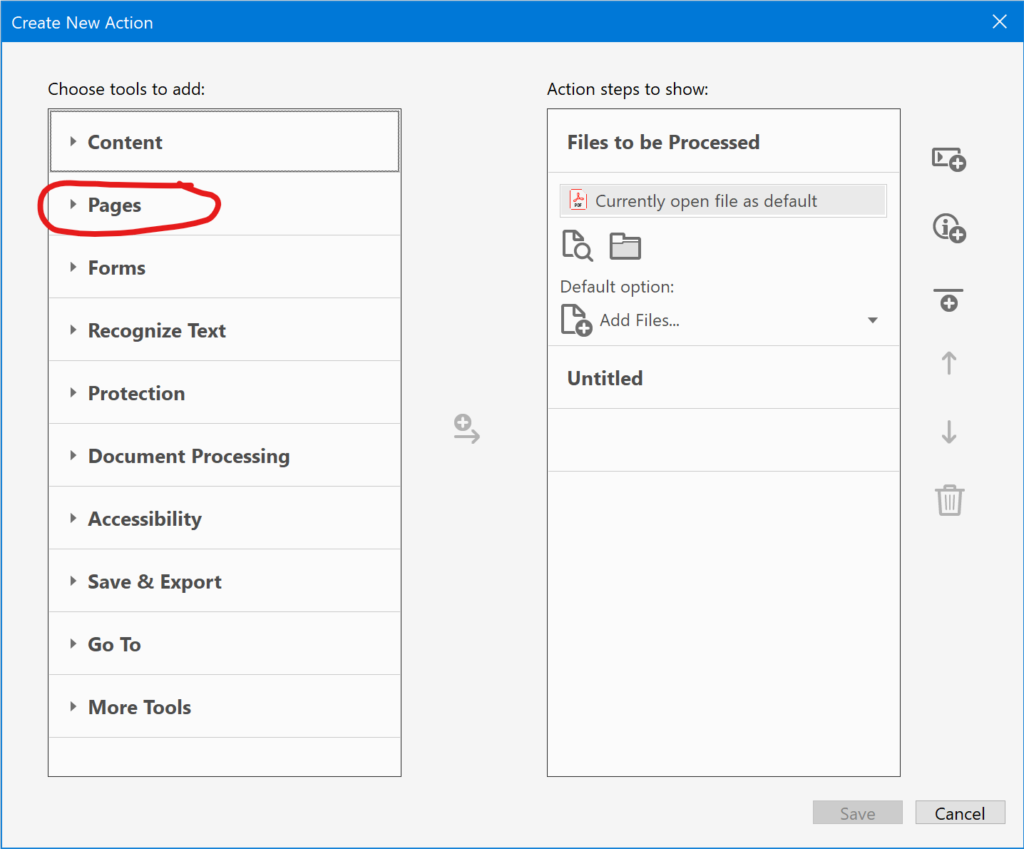
…and then click TWICE on Crop Pages.

If you do this successfully, you should see “Crop Pages” appear in the right-hand column.
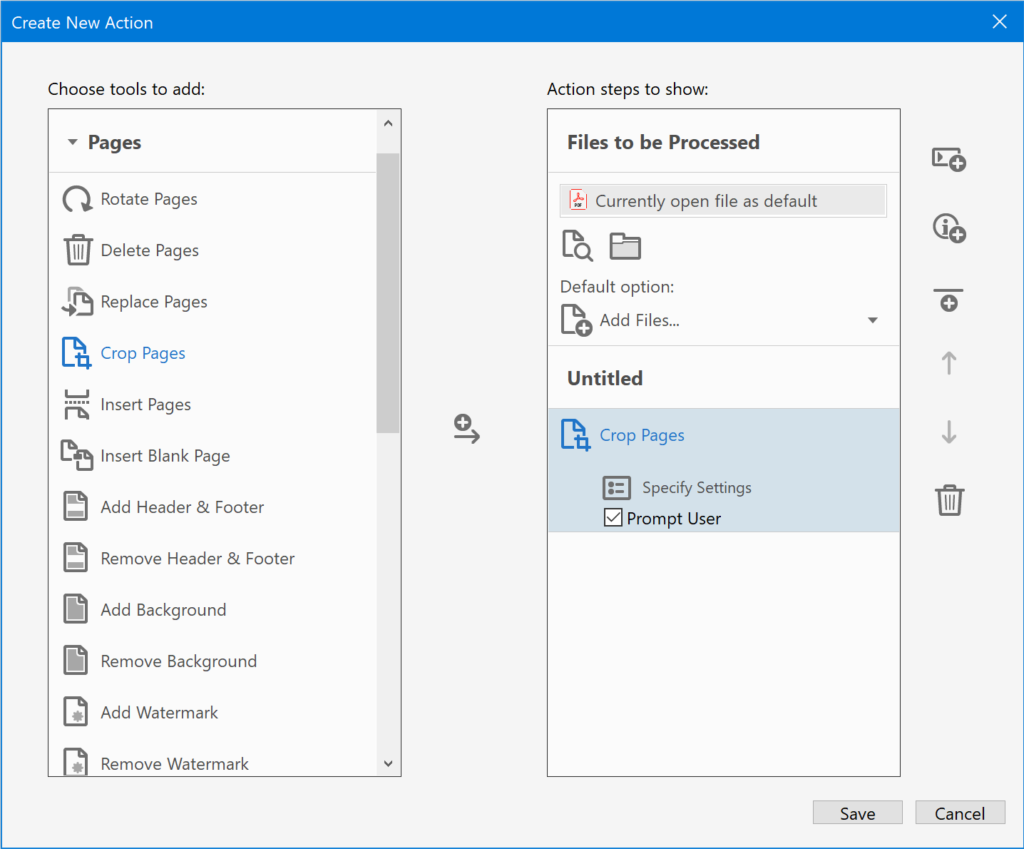
Now, uncheck the box labeled “Prompt User.”
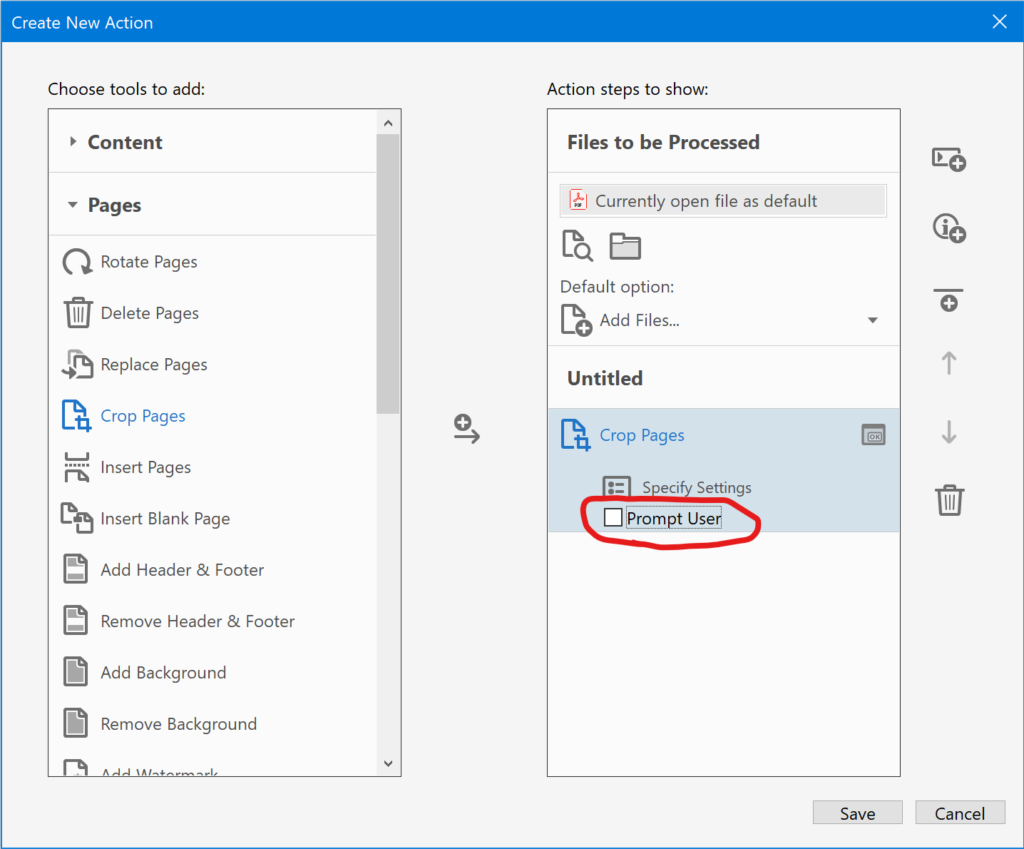
Then, click the “Specify Settings” button right above it.
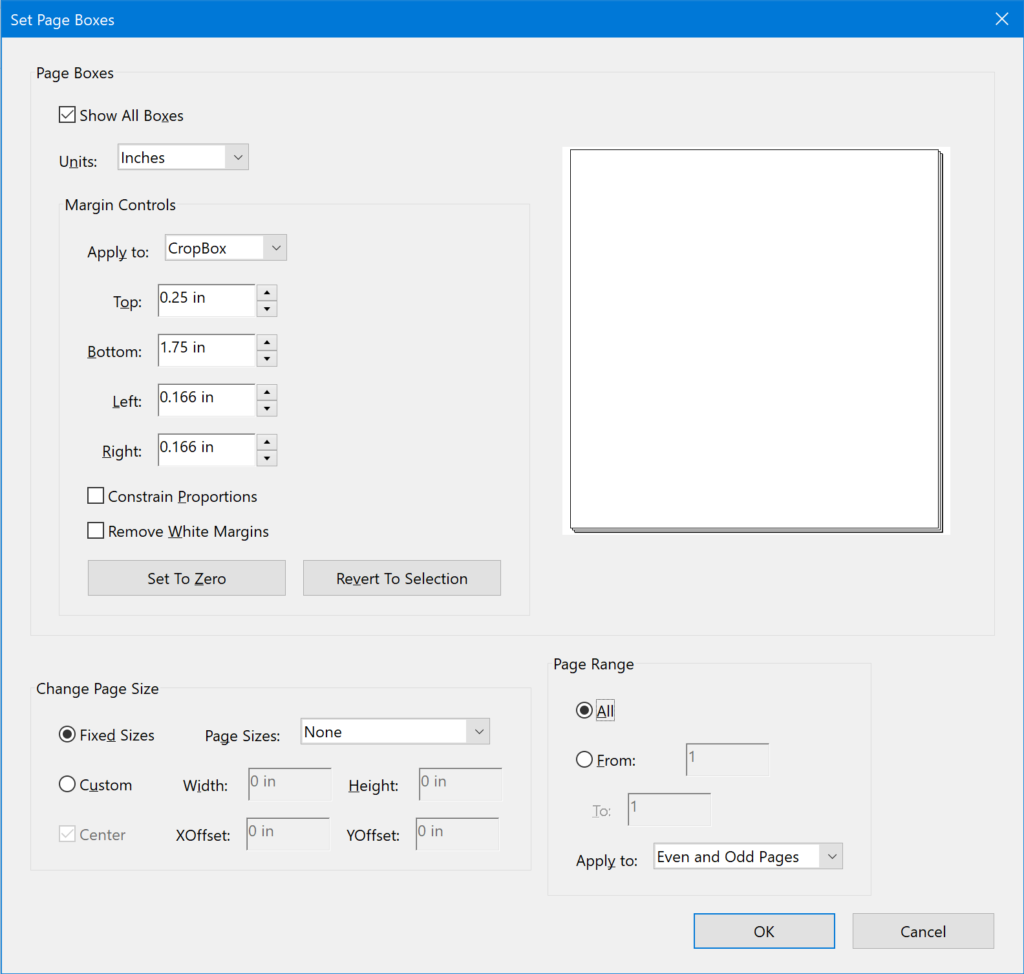
This will bring up a very familiar looking dialog box, except this time the preview is blank. Here, you’ll want to copy in the numbers you wrote down earlier. Also be sure to set Page Range to “All.” (This setting is located directly under the preview box.) Then, click OK.
We need to add one more step to this action. In the list of tools, scroll down to Save & Export. Click on that, and then click twice on Save. The command should now appear in the list on the right, just like before.
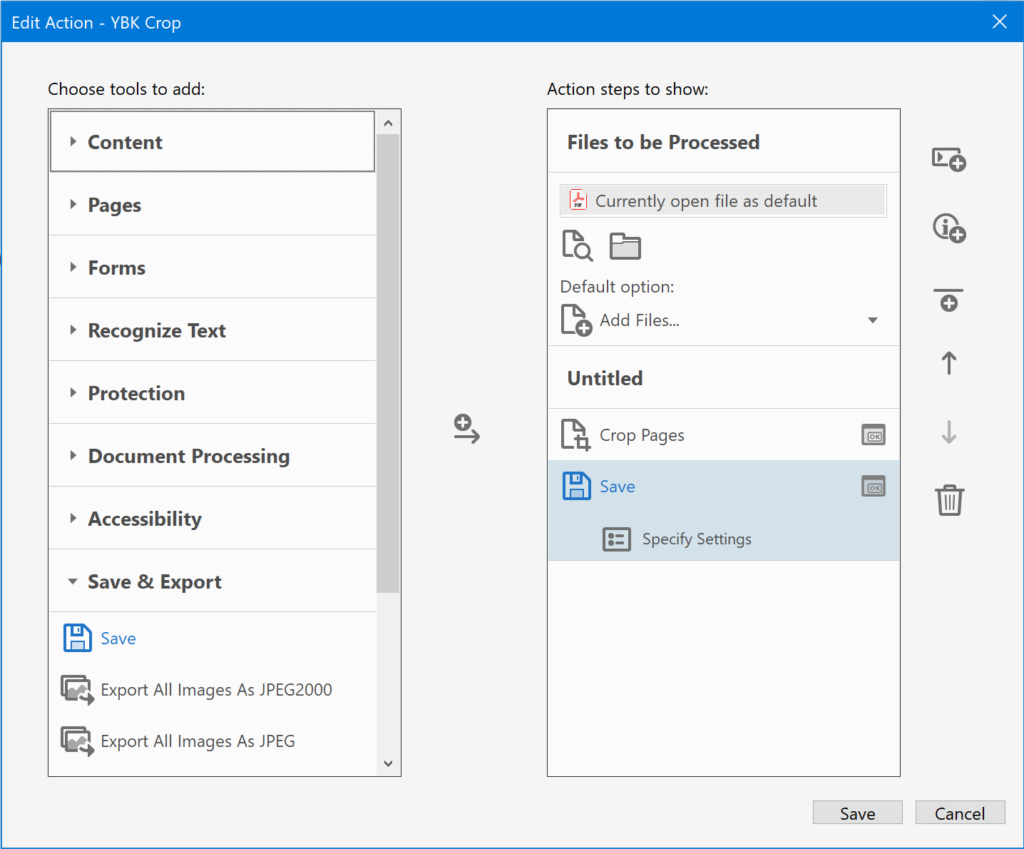
Our action is complete! Go ahead and click the Save button at the bottom of the dialog. You will then be asked to give the ation a name.
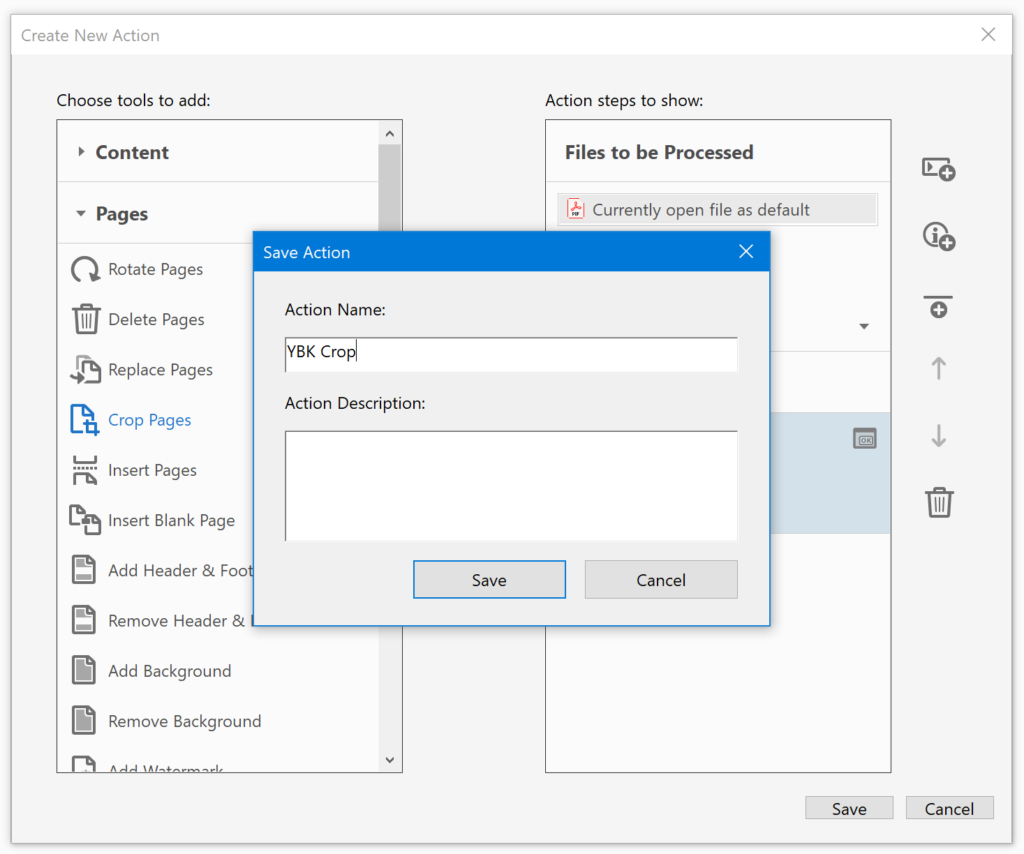
Call it whatever you want, and click Save again. Congratulations! You’ve created an action! You’ll see it in the list on the right-hand side.
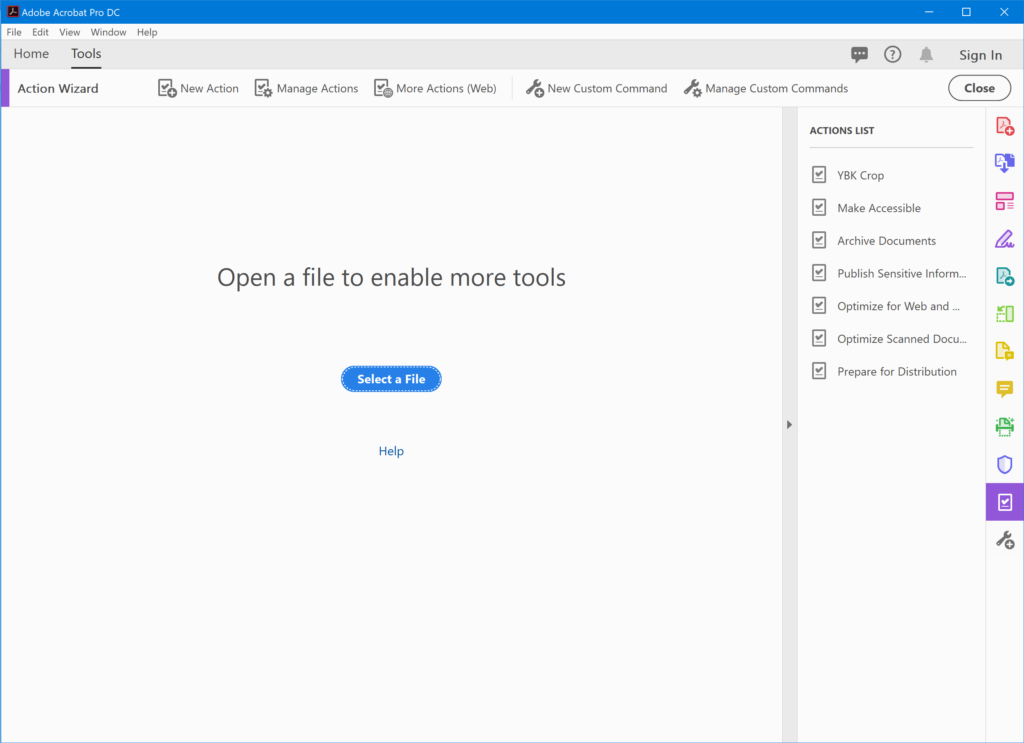
Step 15: Use the Action to Crop the PDFs
So let’s try it out. Click on the action you just created. Acrobat will now ask you to specify the files you want to perform the action on.
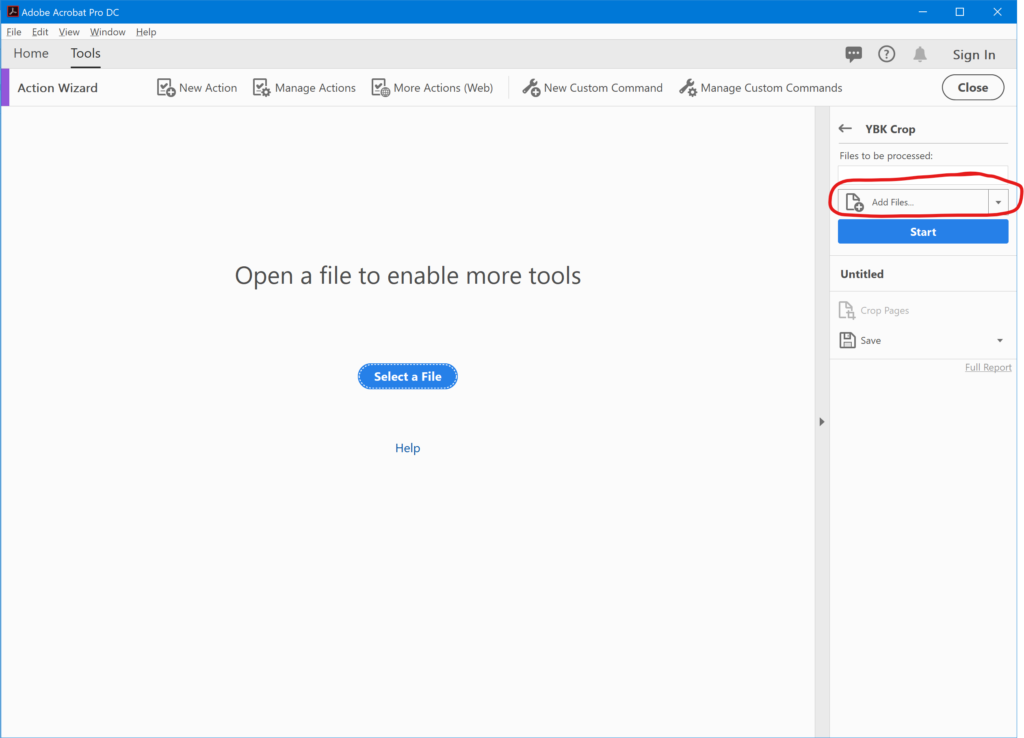
Click the button (circled above) labeled Add Files, and then use the file picker to select all the PDFs that you exported earlier. (Remember that you can use the CTRL key to select multiple files. Or you can click the first file, scroll down to the last file, hold down SHIFT, and then click the last file to select it and everything in between.)
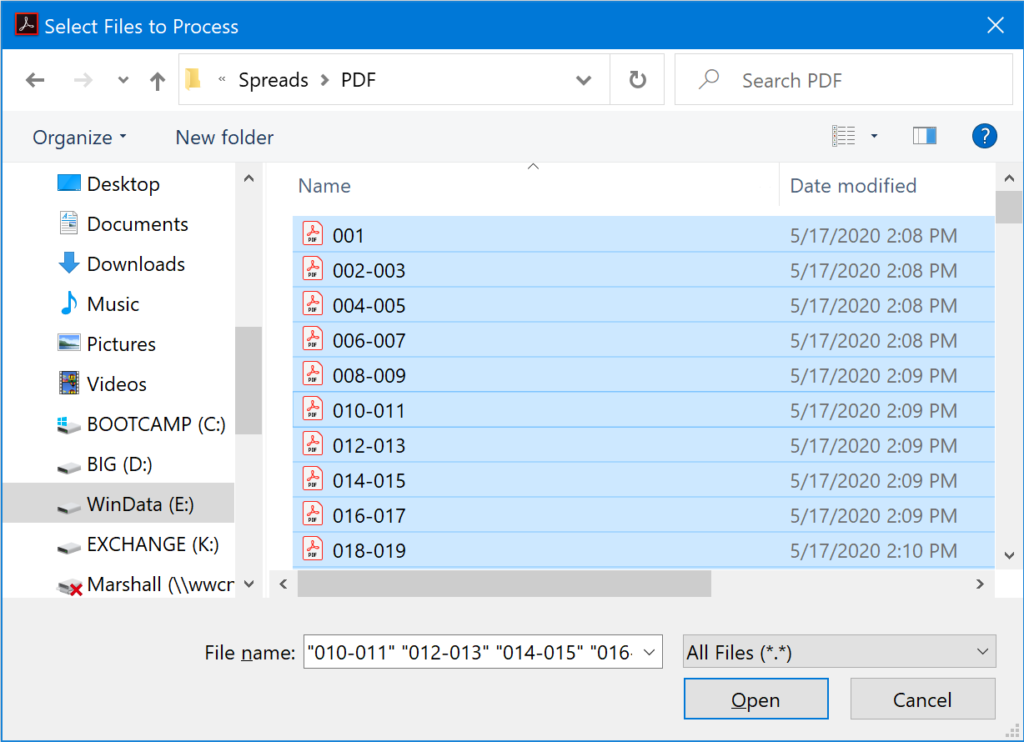
Once you’ve clicked Open, you’ll see the PDFs have been added to the action.
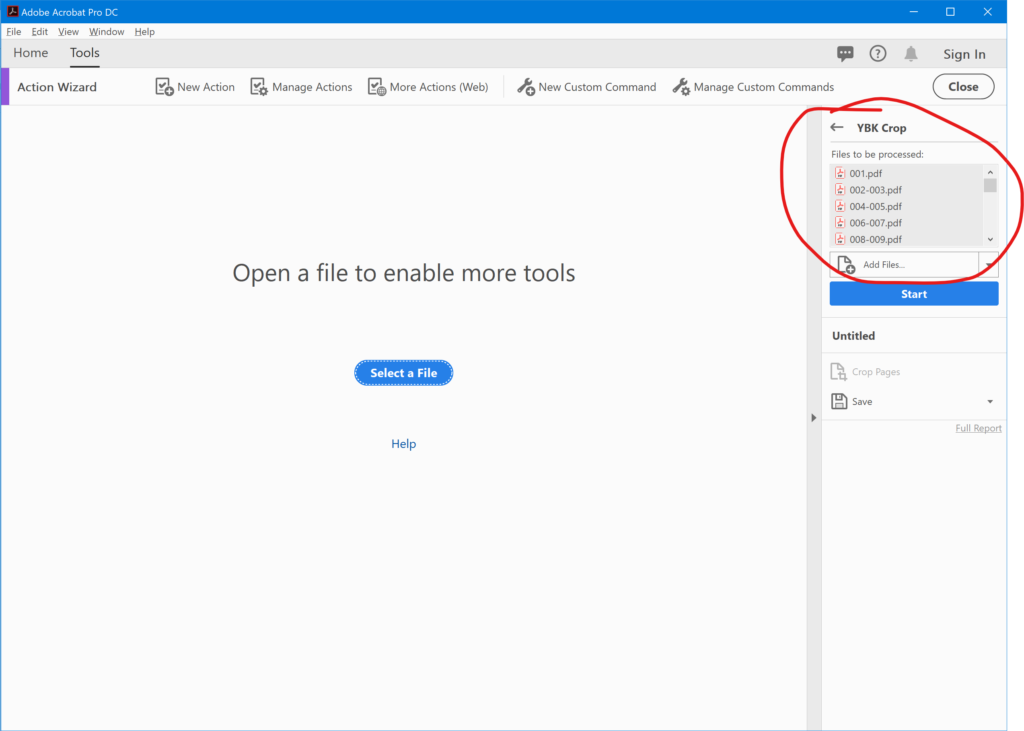
Now, all you have to do is click the big, blue Start button! Acrobat will begin to open and crop every single file. It’ll take a minute or two to finish. When it’s done, open up a few of the PDFs to see the results. You should find that they have all been cropped to your specifications.
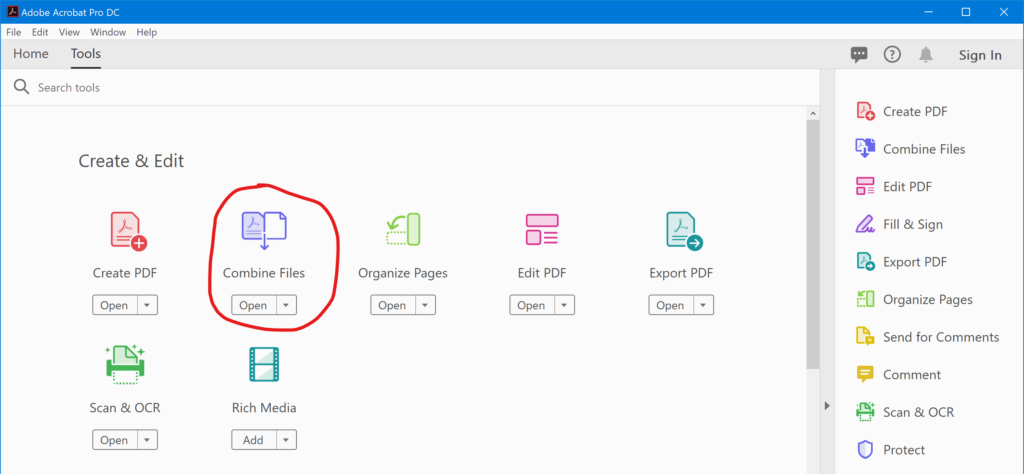
Step 16: Combine Files into a Single PDF
This step is optional, but I decided that I wanted to create a single PDF of my entire yearbook this year to that I can digitally submit the whole thing to critiques and competitions.
To do this, go back to Acrobat’s Tools tab, and click on Combine Files.
You should now see a screen that looks like this:
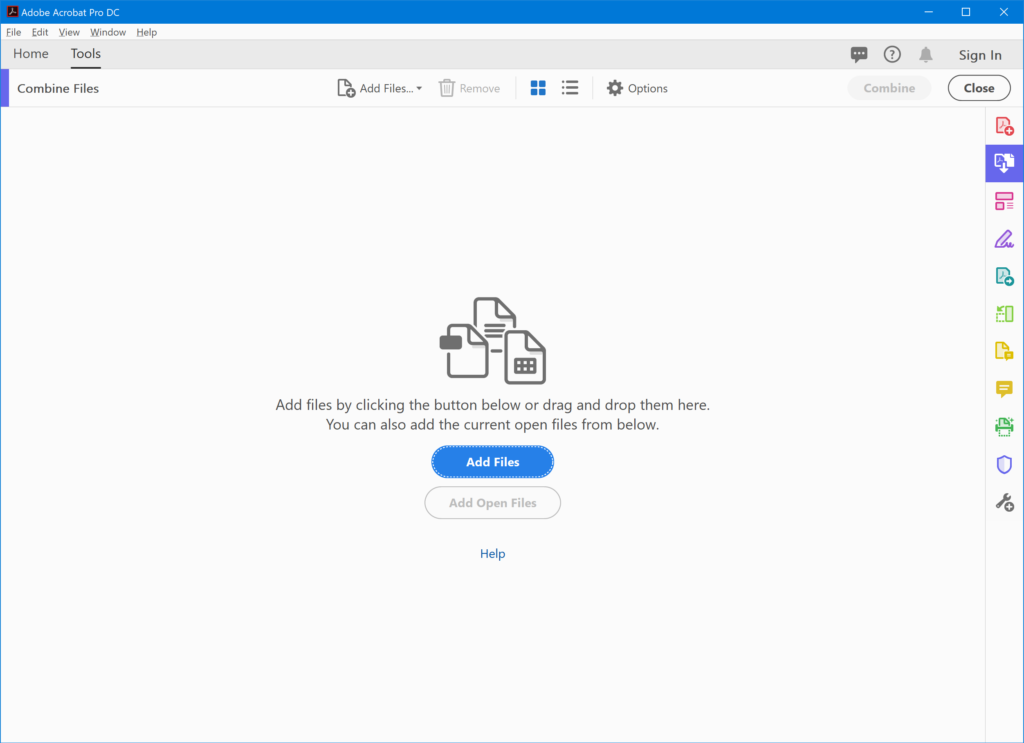
You can either click the Add Files button to open up a file picker or just drag your PDFs onto the window. It’s up to you. When I did this, Acrobat was smart enough to keep everything in numerical order.
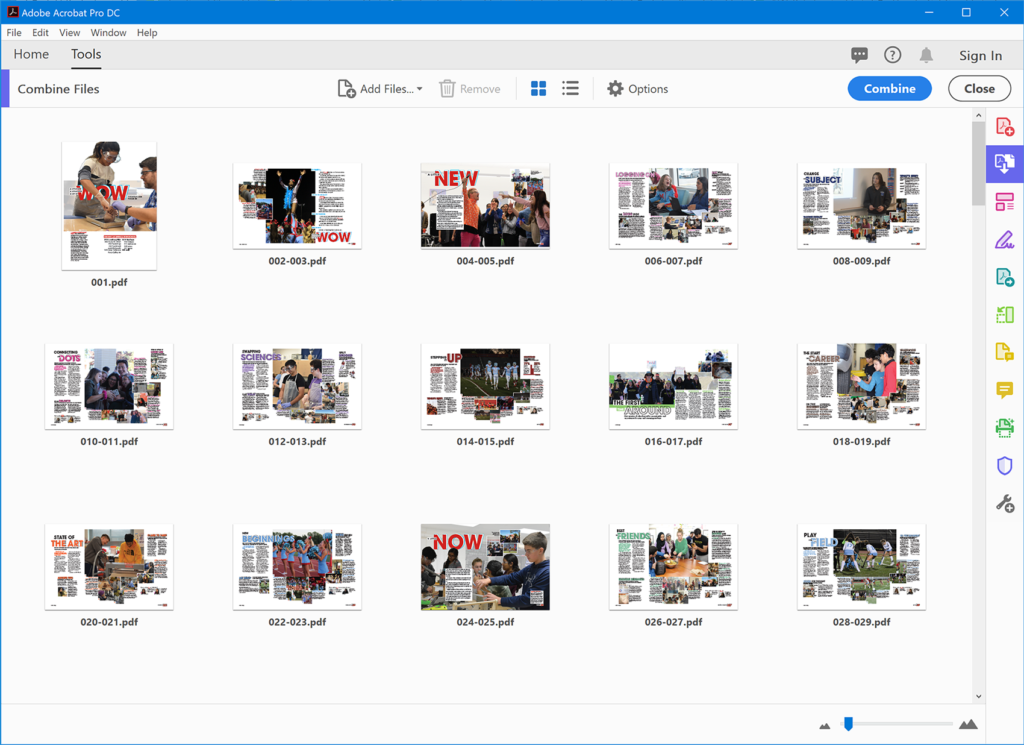
If you need to fix the order of anything, you can just click on a thumbnail and drag it. Otherwise, if everything looks good, click the blue Combine button in the toolbar at the top of the screen.
Acrobat will proceed to loop through all the files, like so:
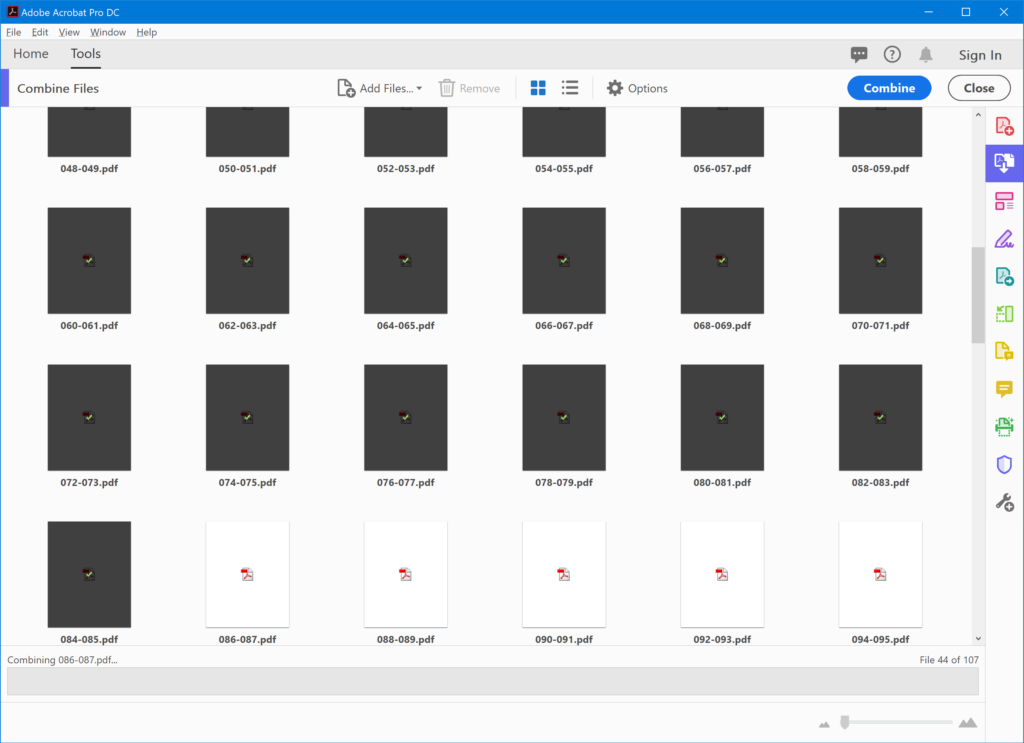
When it’s done, you’ll be presented with a single PDF containing all your pages. Click on File > Save to put a copy of this finished product anywhere you’d like.
If you’ve been following along, you have now successfully created a well-organized library of all the yearbook’s photos, individual PDFs of each spread, and one large PDF containing the entire book. All that’s left, if you’re interested, is to create some JPEG versions of those pages. You’ll find instructions for automating this last process in Part 4 of this series, coming soon!