This post is Part 2 of a multi-part series:
- How to Use Automation to Conveniently Relink and Export Dozens of Yearbook Spreads: Introduction
- How to Use Automation to Conveniently Relink and Export Dozens of Yearbook Spreads: Exporting the Yearbook’s Photos
- How to Use Automation to Conveniently Relink and Export Dozens of Yearbook Spreads: Exporting the Spreads to PDF
- How to Use Automation to Conveniently Relink and Export Dozens of Yearbook Spreads: Creating JPEG “Slides” of Each Spread
Before we can export the yearbook spreads themselves, we need to export all the photos into a well-organized library. In this piece of the automation project, we’ll create just such a library by exporting all of the photos used anywhere in the yearbook to a single folder.
“But wait!” you might be thinking. “That doesn’t sound organized at all.”
So actually, within that single folder will be a subfolder for each yearbook spread (or group of spreads). Each of those subfolders will contain only the images that were found on that spread.
Not only will this make it easier to relink the images later, but it will also make it easier to find digital copies of any material that appeared in the yearbook if anyone ever asks for it in the future. All you would need to do is figure out what page the photo was on and then go to the appropriate subfolder.
See? It’s very well organized!
Step 1: Gather Up the Original Submissions
When I submit pages to our publisher, they’re in the form of individual ZIP files. The first step is to find all of these original submissions and copy them into a single folder on the computer. (I strongly recommend copying the files, not moving them, just in case something goes wrong.)
Step 2: Rename the Files
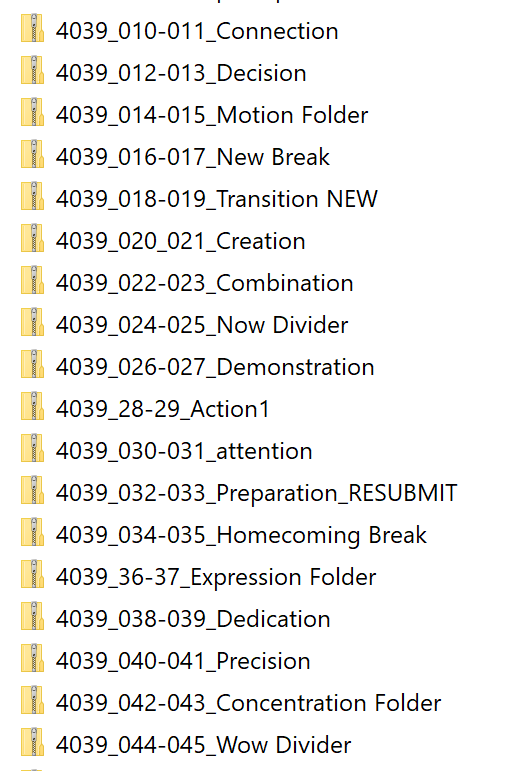
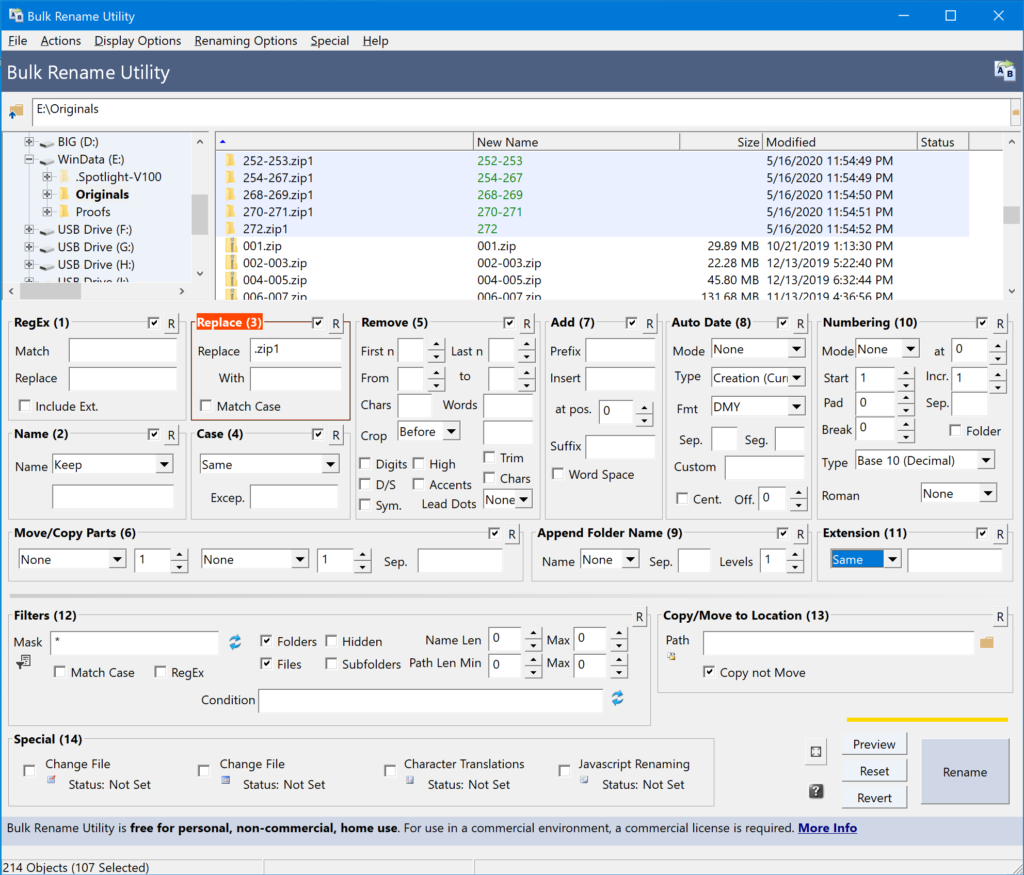
This step can be very simple or very complicated, depending on how carefully the yearbook staff handles file naming. After several years of wrangling, I have finally gotten my students to follow a very strict naming convention. We start with our job number (a code from the publisher), followed by the page numbers in the file, followed by the topic of the spread. Each piece is (supposed to be) separated by an underscore. (See the image above for reference.)
Before exporting anything, it’ll make things a lot simpler to strip all the extra information from the file names and leave just the page numbers. This is where the Bulk Rename Utility comes in.
This is probably one of the worst user interfaces I’ve ever seen, but that’s because the program can process entire folders of files in just about any way you can possibly think of (and then some).
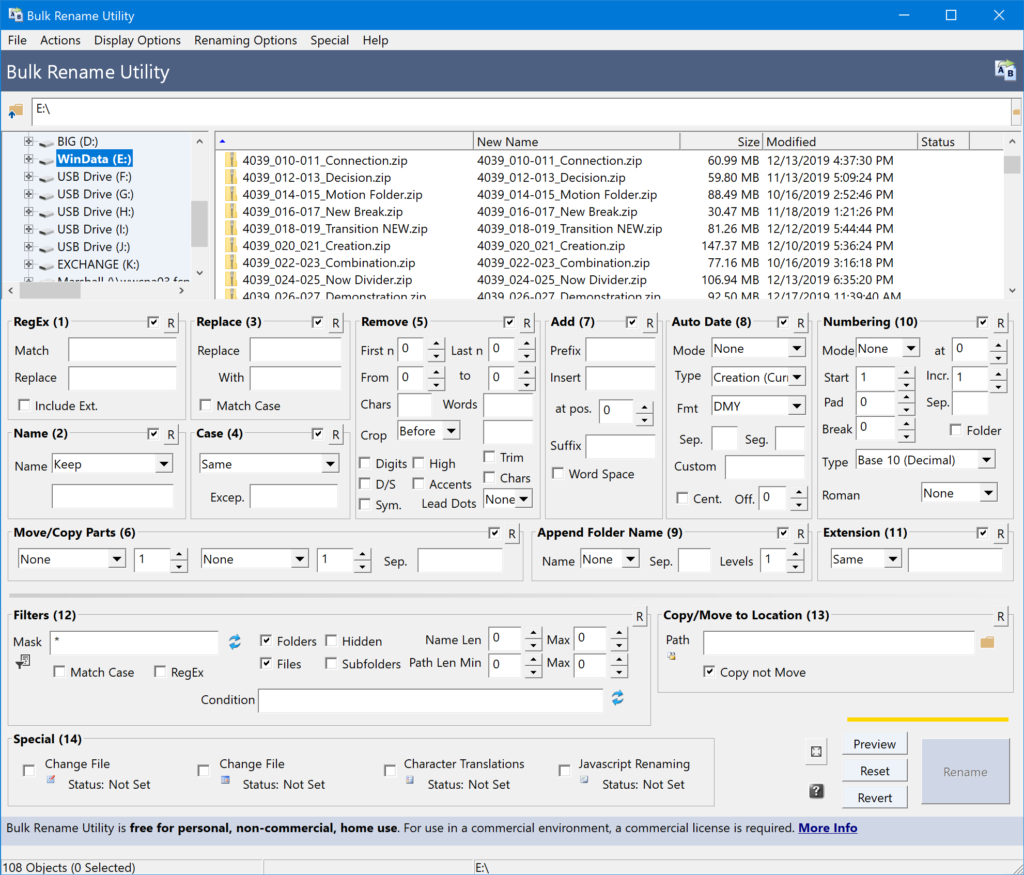
Cleaning up these file names takes a couple steps. The first is to actually find the files by navigating to the appropriate folder in the box in the top left corner. Once you find and click on the folder, the list of files shows up in the box to the right (as you can see in the screenshot above).
The next step is to remove the 4039_ prefix from each file by using the utility’s find-and-replace feature, which is located (appropriately enough) in the section labeled “Replace (3).”
- Type 4039_ into the Replace box.
- Leave the With box blank.
- Select all of the files in the list that should be changed. (If you want to change all the files, you can just click on one and press
CTRL-A.)
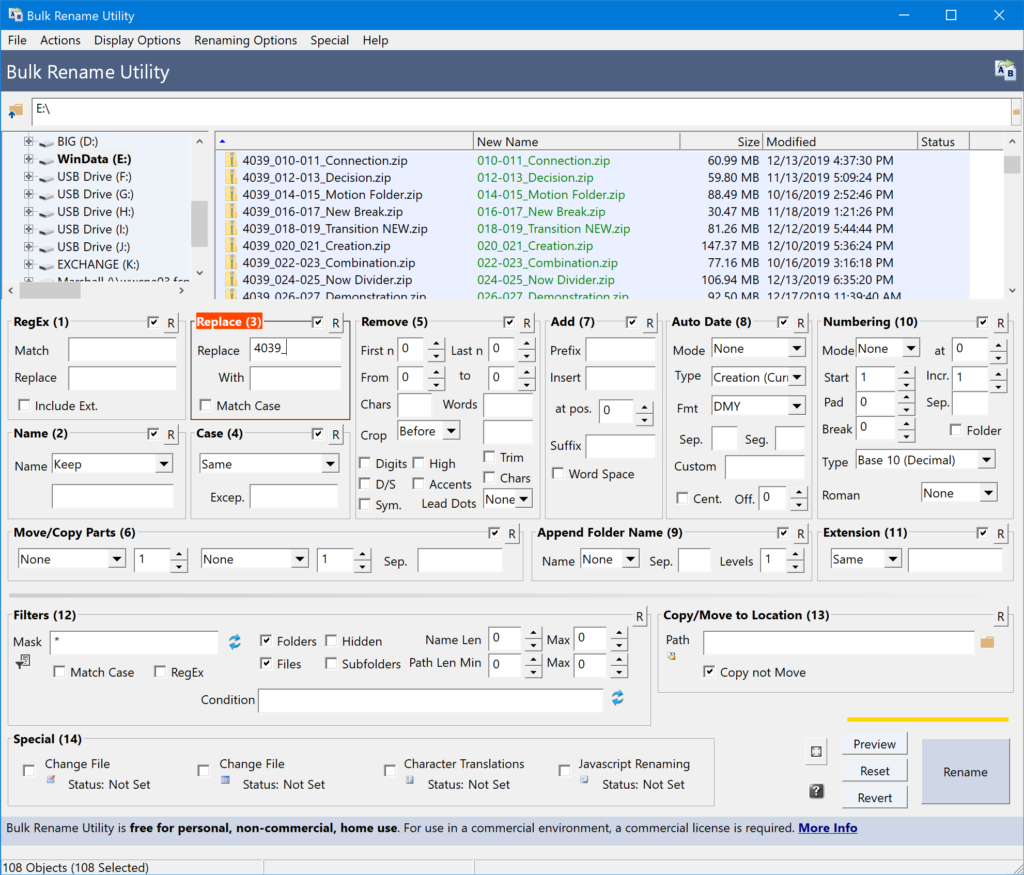
The Bulk Rename Utility previews the changes in the green-colored column. If everything looks alright, then it’s safe to click the Rename button to change the actual file names. (You also need to click through a couple confirmation boxes.)
The files now look like this:
To remove the topic from the end of the file name, we’ll turn to the section labeled “Remove (5).”
- Enter a large number (e.g. 50) in the box next to to. The number has to be longer than the length of any of the file names.
- Enter the number 8 in the box next to From.
- This will only work if all of the page numbers are three digits long and separated by a single character, such as a hyphen. Otherwise, you may need to repeat this step a few times or engage in some trial-and-error with different numbers. (Remember how I told you to make copies of your original files???)
- And, by the way, weird things happened when I tried to enter the to and from numbers the other way around. I don’t recommend it.
- Click Rename.
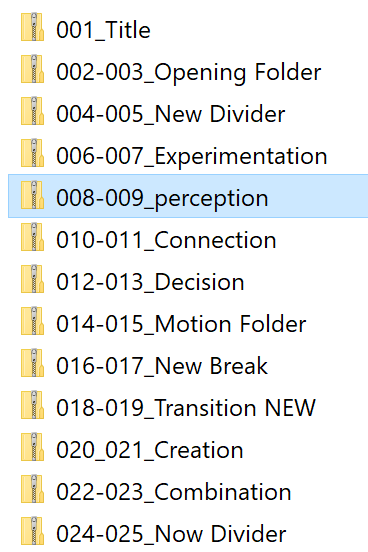
If all goes well, your folder will look something like this:
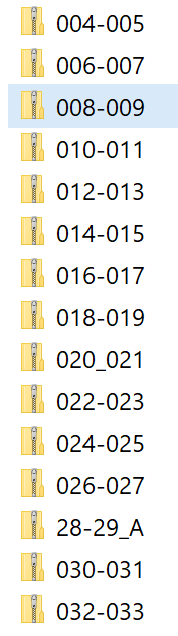
Despite all of my staff’s best efforts, I discovered after the fact that a few files were not named correctly. So, you’ll notice the suspicious 28-29_A in the list above. If you’re following along, be prepared to have to manually fix some of the file names. (I also had to use the “Replace” feature to turn a few errant underscores into hyphens. It’s very important that all of the filenames follow this exact same format!)
Step 3: Extract the Images
Now it’s time to retrieve all the images from the ZIP files. Technically, the image files already exist on the server, usually in several places, but the eventual relinking process will be a lot easier if we can get them all together in one well-organized folder.
This is where 7-Zip and the command prompt come in.
You’ll need to install 7-Zip on your computer if you don’t already have it. Then, open up the command prompt by clicking on the Start menu and typing cmd. The Command Prompt should show up as an app. Go ahead and click it.
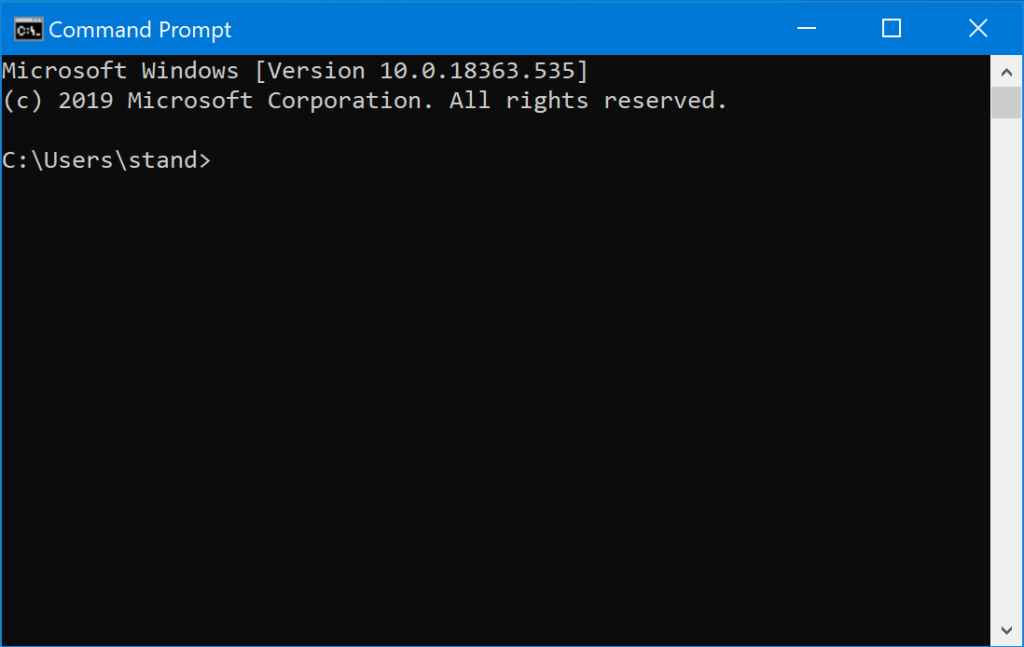
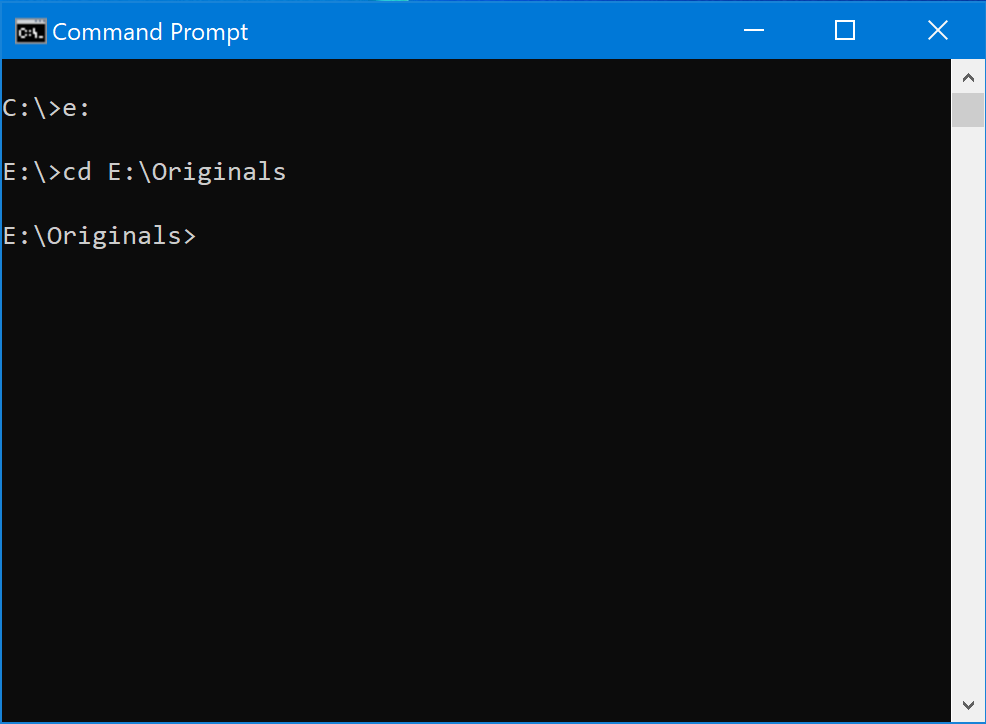
Now you need to navigate to wherever your saved all those ZIP files, which can be a little challenging if you’re not familiar with the command line. Here’s a trick: open up the Windows File Explorer first and just find your ZIP files the “usual” way.
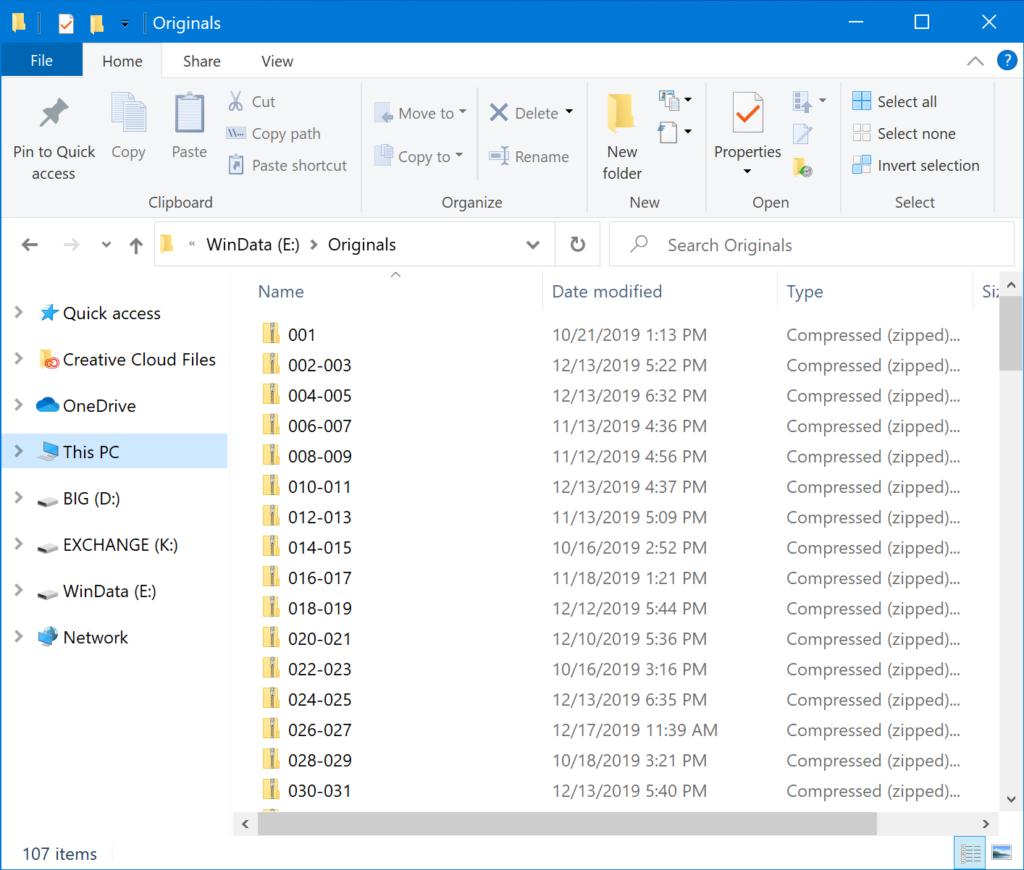
Next, click in the address bar on this window. It will change to show you the full path to the folder. In my case it’s E:\Originals
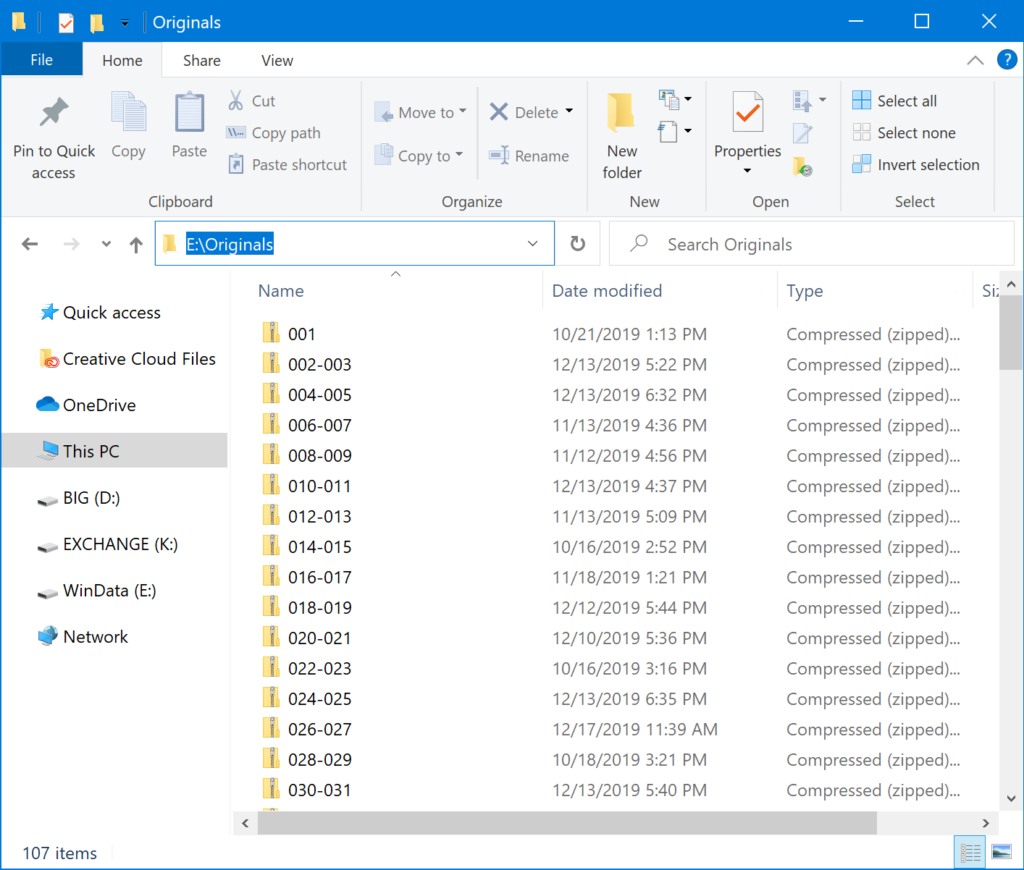
Copy this path by pressing CTRL-C.
Then, switch back to the command prompt and type in the first letter of that path followed by a colon.
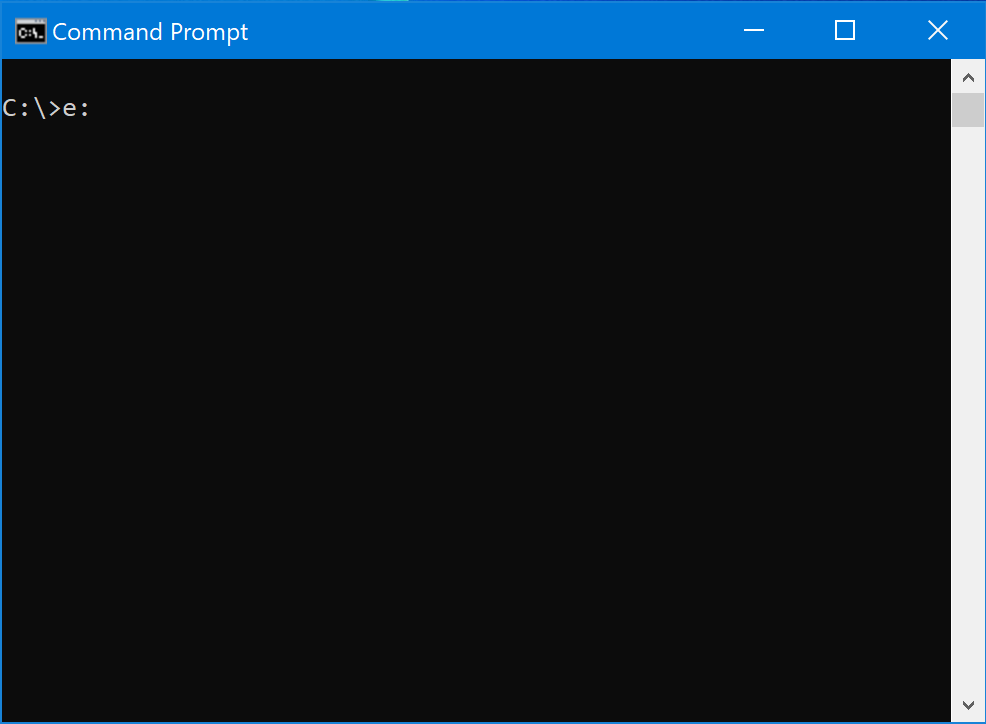
Then, press enter. This will make sure that you are in the appropriate drive on your computer, whether it’s a hard drive, flash drive, server on the network, etc.
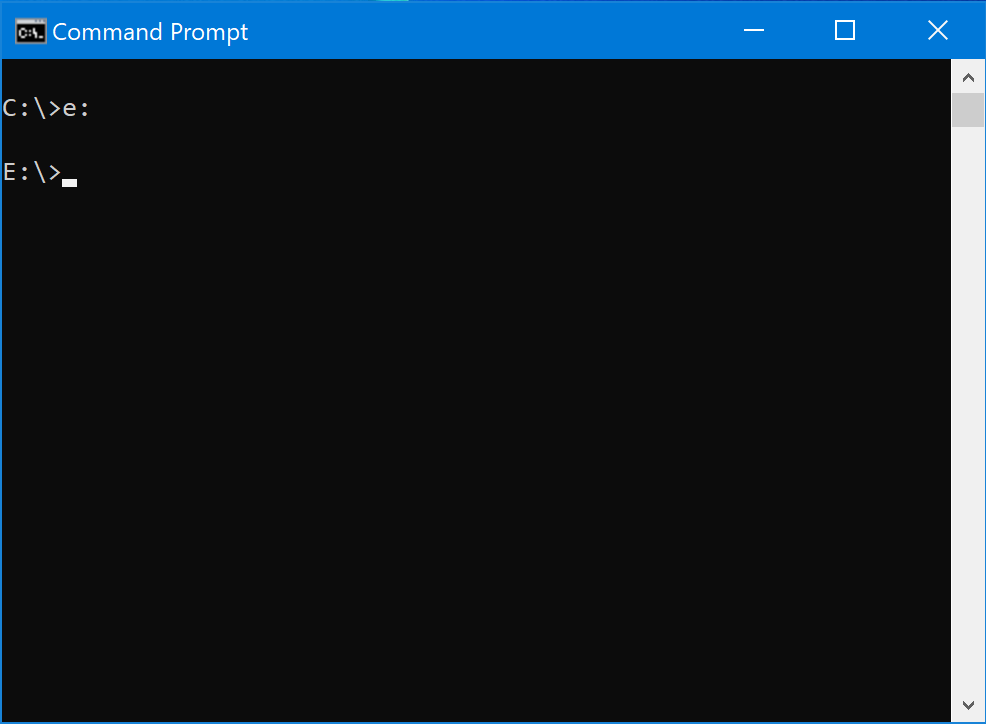
Now, type in the letters cd followed by a space. But don’t hit enter just yet!
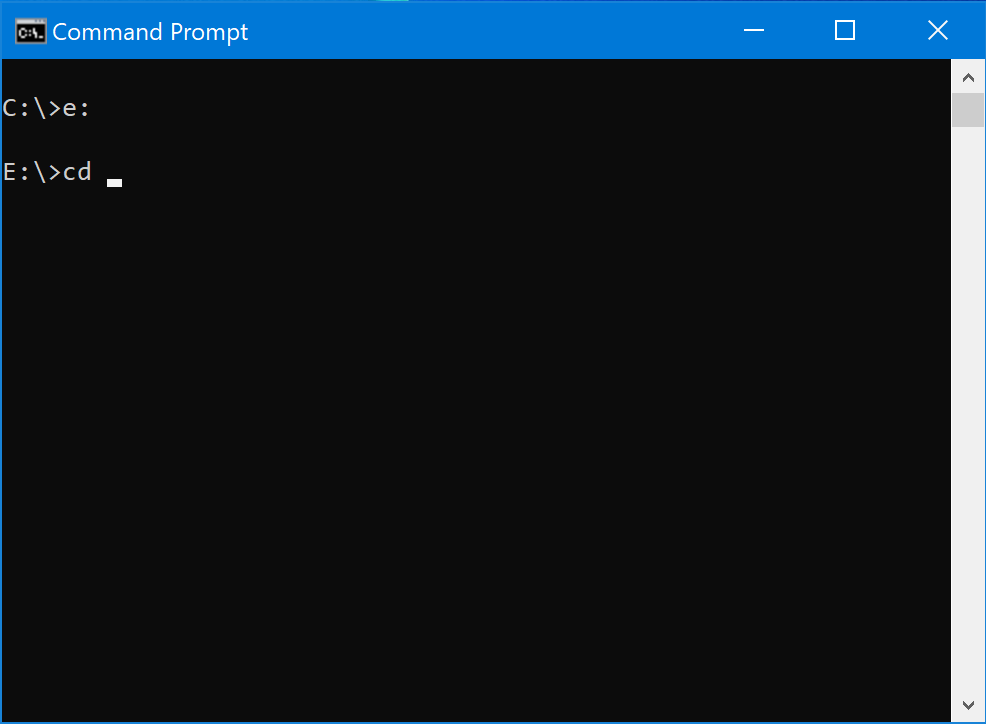
Before you hit enter, press CTRL-V to paste in the path you copied earlier.
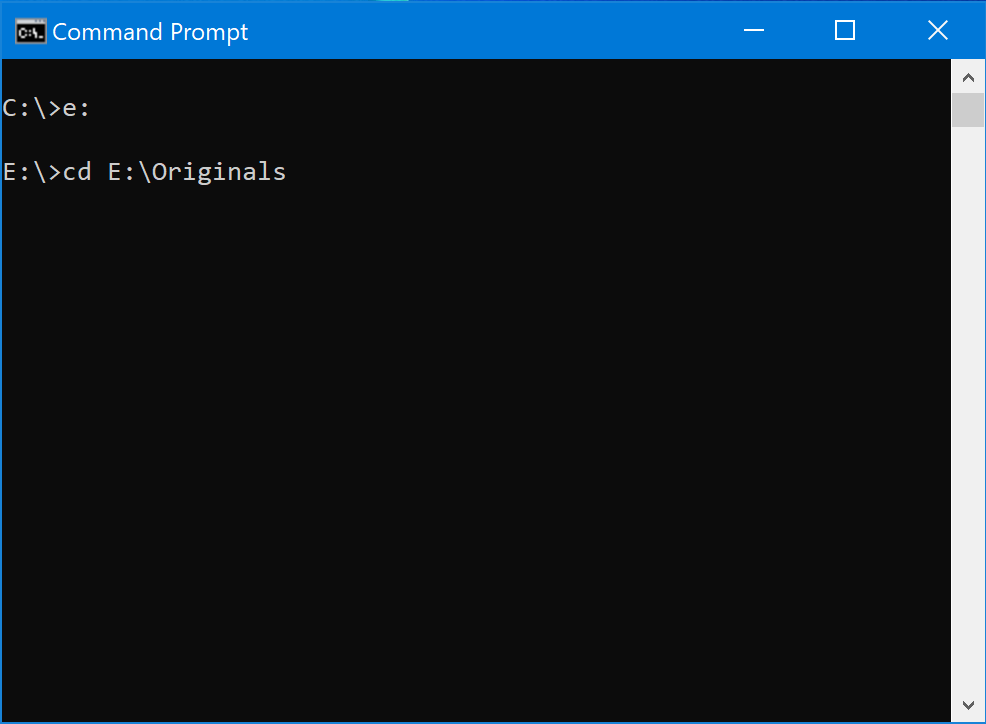
Now, you can hit enter. This will take you to the folder where you stored your files.
Next comes the fun part. Go ahead and copy the following code and paste it into your command prompt. As long as you installed 7-Zip to your main hard drive, this should work without modification.
FOR %A IN ("*.zip") DO "C:\Program Files\7-Zip\7z.exe" e "%A" -o"%A1" *.jpg *.jpeg *.png *.psd -rHere’s a rough breakdown of what this does:
- FOR %A IN (“*.ZIP”): This creates a loop that tells the computer to cycle through each file in the folder ending with the ZIP extension. The %A will serve as a placeholder for each individual file name. This placeholder will be used later in the command.
- DO: This tells the computer that it should execute whatever commands come next for each file in the loop.
- “C:\Program Files\7-Zip\7z.exe”: This is the path to the command line version of the 7-Zip application. Basically, we’re going to run the 7-Zip application for each of those files in the folder, one-by-one.
- e “%A”: The letter e is a “command line argument” that tells 7-Zip to perform an extraction operation. The “%A” tells it which file to do this to. (Remember that %A is a placeholder for each file in the folder.)
- -o “%A1”: Here, we have another command line argument. (Technically, the hyphen means it’s a switch, but the distinction isn’t really that important.) This argument tells the extraction procedure where to output the results. In this case, we’re going to dump the results of each extraction into a folder with the same name as the ZIP file but with the number 1 appended to it. (This is because a folder and a file in Windows cannot have the same name as one another. We’ll deal with this later)
- *.jpg *.jpeg *.png *.psd: This tells 7-Zip to extract every file from inside the ZIP archive with the specified extensions. In this case, we only want to extract the image files. For my yearbook, pretty much every image is either a JPEG or a PNG. And occasionally (usually by accident), something gets saved in the Photoshop format. So these four file extensions pretty much cover all of our image links. Because we’ve specified these extensions, 7-Zip won’t attempt to extract any of the other files in the archive (e.g. InDesign documents, fonts, etc.).
- -r: This switch tells 7-Zip to look for files inside the ZIP archive recursively. In other words, it will look inside folders within folders.
Once you’ve pasted the command in, hit the Enter key. You’ll see a bunch of output as 7-Zip attempts to extract the images from each archive.
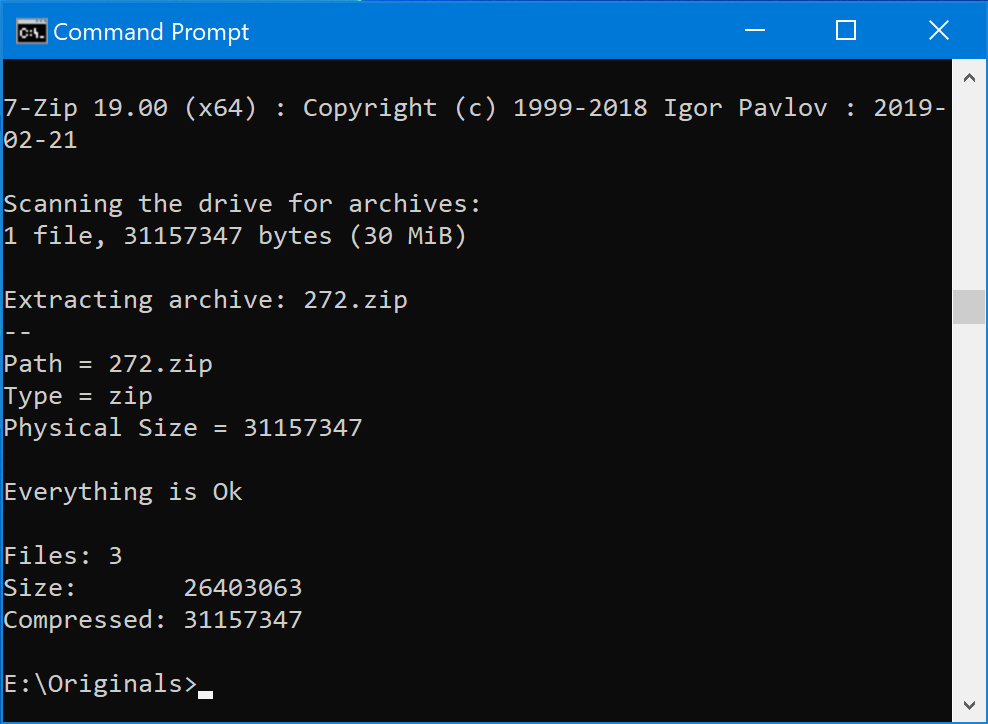
Once it’s all done, you should see a bunch of brand new folders in File Explorer sitting alongside the ZIP files.
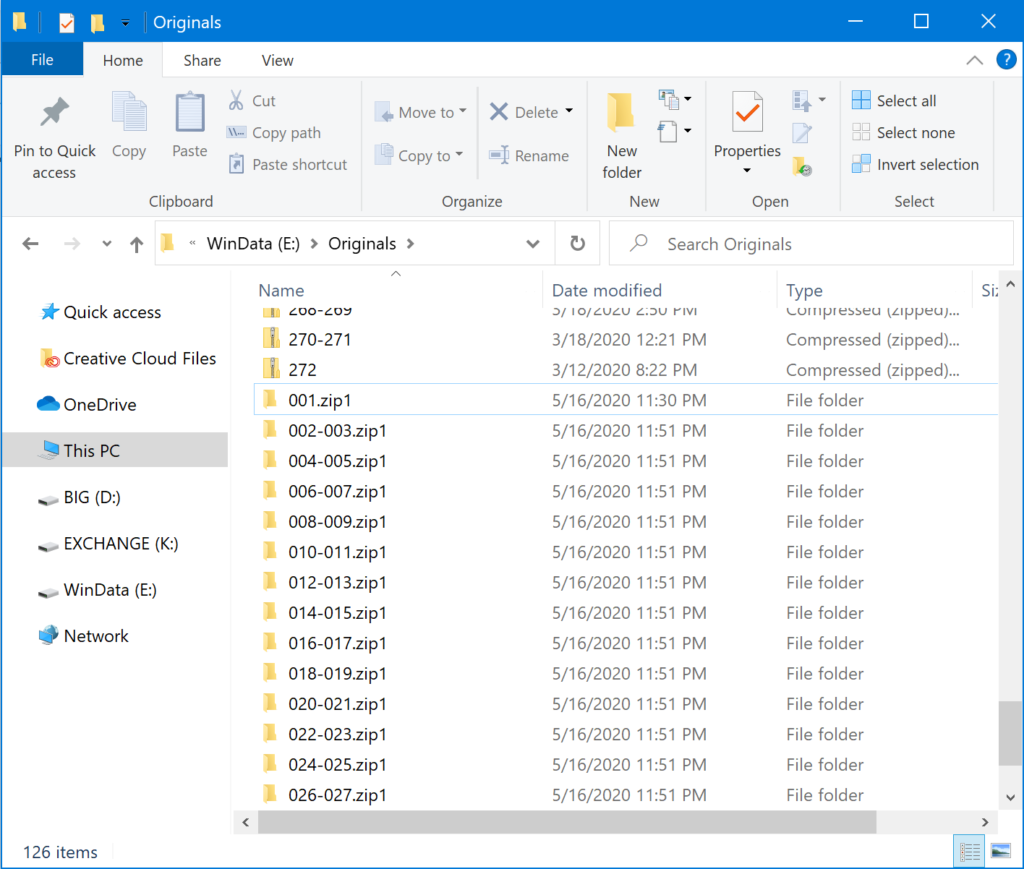
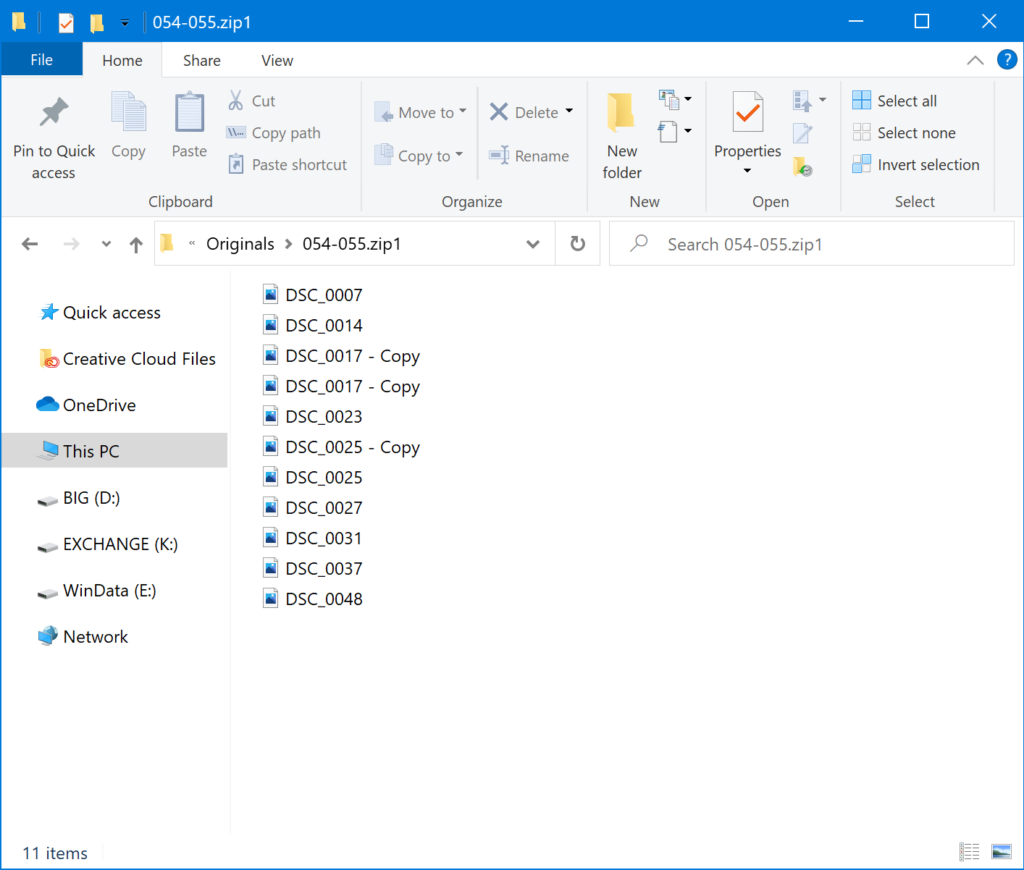
And if you open any of these folders, you’ll see that they each contain all of the images that were part of that archive.
We are now done with the copies we made of the original ZIP files. If you’re feeling brave, you can delete them. Otherwise, you should move them to another folder somewhere so they’re out of the way. The one thing you can’t do is leave them here. (I’ll put mine in a folder named “ZIPs” in case I need to find them again.)
The end result of all this is that you should now have a folder full of images sorted into subfolders by page number. They still have that pesky “zip1” in their file names. We’ll get rid of it eventually, but not quite yet.
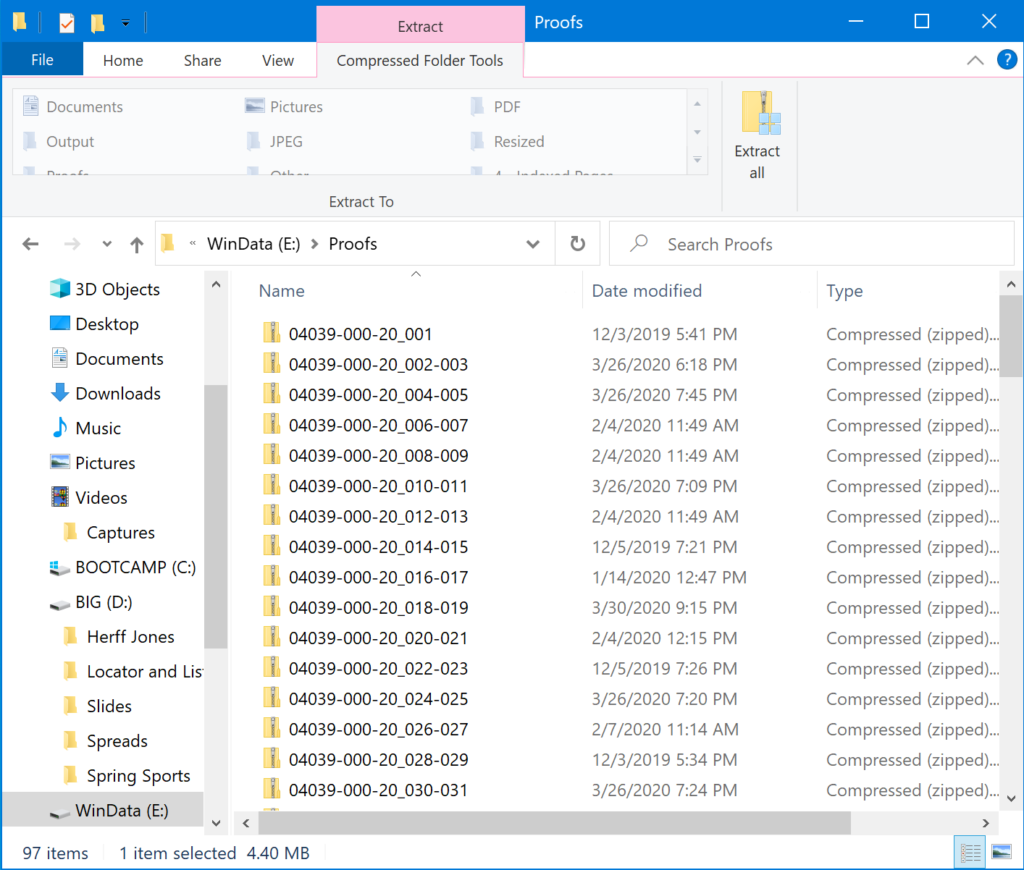
Step 4: Gather Up All the Proof Submissions
Once all the photos have been extracted, it’s time to gather up the yearbook pages themselves. Rather than use the original submissions, for this step we want to use the proof submissions. This way, we can be sure that we are ultimately exporting the final versions of each page.
So just like in Step 1, you’re going to find all your proof submissions and then copy them into a single folder.
Step 5: Rename the Files (Again!)
Different yearbook staffs will likely have different conventions for how they save and submit the edited proofs. My proof files all come from the publisher with a naming convention that looks a little like the one we use for our originals. They start with a prefix indicating the internal job number and publication year, and they end with the page numbers.

When I’m ready to send the files back, I just turn them each into a ZIP archive using the same file name. Usually, the ZIP contains just the InDesign file. Sometimes, it contains some new images as well.
Once I’ve gathered all the proofs together in one folder, they look like this:
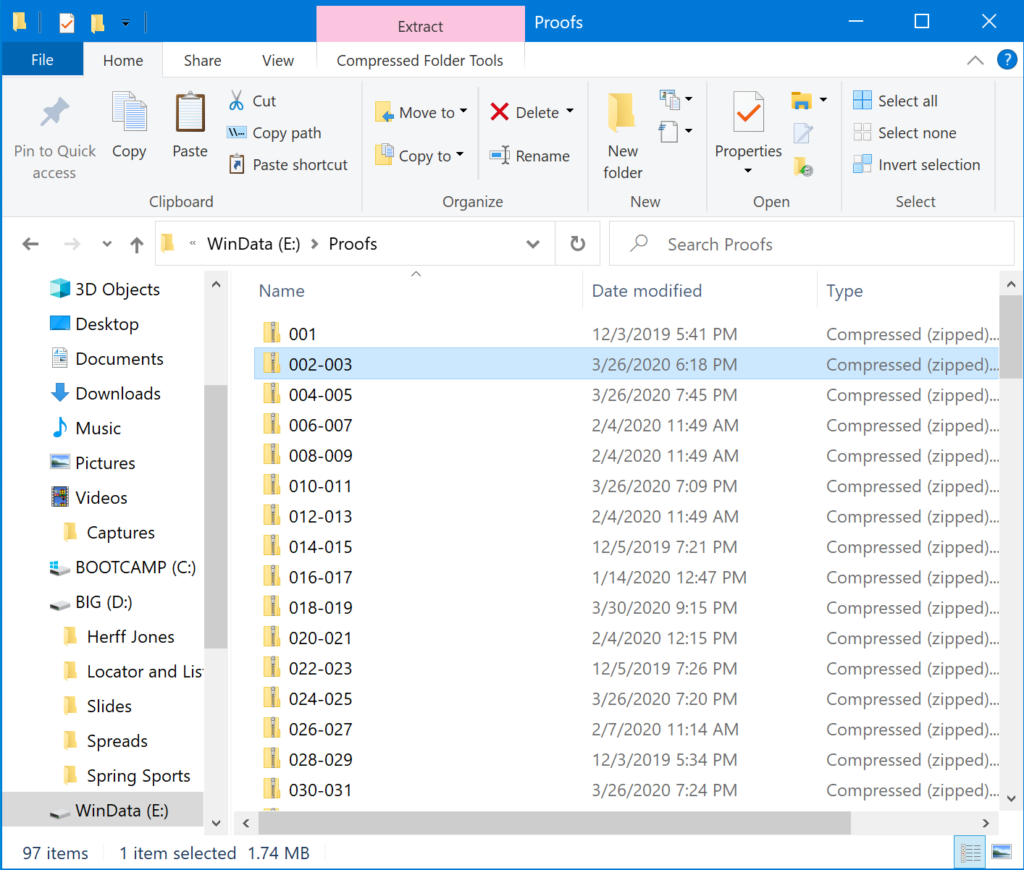
But just like in Step 2 above, I want to rename all of them so that they’re just the page numbers.
Because my ZIP files follow such a predictable naming convention, changing the file names is just another find-and-replace procedure with Bulk Rename Utility. If yours are not named as cleanly, you may need to do some manual work to get it all sorted out.
When all is said and done, you want your ZIP files to look like this:
Step 6: Move the Renamed ZIP Files (if needed)
When I gather up all the proofs, I like to put them in their very own folder before renaming them — just to be sure everything goes according to plan. But before I try to extract any files from them, I need to move them into the same folder that I used for Steps 1 through 3. (In other words, they need to be in the same place as all the image folders.)
Step 7: Extract Any Additional Images
As I mentioned above, some (but not all) of my proof submissions contain new images. This happens if we decided to change something on the spread or needed to edit one of the photos for some reason. So I need to make sure that I extract these new images and add them to the photo library I created in Step 3.
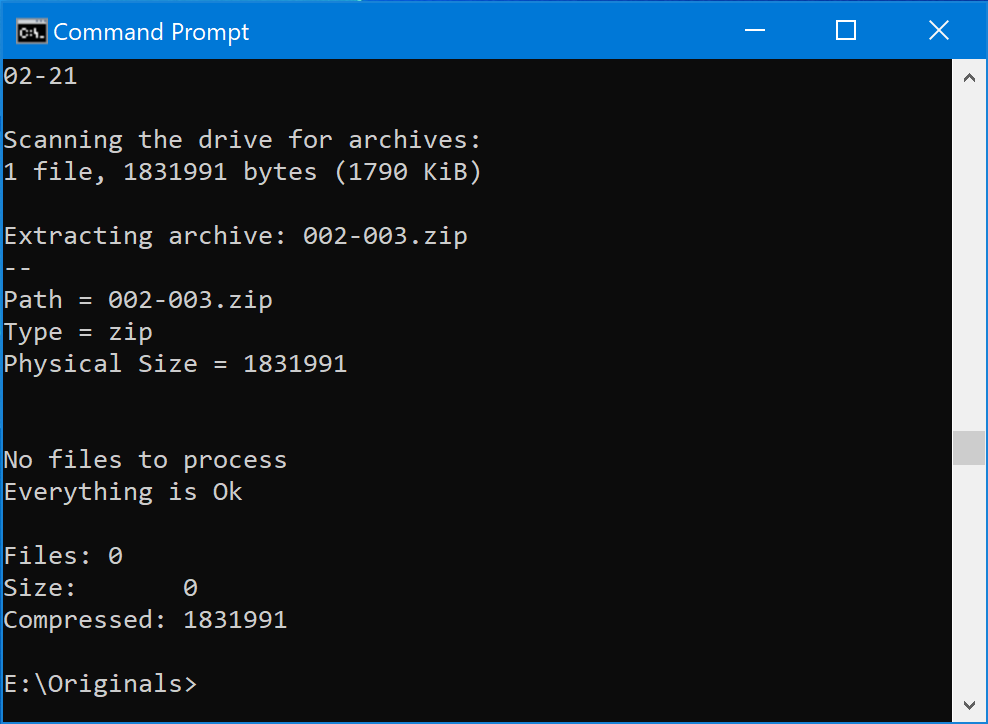
This is actually pretty easy to do. We just have to go back to the command prompt, make sure we’re still in the same folder, and use the exact same command we used before.
FOR %A IN ("*.zip") DO "C:\Program Files\7-Zip\7z.exe" e "%A" -o"%A1" *.jpg *.jpeg *.png *.psd -rThis will copy all the images from the new ZIP archives (i.e. the proofs) to the folders we already created. The only unexpected thing that might happen is you may occasionally come across a new image with the same name as an old one. This might happen if you resubmitted an edited version.
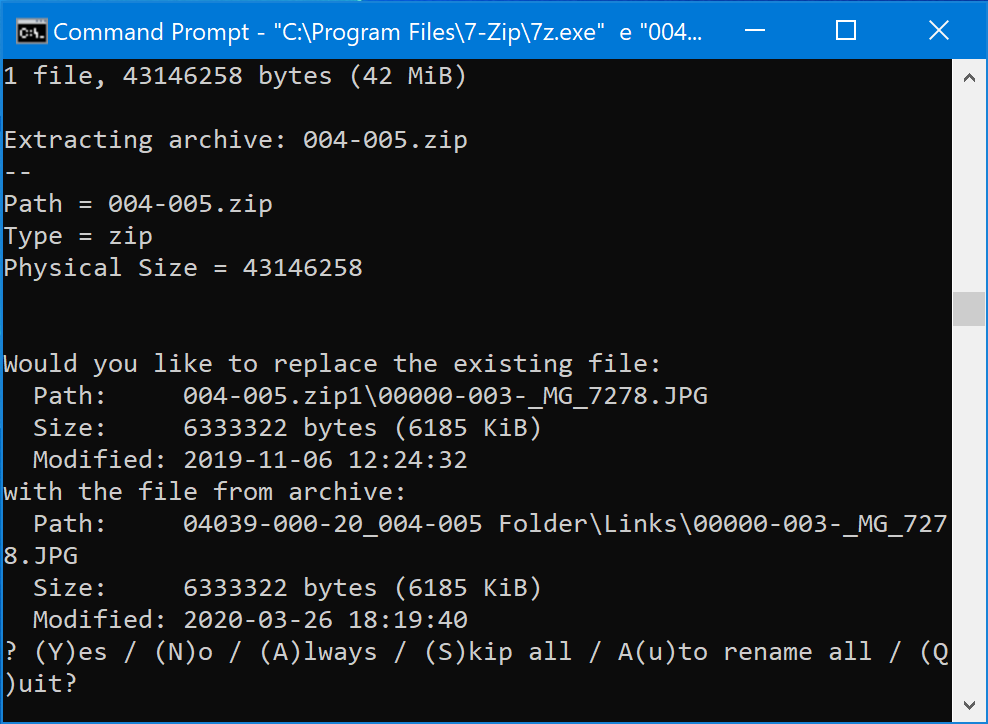
The command line interface will ask you what you want to do when this happens. In my case, I usually tell it to replace the old image with the new one.
When it’s all finished, you can give yourself a pat on the back! You’ve successfully merged all of your photo submissions into a single collection.
Now, as I’ve mentioned a couple times, each of our merged image folders has a weird zip1 after it. It’s finally time to fix this. So let’s fire up Bulk Rename Utility one more time to clean this up.
You should be able to see in the above screenshot that I’ve selected all of the folders and used the Replace function to take “.zip1” out of the name. I’ll follow this up by clicking “Rename,” and now the change is permanent.
We now have a well-organized library of all the yearbook’s photos. In Part 3 of this series, we’ll use the command line and the Bulk Rename Utility one last time to extract the InDesign files from our proof archives. Then, we’ll use some more automation tools to export the entire yearbook to PDF.