Let’s talk about mail merge, a technique for sending an email out to a large number of recipients while personalizing that message for each recipient. The simplest way to do a mail merge is in Microsoft Office, using a combination of Excel, Word, and Outlook.
Continue Reading →
I don’t always know why I care so much about certain things. But what I find out, time and time again, is that being able to recover and produce memories when someone needs them most is invaluable.
Continue Reading →
When I switched to all-digital rubrics a couple years ago, I wanted to reproduce the feel of writing on paper without actually using any paper.
Continue Reading →
One of the most important steps of planning a yearbook is seeing all the cool things that other yearbook staffs have done. So advisers throughout the country share “slides” with one another in the form of PDFs and JPEGs so that they can be included in presentations, galleries, and more.
This need to share work digitally has become even more pressing with the advent of COVID-19 since many of us are now facing significant delays in the printing and shipping of our books.
Exporting to PDF or JPEG isn’t that complicated for a single file, but the yearbook is made up of over 100+ files. On top of that, the printing plant breaks all of the documents’ image links when they send them back to me after processing. So I need to fix all those links, export the file, and then crop a whole bunch of technical garble off the bottom of the output over 100 times. (Ugh!)
This sounds like a job for automation!
Want to see how it’s done? Follow along!
- Introduction
- Exporting the Yearbook’s Photos
- Exporting the Spreads to PDF
- Creating JPEG “Slides” of Each Spread
Continue Reading →
So let’s be clear: I think macOS is a pretty good operating system. But I’m not going to be a zealot about it.
My philosophy is that you use whichever tool is best for the job at any given moment. When I’m editing yearbook spreads, I prefer to use Adobe InDesign in macOS. If I were a gamer, I’d probably want to be running Steam in Windows. And when I’m messing around with a Raspberry Pi, I find it much easier to use Linux since it can natively read and write to the Ext4 filesystem.
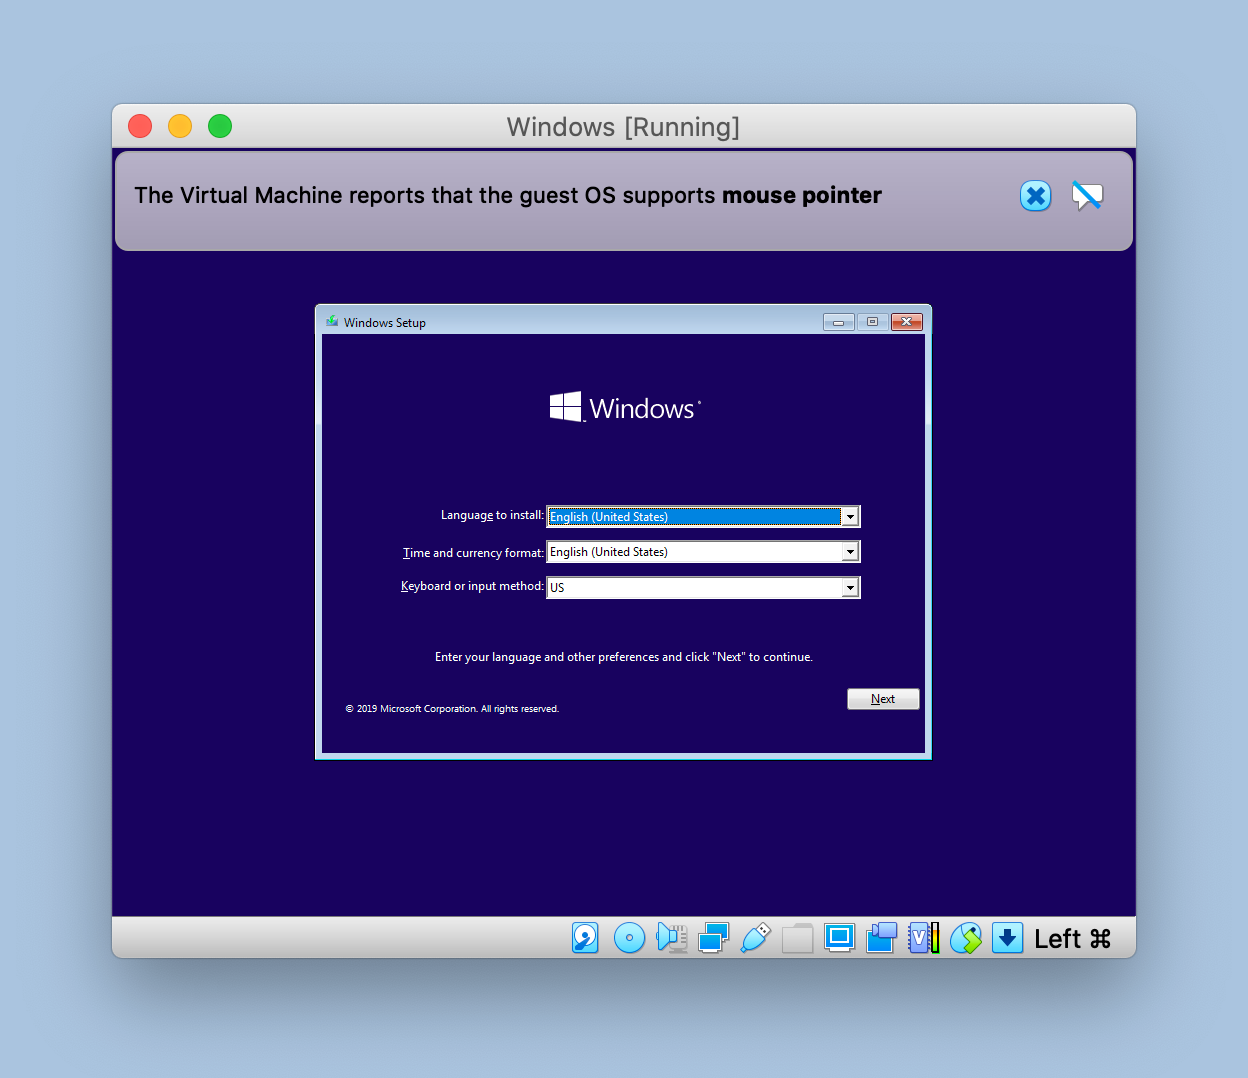
Rather than choose which OS to install, I love the idea of choosing which OS to use. For this reason, I’ve created dual-boot and sometimes triple-boot setups on most machines that I’ve built or owned.
Getting this setup to work on my current Mac was a bit more challenging, so I’ve created this tutorial to help anyone else who might be interested. Please browse the parts below to get started.
- Materials
- Installing Windows 10 Externally
- Adding Linux to the Mix
Continue Reading →
Turning off my noisy hard drive enclosure requires unmounting multiple volumes and then reaching below the desk to hold down a power button for several seconds. Wouldn’t it be cool if this could happen automatically as soon as I’m done using it?
Continue Reading →
We adopted a dog named Tucker. He’s adorable, but downloading his photos from our dog walker’s website was a little too difficult.
Continue Reading →
Who wouldn’t want to be responsible for dealing with hundreds of applications, planning an induction ceremony, and overseeing countless hours of service projects? It didn’t take long to discover that I had inherited an administrative nightmare.
Continue Reading →
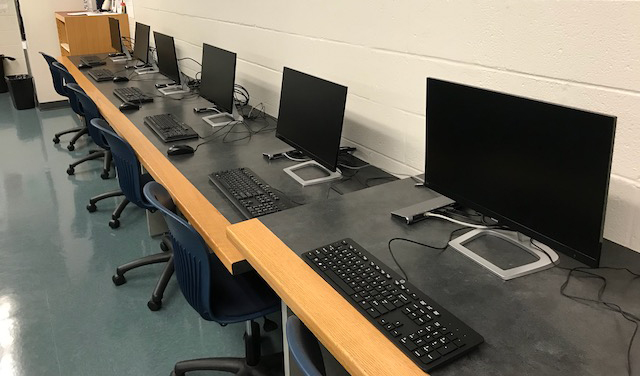
After the school district replaced all the desktop computers in the journalism lab with laptops, I needed to find a way to reproduce the ergonomics and efficiency of our old setup using more modern hardware.
Continue Reading →
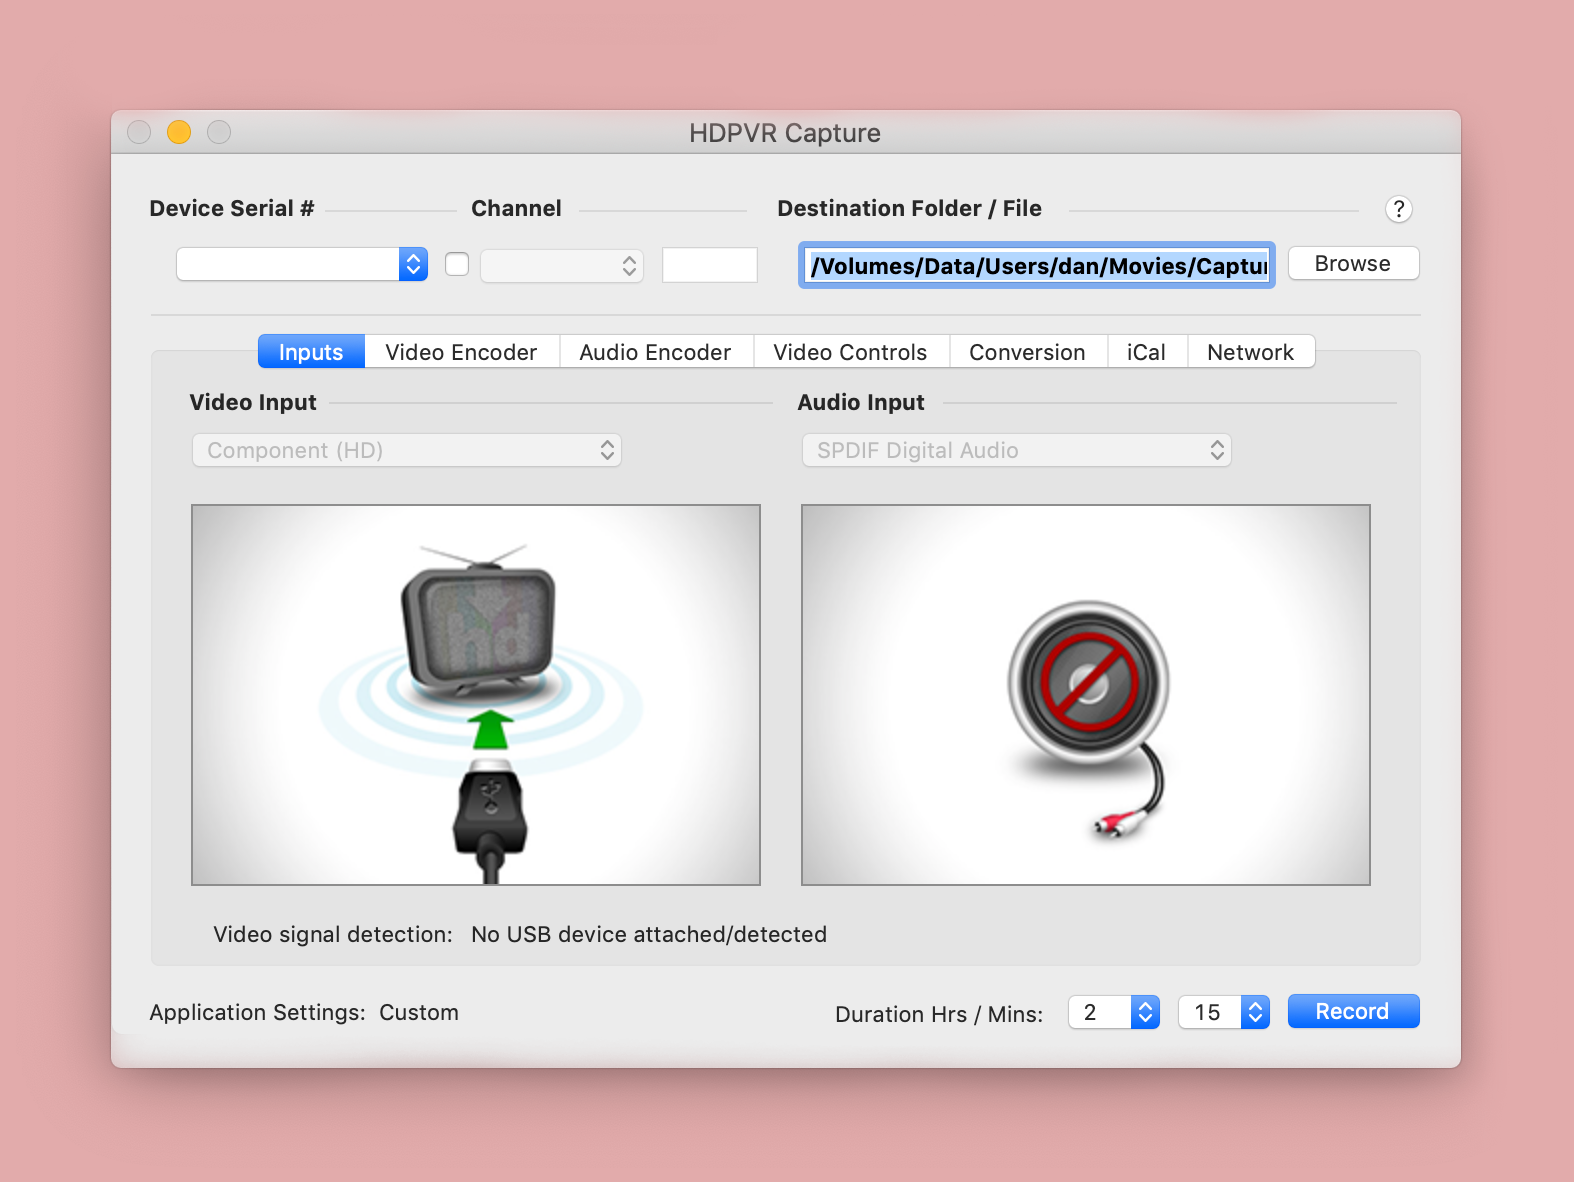
This is a three-part series. In the first post, I’ll discuss the equipment and other considerations necessary for converting old home movies into digital videos on a modern-day Mac computer. I’ll also share what I decided to buy for the project and why.
Part 2 will explain how to do the initial conversion using my particular setup. And Part 3 will walk you through the process I used to clean up the captured footage.
- Equipment and Considerations
- Doing the Video Conversion
- Cleaning Up the Captured Footage
Continue Reading →